Desktop Spectrometry Kit
New version available
This version of the kit is no longer in production, and have been replaced with the Desktop Spectrometry Kit v3.0.
Getting Started
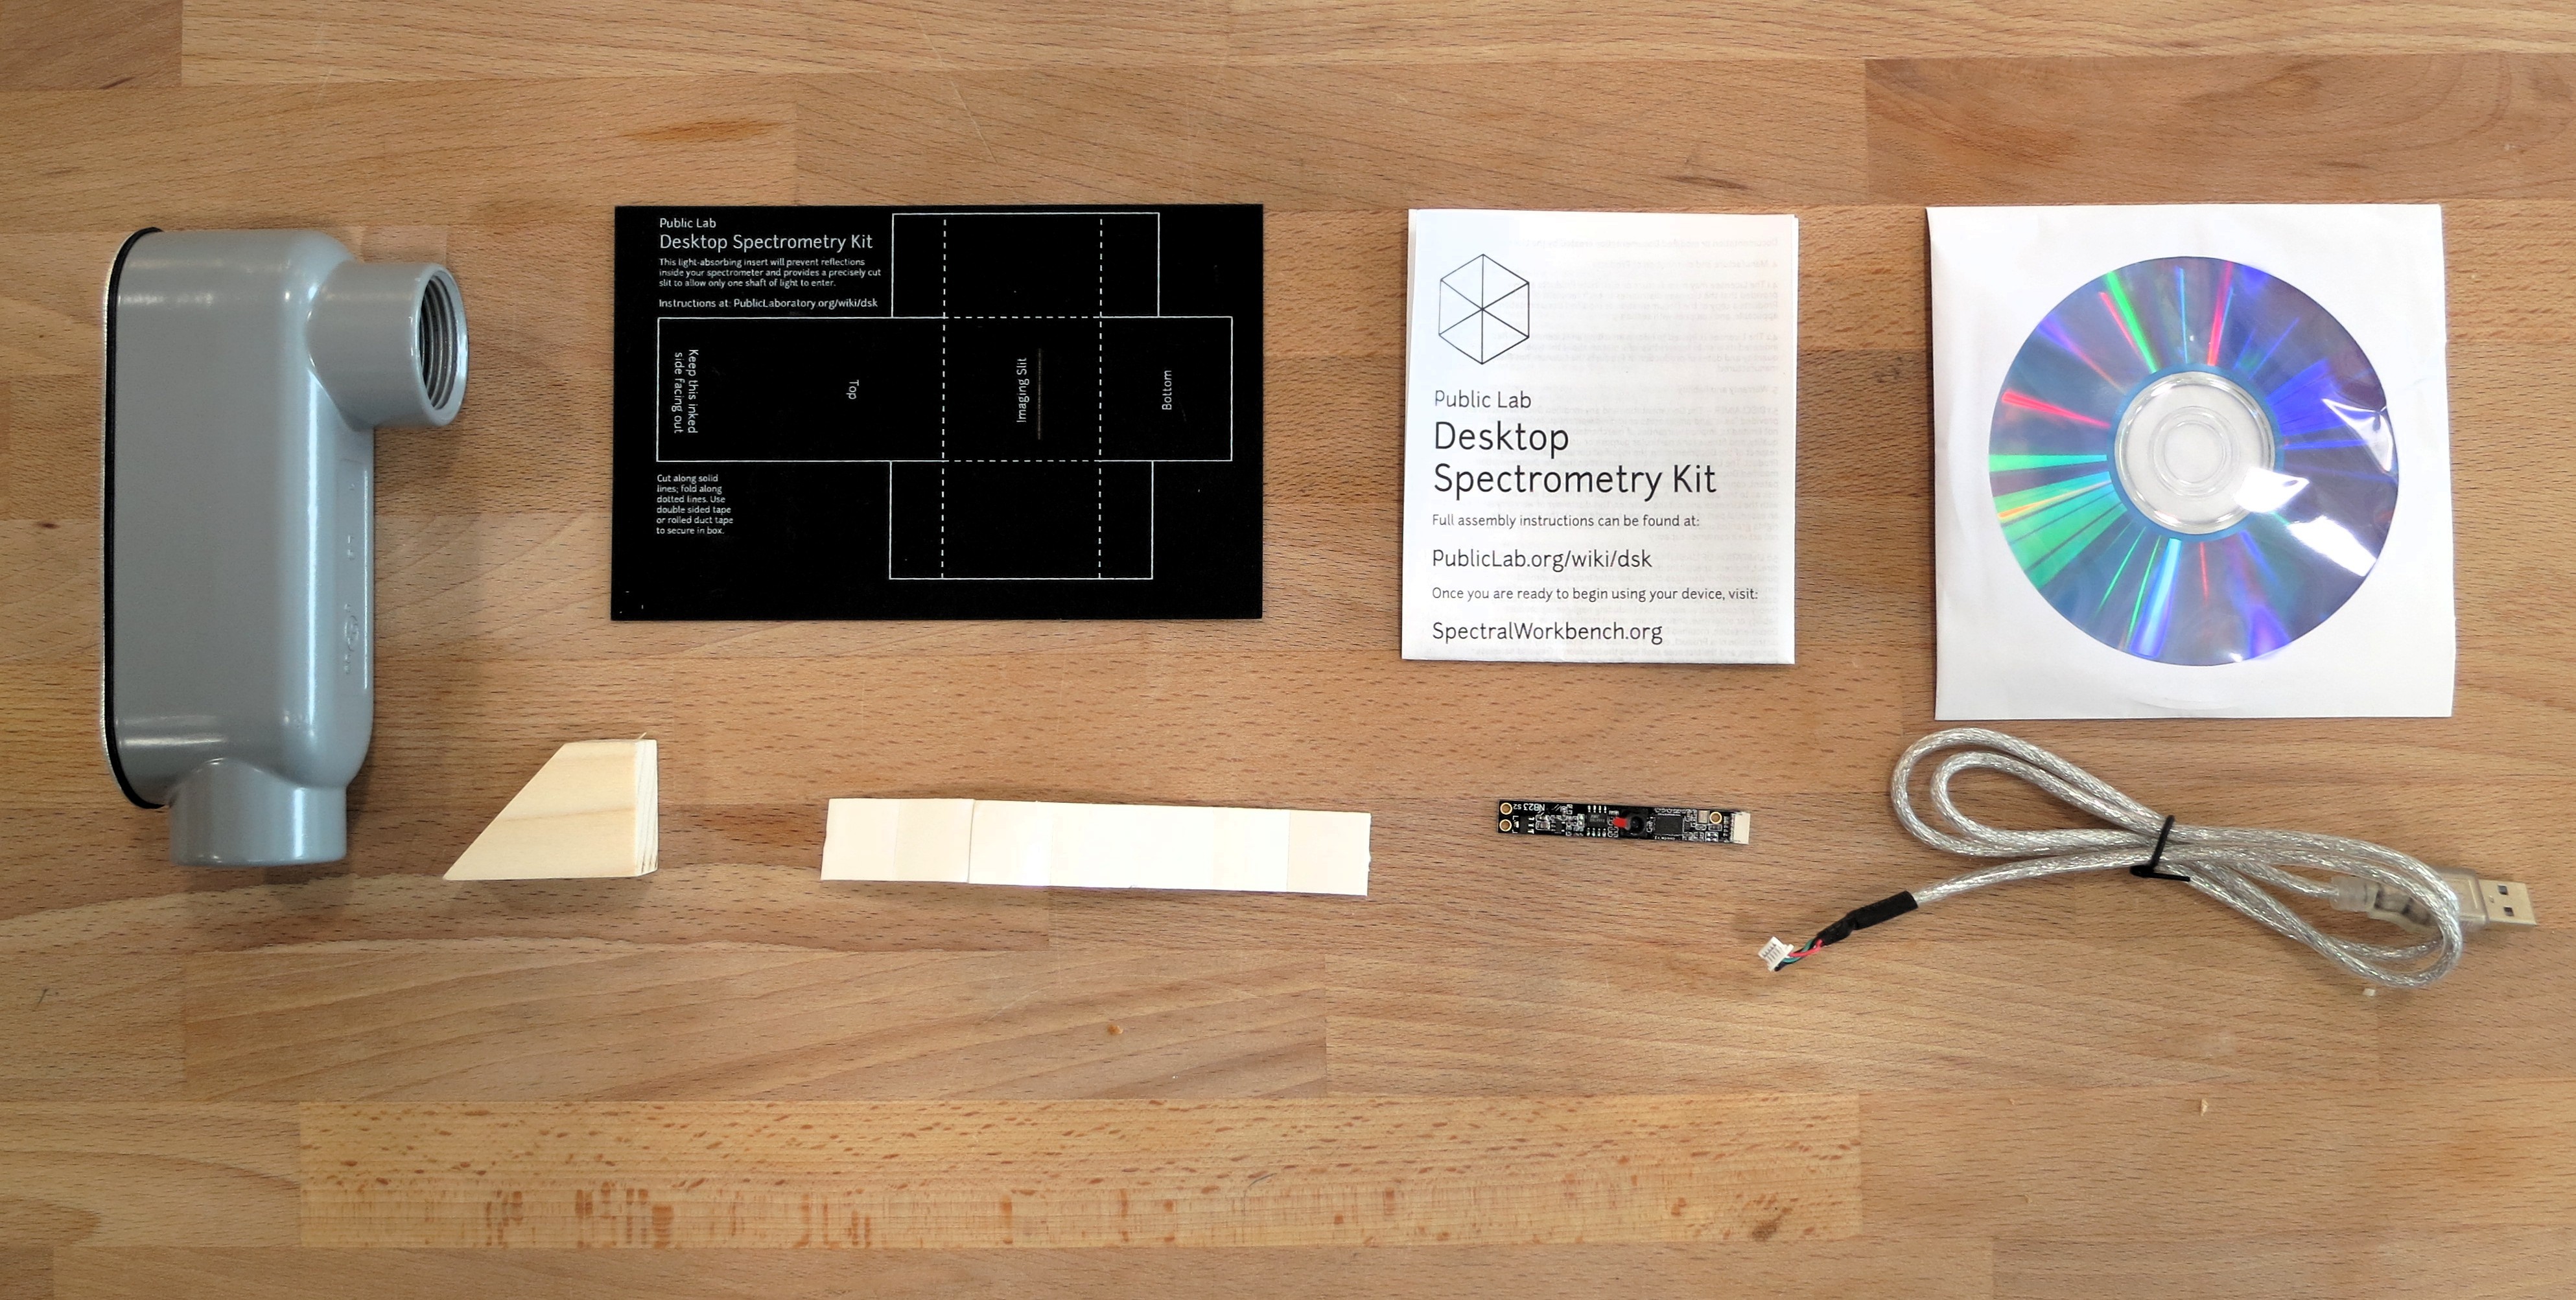
The 1-page instruction sheet which shipped with your spectrometer remains the best documentation to date on how to assemble it. There are now two versions of these instructions, as the kit was updated in late 2013. Please check that the type of camera matches the kit you have. The flat, gum-stick-shaped circuit board cameras are the newer ones (version 2.5 of the kit) and the small grey box webcams are the older 2.0 version:
JDEPC-OV04 "gum stick" 3.0 version (see notice above for new instructions page)
SANM "gum stick" 2.5 version: desktop-kit-instructions-2.5.pdf (140 kB)
SYBA "grey box" 2.0 version: desktop-kit-instructions-0.4.pdf (200 kB)
Here are the v2.5 instructions:
Using your spectrometer
Once you've assembled your spectrometer and are ready to use it, plug it in and visit SpectralWorkbench.org to begin recording data with it. The web-based software works in the Chrome, Firefox and Opera browsers on most computers and Android phones.
(Peer) Support
Public Lab is not a corporation; we're an open community of DIY environmental science researchers which you have just joined! The best place to get help is the spectrometry mailing list; to join, sign up in the form to the left.
The spectrometry mailing list is made up of people like you, who are building and improving open source spectrometry techniques. Ask questions, look for help, and consider helping others too!
You can also post a question on this site; it helps to share some photos or screenshots of what you're trying to do:
Ask a question about spectrometry or Sign up to answer questions on this topic
Resources
- Common hardware issues
- Using the software (including setup and software troubleshooting)
- peer-contributed research on open source spectrometry
Design files:
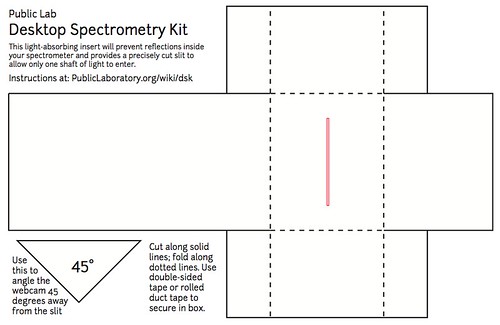
Insert for cutting out of stiff matte black card paper: https://publiclab.org/sites/default/files/desktop-spec-insert-1.1.pdf
Upgrades
A list of documented upgrades to the kit, if you're looking to further refine your device!
- upgrade to the new version 3 spectrometer with the upgrade kit
- using an acetate collimation slit (as available in the PL store -- basically a more precise, narrower slit, printed on plastic film -- for a more precise, though less light-sensitive, device (This needs better documentation on how to integrate it with the Desktop kit!)
- darken the inside of the spectrometer box with black, matte, absorbent paint or felt
- use a more light-sensitive camera
Assembly photos
Here are some photos of the build process to help you figure it out. It doesn't hit on every step but just the important parts -- refer to the above PDF guide for a step-by-step guide.
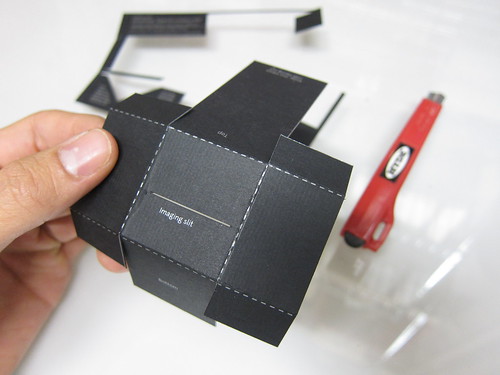
Crease and fold up your black card insert. This will reduce reflection in the interior of your device. Keep the ink on the "outside" as it is reflective.
Using a piece of double-sided foam tape, form a box with the tabs on the outside, keeping the longer tab on the bottom, as shown above.
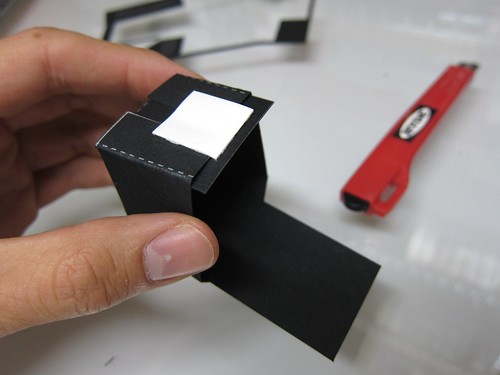
Press the foam tape firmly onto the bottom of the spectrometer case, with the long tab on top, as shown. Keep the imaging slit pressed up against the inside of the box's hole.

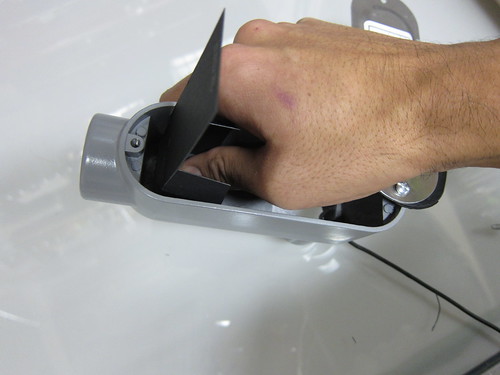
Snap off the useless half of the webcam
Some cameras may rest flat on the side of the box; our kit includes a nice, compact camera with flat sides (hard to find! too much ergonomics!) but to make it fit you have to snap it in half. Don't worry, the non-camera half is empty!
(If you're building this without a kit and can't find a flat-bottomed camera, you can use hot glue, epoxy, moldable plastic, or metal brackets to ensure that your camera stays level and rigidly in place.)
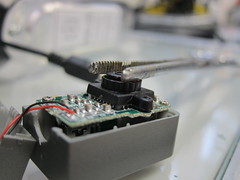
Unscrew the lens and remove the infrared filter
Heating the lens a bit with a hair dryer, or by leaving it close under halogen desk lamp can help loosen it. The filter will look iridescent -- pry it out with a knife or sharp screwdriver, and throw it away. Screw the lens back in close to how it was.
More tips on removing filters from other types of webcams can be found here: Webcam filter removal
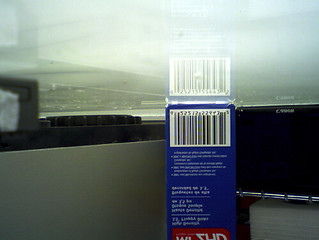
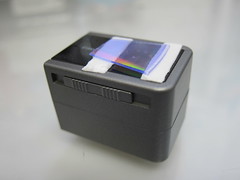
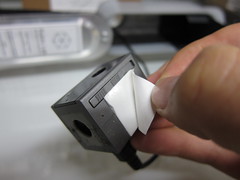
Look at a barcode through the webcam to refocus it to about 22 cm (9") away
Use a webcam program like Photo Booth or even https://spectralworkbench.org/capture (experimental). A barcode has fine details so it's a nice test of focus. (The above image is of an older kit)
Rotate the camera lens to adjust the focus. You may need to gently use a pair of needle-nosed pliers at first. Anything around 9 inches away (22cm) from the lens should be in focus. This means your slit will be in focus when the box is closed. If you don't carefully refocus your camera, your spectra will be of very low resolution.
Now snap your webcam back together.
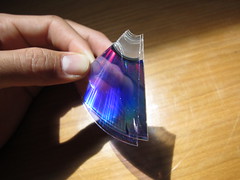
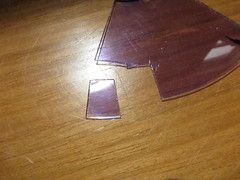
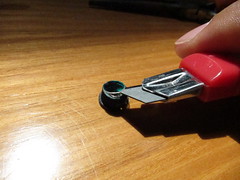
Split the DVD-R into layers and cut a small rectangle from the clear layer
You should be able to easily pry apart the DVD layers, and they're far easier to cut once they are separated. You'll need about a 1cm x 1cm square of the 'outside' edge of the disc.
Don't get fingerprints on the DVD, and cut your "grating" from the outside edge where the track lines are more parallel. You can cut this piece down more precisely later.
See also: Preparing a DVD-R to act as a diffraction grating for more information on removal of the residual aluminium and dye layers.
Use two thin strips of double-sided tape to adhere the DVD fragment to the front of your camera.
Use double-sided tape on the top of the webcam. If you're worried about the lens cover closing, you can use the tape to hold it open.
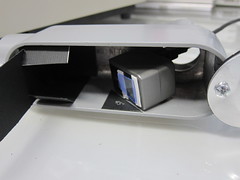
Using the provided 45 degree angle guide, place the webcam -- facing outward -- on the side of the box as shown. You should first plug in the USB cable to be sure it will fit when the webcam is in position. Press it firmly down to adhere the foam tape to the side of the box.
Now you can fold down the long black tab, close the 2 side tabs over it, and close your spectrometer, screwing it firmly shut.
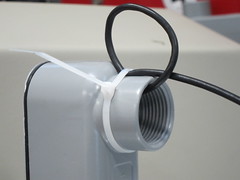
A zip tie or strip of tape can keep the USB cable from tugging on the camera and messing up your data.
Suggested edits
Better showing of discarding of opaque DVD piece:
