Webcam filter removal
This is an old page -- please see this page for more info on converting cameras to infrared:
https://publiclab.org/wiki/infragram-convertible-cameras
$8 Creative Notebook Live Webcam
Someone ought to post a video about this mod, but for now here is a Q/A based on a thread on the mailing list:
Is there a UV filter that I need to remove from the camera?
There is an IR/infrared filter. It probably blocks some UV too.
If so, do I need to open the case on the camera?
If you want broader band readings, yes. But it is still quite functional as a visible-range spectrometer otherwise.
I’m not quite sure the best way to do that, although I did manage to get one of the clear clips to pop off.
That one is a bit tricky -- first, just yank the plastic lens cover off; it seems a bit violent but you won't damage the lens -- inside it's actually an aluminum tube with an aluminum lens holder screwed and glued into it (I was struggling with it and tried using my teeth, which is how I found out it was aluminum, owwwww).
But I was successful in using a large pair of pliers to firmly grip the lens holder and unscrew it. Be careful not to crush the aluminum tube.
Before unscrewing the lens tube, it helps to heat it up -- there is a gooey stuff holding it in place which softens in the heat. I used a hot-air soldering iron, but maybe a hair dryer would work too?

Once you unscrew it, the infrared filter is a small piece of reddish glass glued (inside a metal ring) to the back of the lens holder. It's extremely well glued on there, and I eventually used a table clamp to grip it and yank it off with brute force, breaking the filter. (DON'T DO THIS ANYMORE, READ BELOW FOR A BETTER SOLUTION) After thoroughly cleaning up the bits of the broken filter (it shattered), I screwed the lens back in.
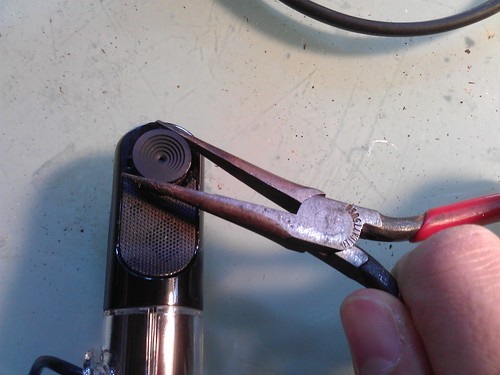
Unscrewing the filter
Update: Discovered that the filter is not glued in place but actually screwed into place with some glue added afterwards. With a pair of wire clippers or good needle-nosed pliers, you can unscrew the ring-like cap and the filter can be removed.
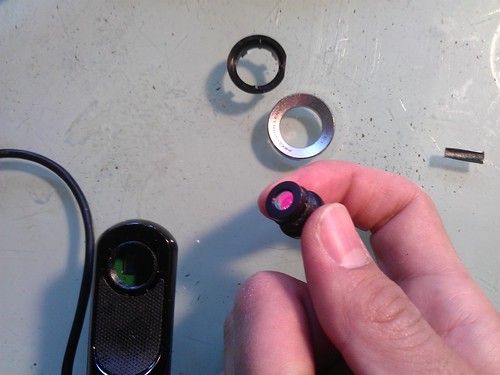
BE CAREFUL not to let the lenses fall out -- you'll get them dirty and out of order... just keep everything on the table and pull out just the filter. The cap is all that's keeping that stuff in place!
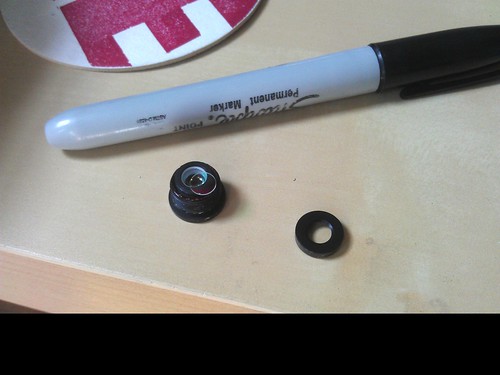
Using a spacer to secure the lenses
Important: After removing the filter, the lenses will tend to rattle around a bit, even after you've replaced the cover. This is because with the filter gone, there is extra space in the lens holder. I solved this by using a small ring or loop of very thin wire (coated or uncoated) instead of the filter, which acts as a spacer and holds the lens steady. You should be able to screw the cover back into place atop this wire loop, if the wire is thin enough.
If you zoom in on the image below you'll see it -- and if you have a better solution, post it!
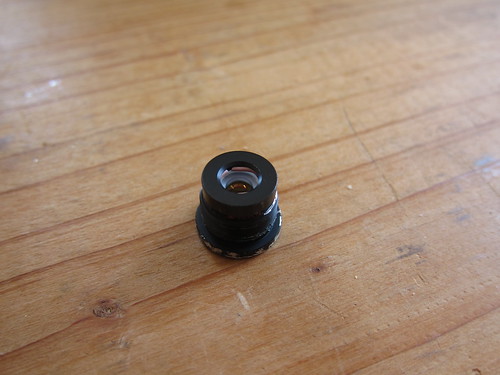
This modification is optional
I know this sounds a bit involved, and we've found cameras which are much easier to modify. But this camera is HD resolution and is extremely compact and very low cost -- in short, it's the perfect camera for this kit. It even has a flat side perfect for mounting it inside the spectrometer case. So until a "more ideal" camera comes along, I think we need to post a video on the filter removal to guide folks through it bit more.
If you're unsure of the modification, I recommend using the spectrometer as-is for a bit before trying to upgrade.