Building on these two activities: #coqui-audio-jack, and looking to do a Coqui water sampling and comparison workshop, we added an audio jack to the Coqui so we could amplify the output. This was nice both at the student workshop in Cranston, and also at the Texas Barnraising, where people built their own Coquis.
To do this, start with the basic Coqui building activity here. Then follow the next few steps to add an audio jack and plug it into a speaker!
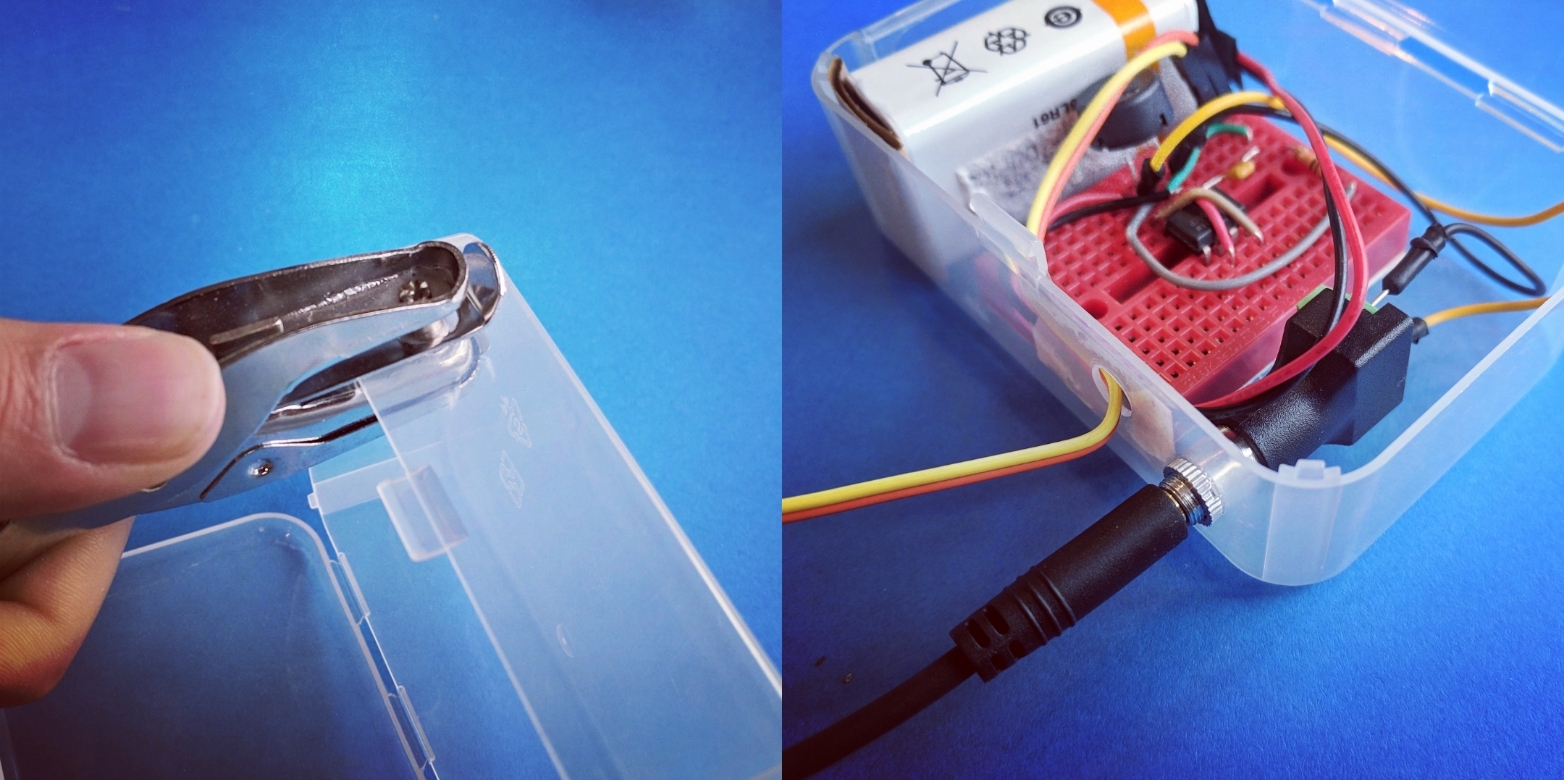
I built it all into a small box, and found these audio jacks which can be screwed into a hole - they worked in just the kind of hole a paper hole puncher makes (order a Coqui with an audio jack here):

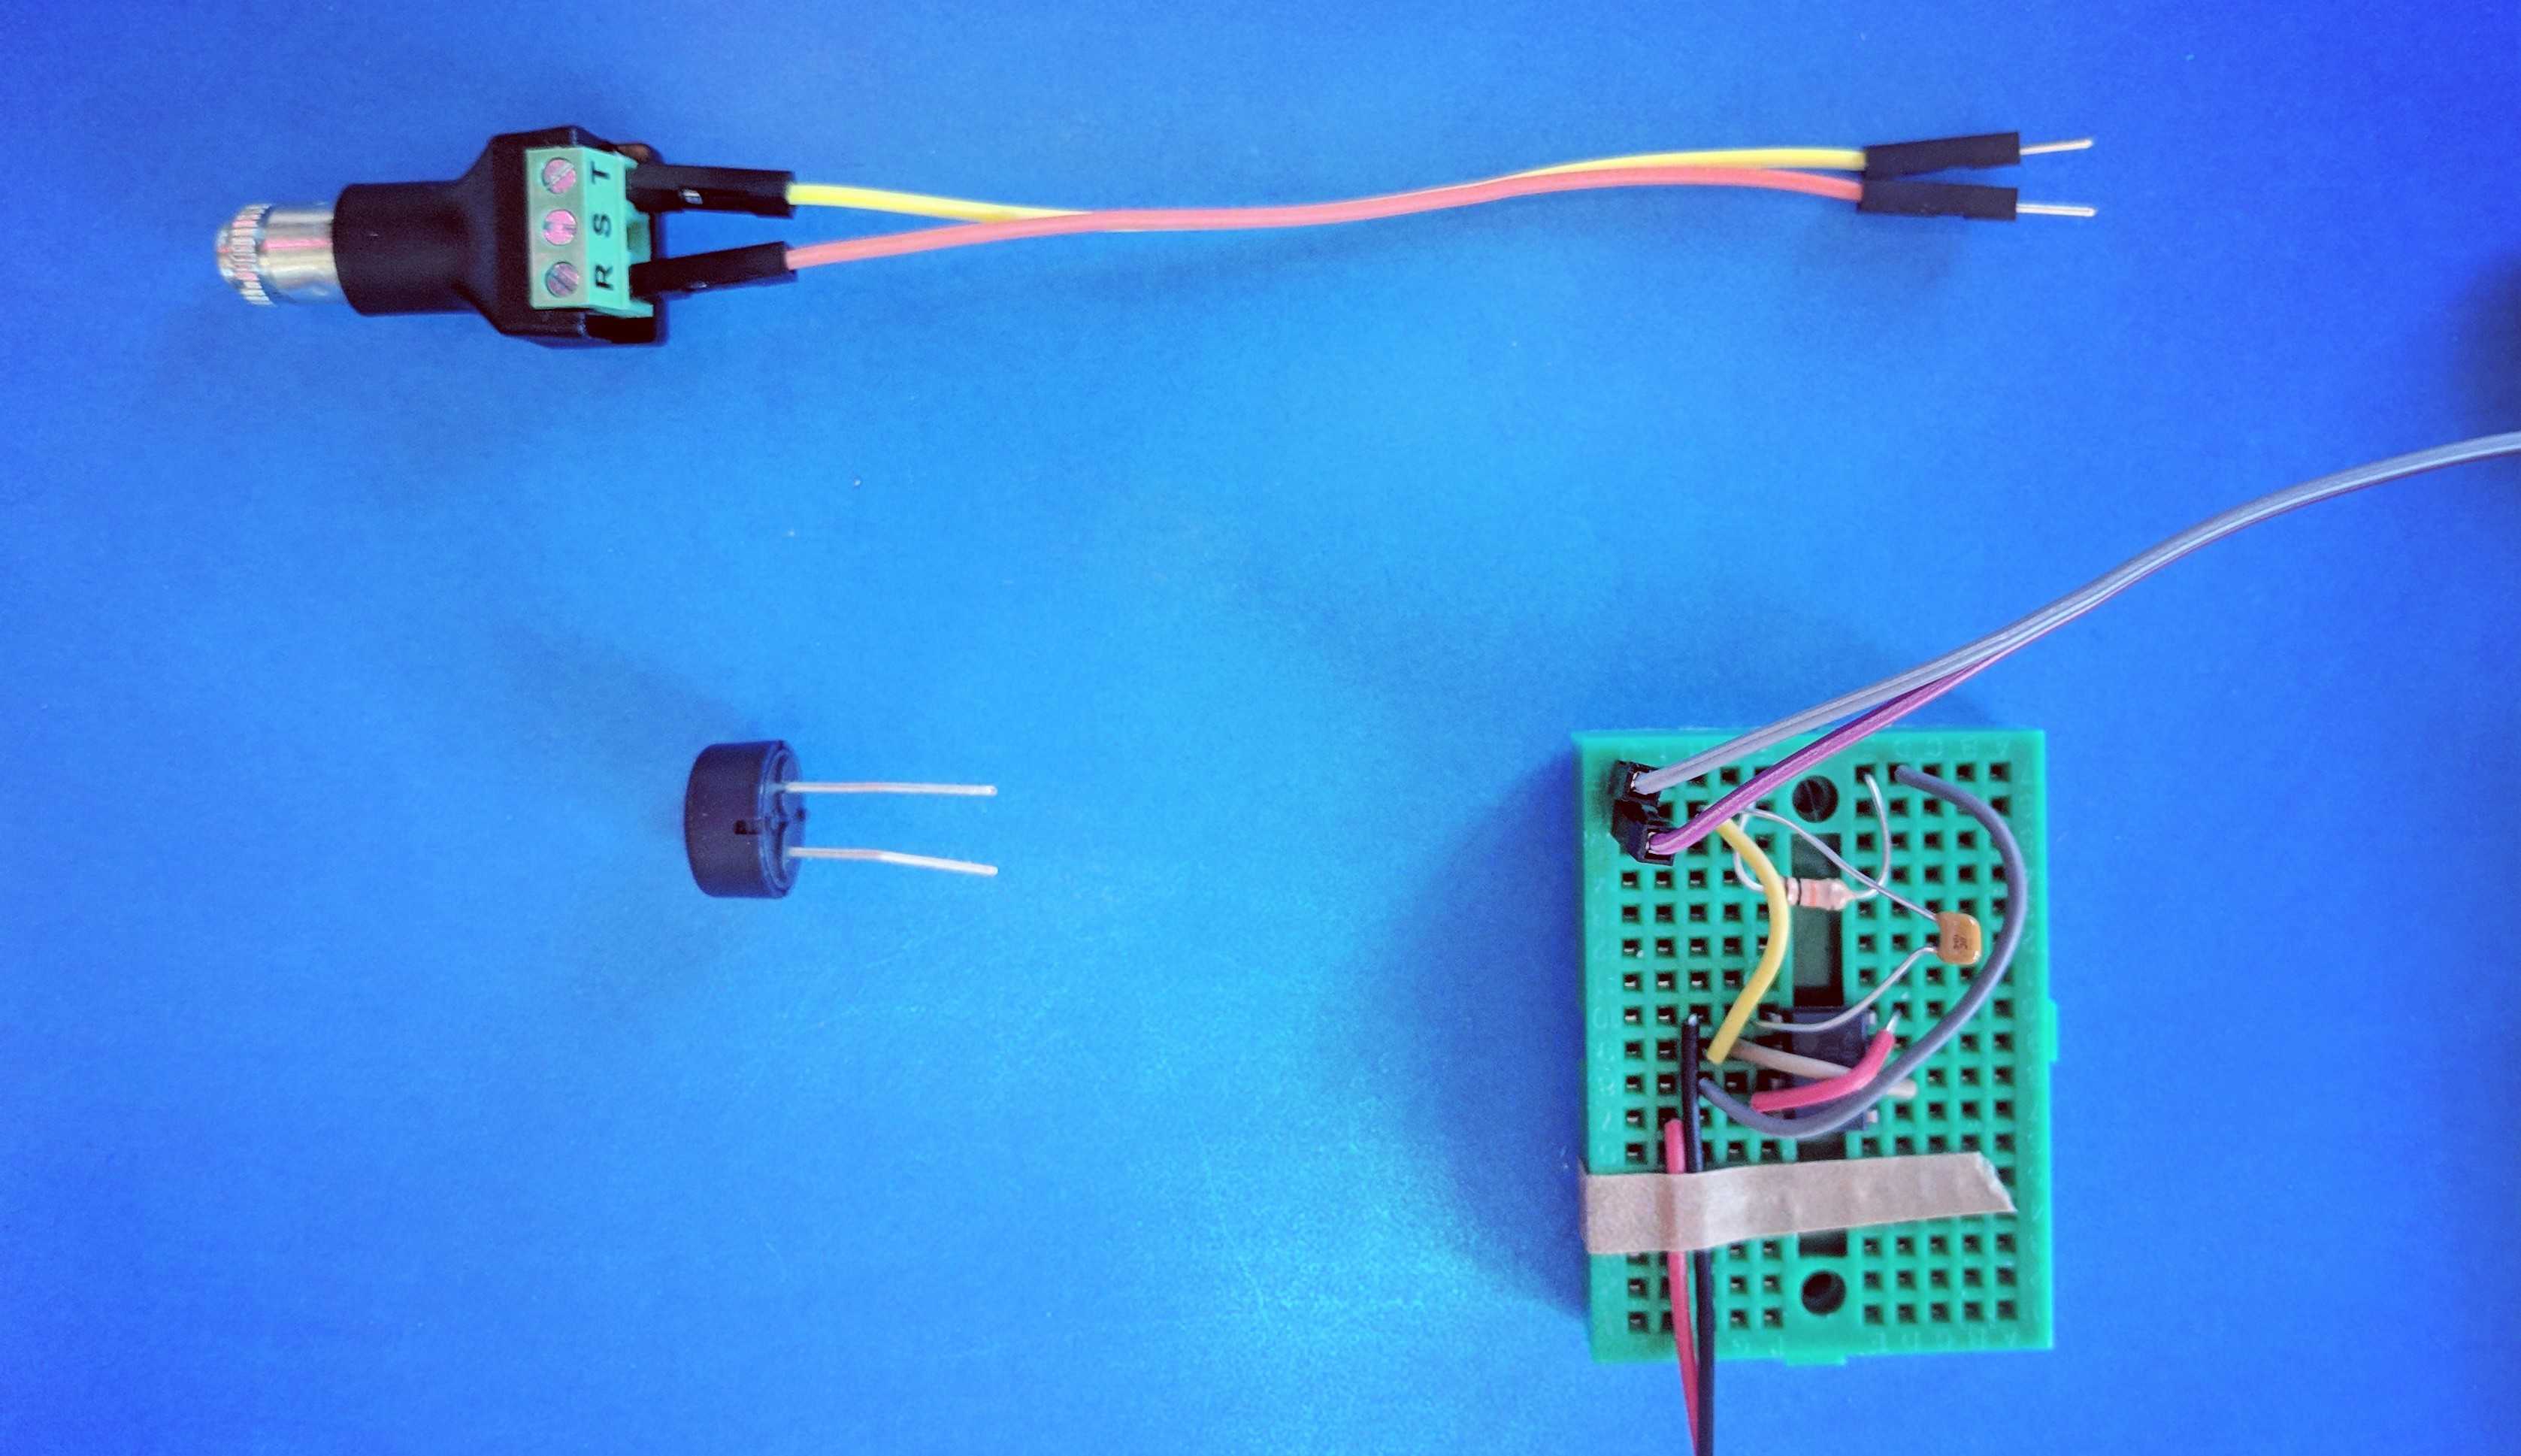
I put wires into the R and T holes (standing for Ring and Tip, i believe) and ran them to the same holes as the piezo buzzer go to in the Coqui circuit board.
Basically the plug can play the same role as the piezo and can be plugged in at the same time, or instead of the piezo buzzer:

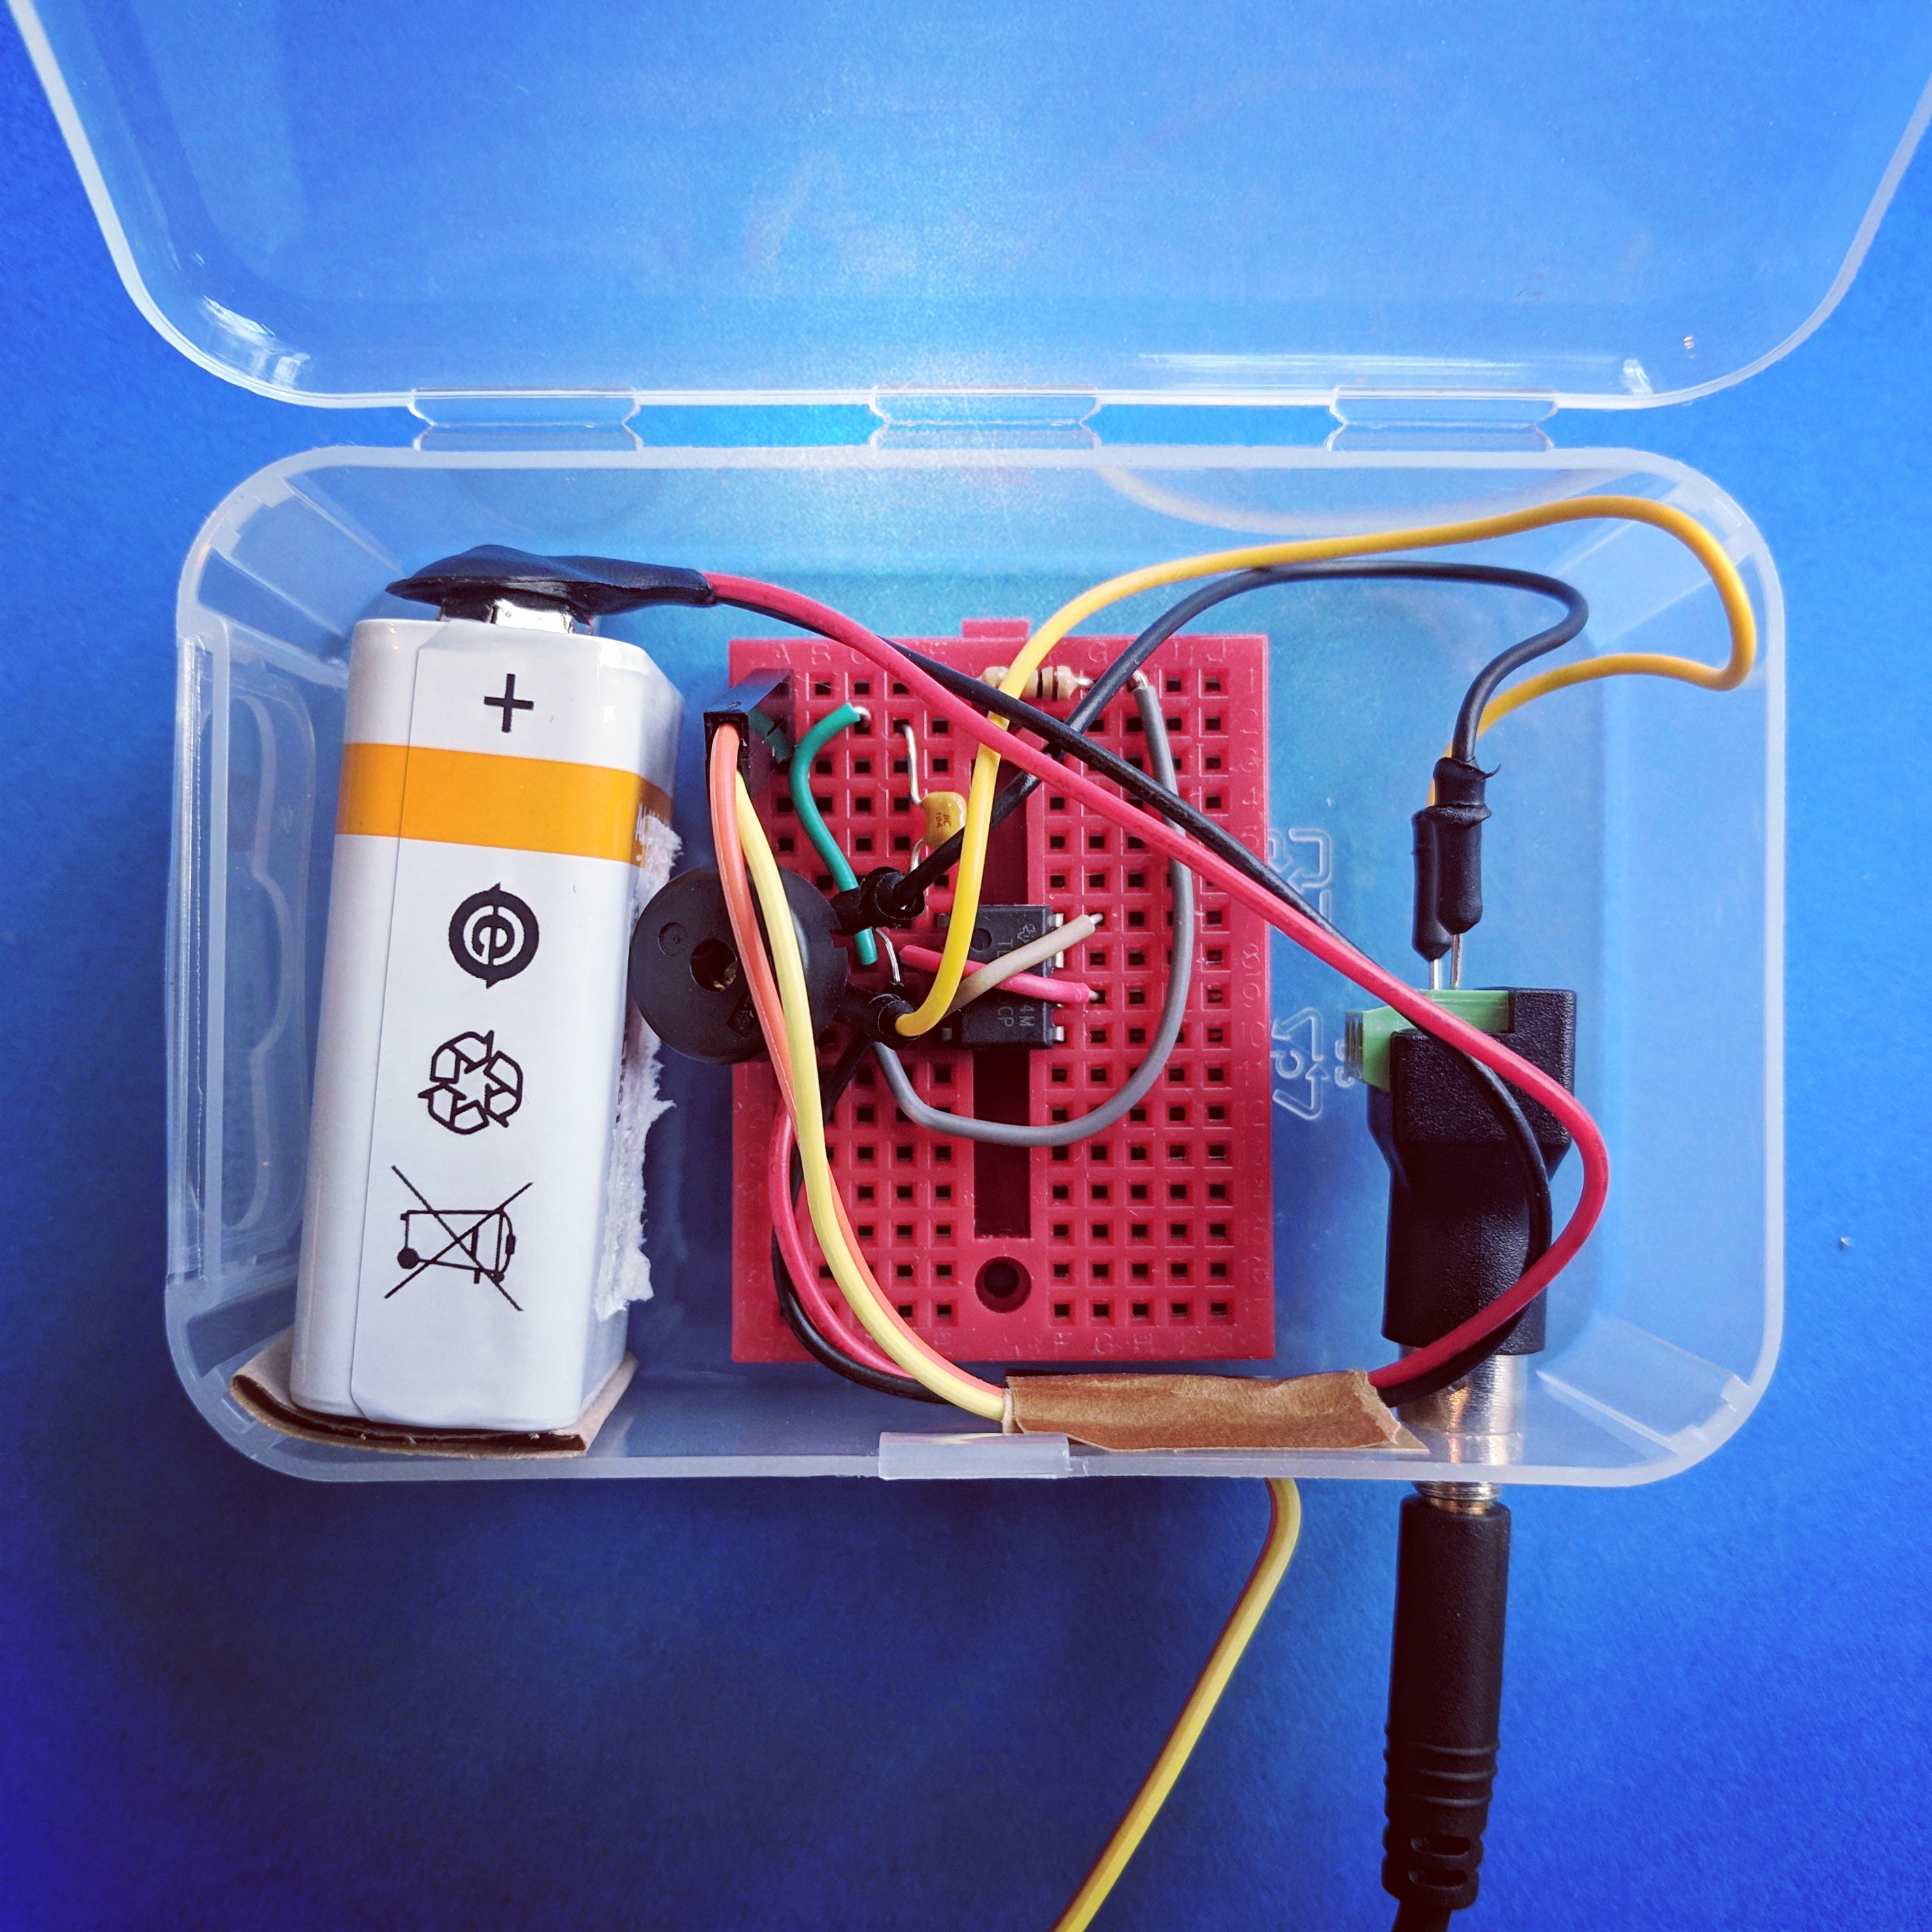
I started with a light sensor instead of probes, for testing (so I could just hear the sound changing pitch without needing a water sample), but also added two longer probe wires through a second hole, which I covered with strong tape from the inside:

Finally, I used some strong tape to attach everything inside, making it easier to carry around. It's quite loud!
We're carrying these now in the Public Lab store -- click here to order one!
See the lead image where we've plugged it into a little speaker!
I'd love to see where people take this and what you do with it!


2 Comments
@warren has marked @mimiss as a co-author.
Reply to this comment...
Log in to comment
Once you build a mega-coqui you can then record the audio signal and later analyze it using the free and open source software Audacity
Record → https://publiclab.org/notes/imvec/06-09-2018/coqui-wave-audio-recording
Analyze → https://publiclab.org/notes/imvec/06-11-2018/analizing-the-signal-of-the-coqui-using-audacity
Reply to this comment...
Log in to comment
Login to comment.