I wanted to revisit the current Pole mapping kit, and look to improve stability and safety of the product.
The concern was that the junction was prone to breaking under stress, and that there was no documentation for how to use the product safely (or at all).
I started playing with the pole, as we ship it. We are recommending actually moutning the camera a ways down the pole, in order that the mount is seated at a junction, which we deem to be stronger than in the middle of a section.
The pole is composed of segments labelled 1a, 2a, 3a all the way to 6a, being the fattest, base piece. We recommended attaching the mount to the junction of 3a and 2a.
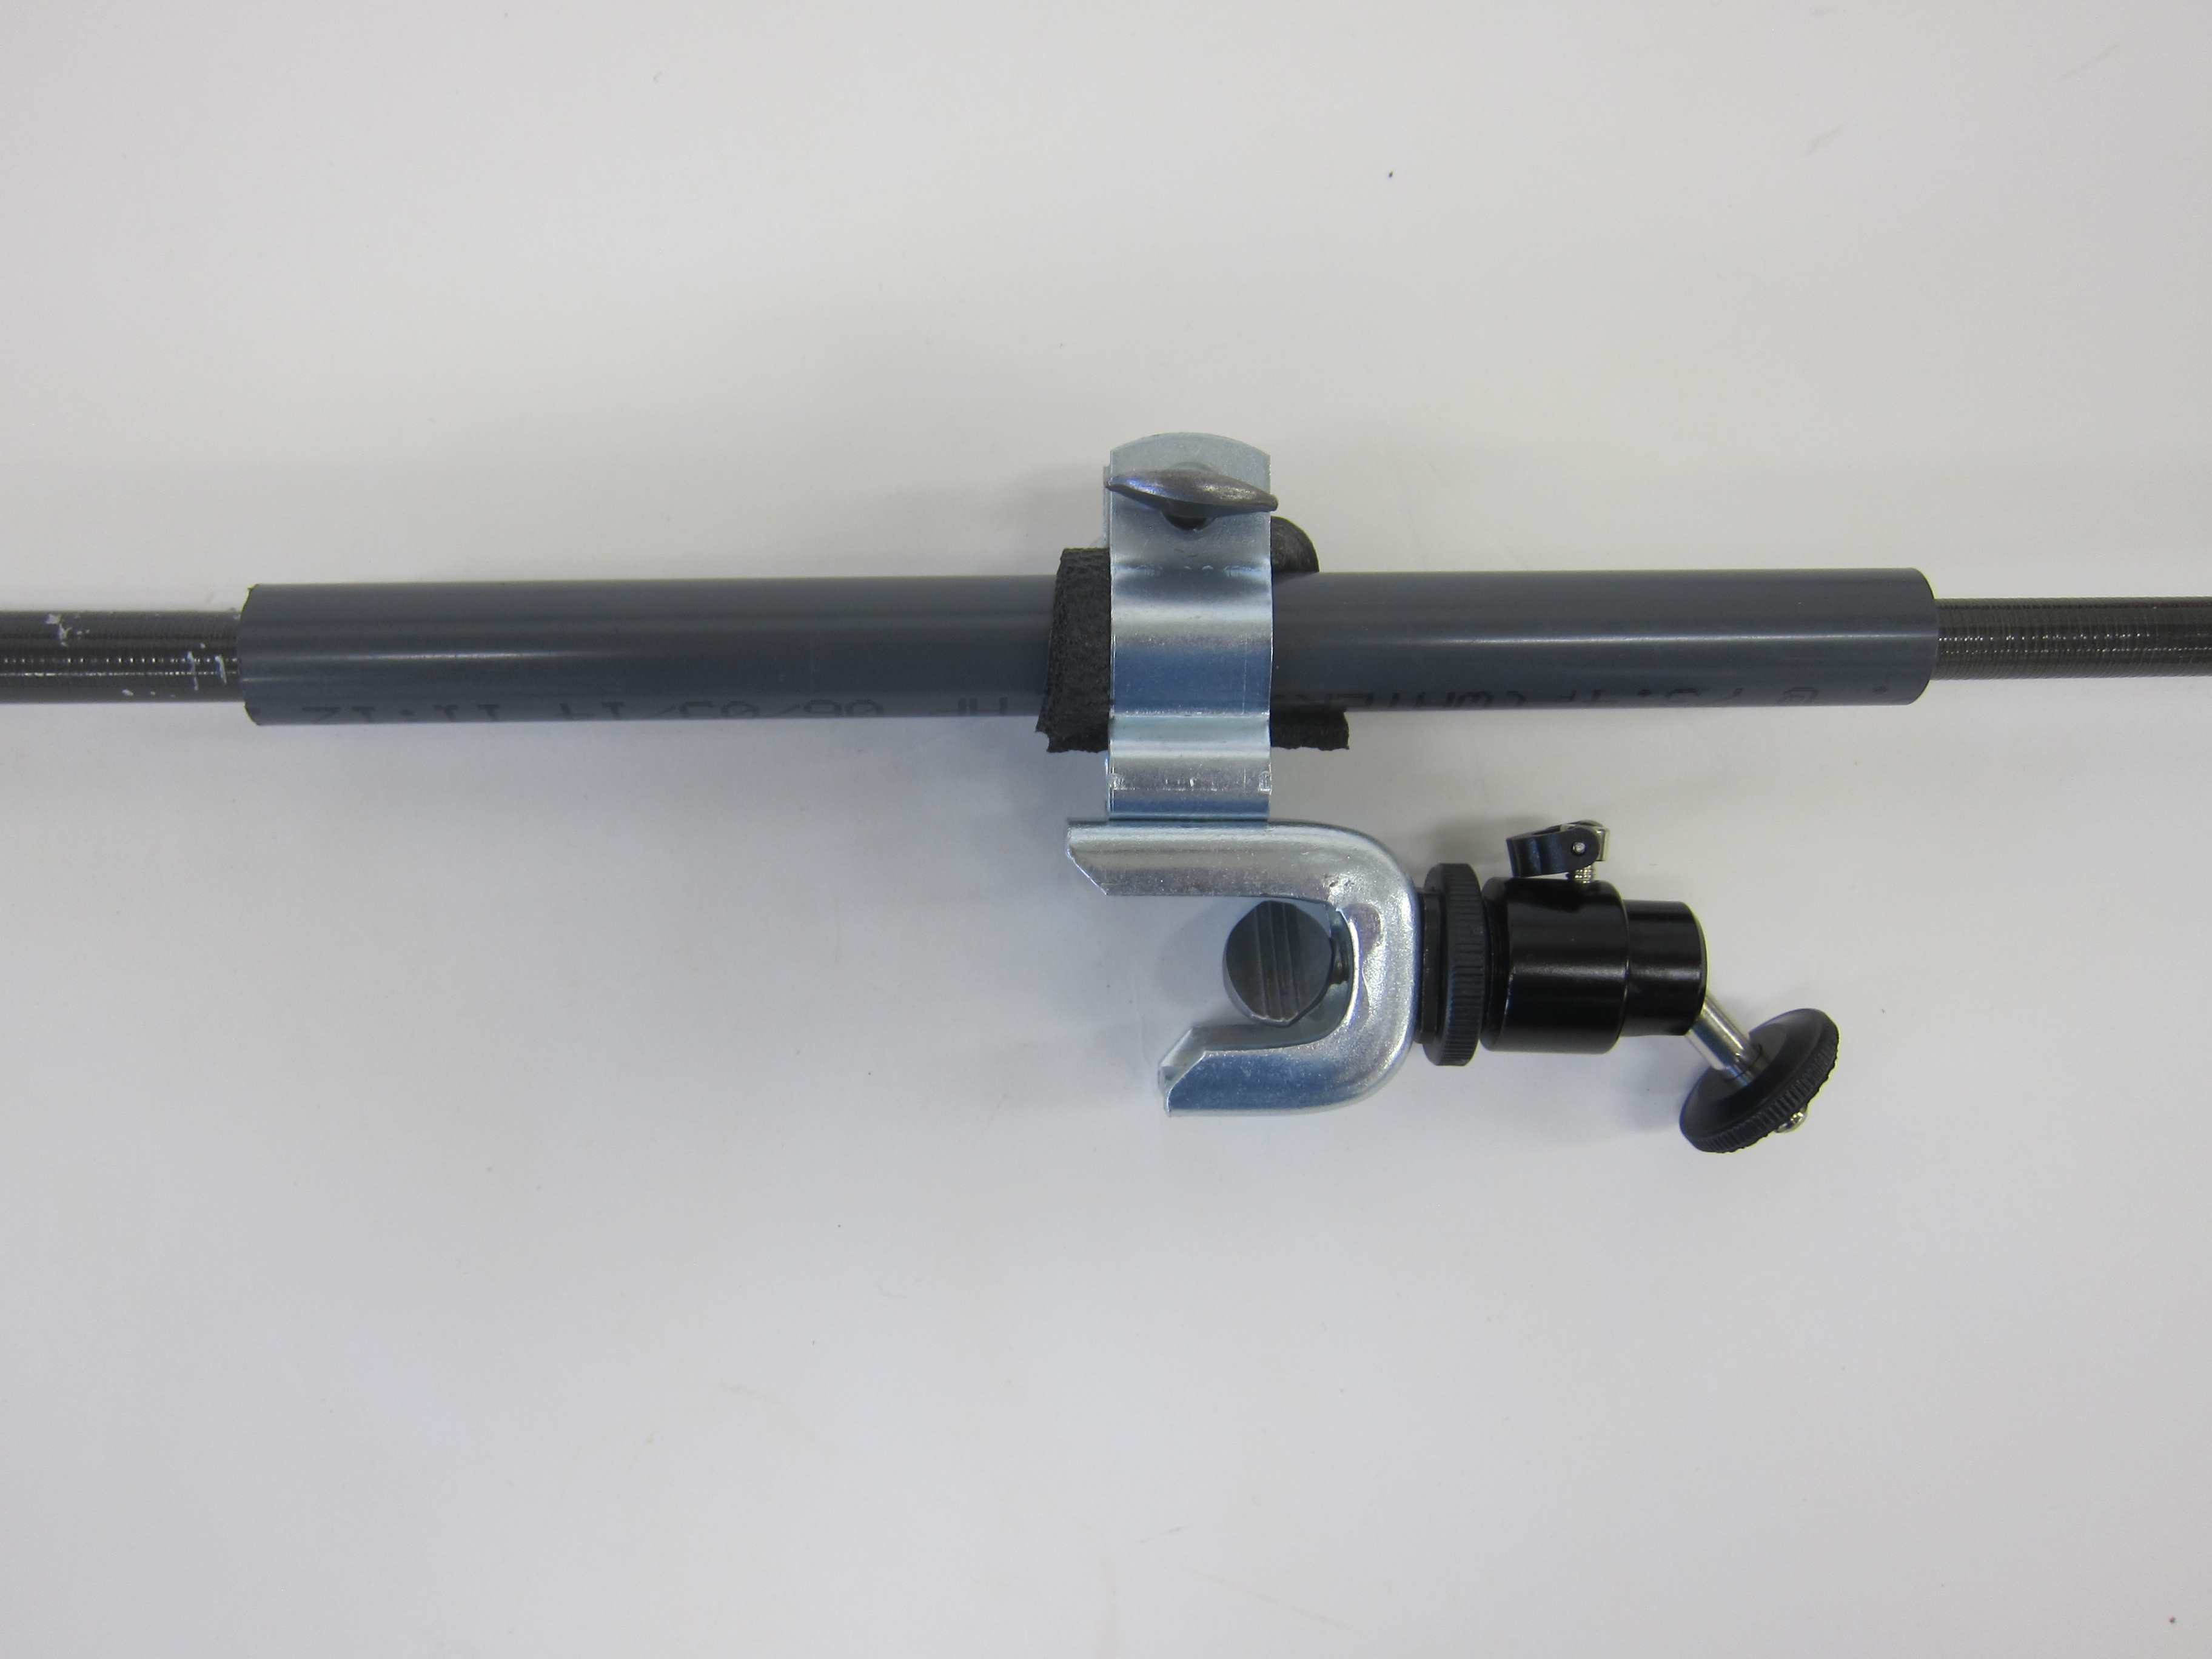
The mount attaches directly to the pole, with a piece of foam-rubber tape lining the pole and giving more purchase for the mount, and a bit of cushion.
One quick idea was to double up the 2a section. Each pole ships with replacement tips, including 1a and 2a. By simply inserting one 2a into another, then screwing it down a bit, they pole appears to become more rigid. (The 1a section is entirely too narrow to consider using).
It's unclear just how much "oomph" this adds to the pole, and whether it's recommendable over just using the one, and reserving the replacement to be just that.
As a separate idea, I experimented with using a piece of rigid conduit to act as a sleeve over the 2a section of pole, which would then have the mount attached to it. The idea being it would spread the force of the mound and camera over a longer section of pole, hopefully reducing the chance of breaking the pole under movement or by pure weight of the rig.
This was a promising idea.
 I then set out to try to find a way to get the sleeve to fit rigidly along the slight taper of the pole. I first tried cutting long triangular pieces of duct tape, which I applied to the pole with fat end up, narrow end down. By layering a few of these around the pole, it succeeded in getting the sleeve to be in contact with the pole at both ends of the sleeve, although it was a royal pain to get right. Basically, it made that one section of pole almost cylindrical instead of slightly conical. But in pulling the sleeve over this shape, the friction increased until it would start to bunch the tape inside itself.
I tried a new idea which was to use a strip of rubber (a cut rubber band). I dropped this inside the sleeve, so it protruded from both ends. Then I pulled the sleeve over the tapered 2a section of pole until it caught. This created a good fit, and the piece slopped around much less. however, when I tried to remove the sleeve, I hit a fatal problem.
The rubber bunched up inside the sleeve, creating a little snowball that gave enough force to shatter BOTH sections of the doubled 2a section of pole.

thoughts: doubling still promising. May not need solution to the taper issue. The sleeve seems like a must-have addition in some form.
Also played with a lanyard safety attachement, in event of camera or mount falling off. Simple combo of o-ring and metal ring, along with rubber bands. Could slow and eventually hard-stop a falling rig as it slid down the pole. Rubber is first line defense, metal and rigid cord would be second failsafe.


5 Comments
I used a cracked piece of this pole to stress test the conduit idea, and happy to report that leveraging on the mount as hard as I could, the pole broke below the conduit, but not right at the lever point. Meaning it wasn't the pressure from the conduit on the one point, but the overall force that made it fail. I really had to lean into this thing to make it go, too. With the conduit in place, as long as you didn't really whip the pole around I believe this would be safe for any small camera. I might explicitly say in instructions not meant for DSLRs just ot be safe, though
Reply to this comment...
Log in to comment
It sounds like you found a good system. Folks have been lifting cameras with these poles for many years, and there are a lot of different types of solutions. There are also a lot of different goals for pole photography. I wonder if a kit with a single mounting solution is the best way to market these poles. Maybe most people will need an alternate solution and would be better off with just the pole and lots of good instructions on a wiki. A separate mounting kit or two would also be good for those who needed a particular solution. There are lots of ideas at the KAP forum (google: site:http://arch.ced.berkeley.edu/kap pole)
For example, I approach this really differently:
If you are using a pole for mapping, a good way to keep the camera pointed vertically is to let gravity do it. The material cost to attach a Redstone Rig to a pole is well under a dollar and it adds only 25 grams.
There are also some tips about repairing cracked carp poles at the KAP forum: http://arch.ced.berkeley.edu/kap/discuss/index.php?p=/discussion/1778/carp-pole-repair
Chris
Is this a question? Click here to post it to the Questions page.
Reply to this comment...
Log in to comment
what would make a suitable pole and bracket for a DSLR (D610 with a 28-105mm zoom or an old Nikkor 35mm PC AI lens in my case): so 850 g + 455 g = 1305 g or 1.3 kg
I'd rather spend a bit more on the pole than buy a point and shoot I think. I have some point and shoots on the other side of the country I don't want another one but have an event coming up I'd like a pole for.
Reply to this comment...
Log in to comment
I'd say a DSLR would require mounting it much lower on the pole to ensure it's at a stout enough section. In the store, we do offer additional mounting brackets for this application
https://publiclab.myshopify.com/admin/products/454862584
@Alastair
And the
Reply to this comment...
Log in to comment
Kits is going to start shipping the pvc length as part of this kit, but will recommend using it without any internal padding (to compensate for the pole's taper). And I'll just explain it using the regular construction, not the double wall variation. Better to retain
Just spreading the force out over more of the pole area does increase the strength, and allows a bit more height as a result. Also, it makes the mounting more easily communicated, as you're not having to explain where to mount it, just mount it to the pipe, and slide pipe over #2 section of pole until it stops.
t
Reply to this comment...
Log in to comment
Login to comment.