What I want to do
Design a rig using readily available materials that can
- survive a hard fall from any angle (hard fall being free drop from 8')
- be built using no special tools
- allow for variable oblique shots and downward, mapping shots
- fly securely
- be as light as possible
- fit in a standard kit box
My attempt and results
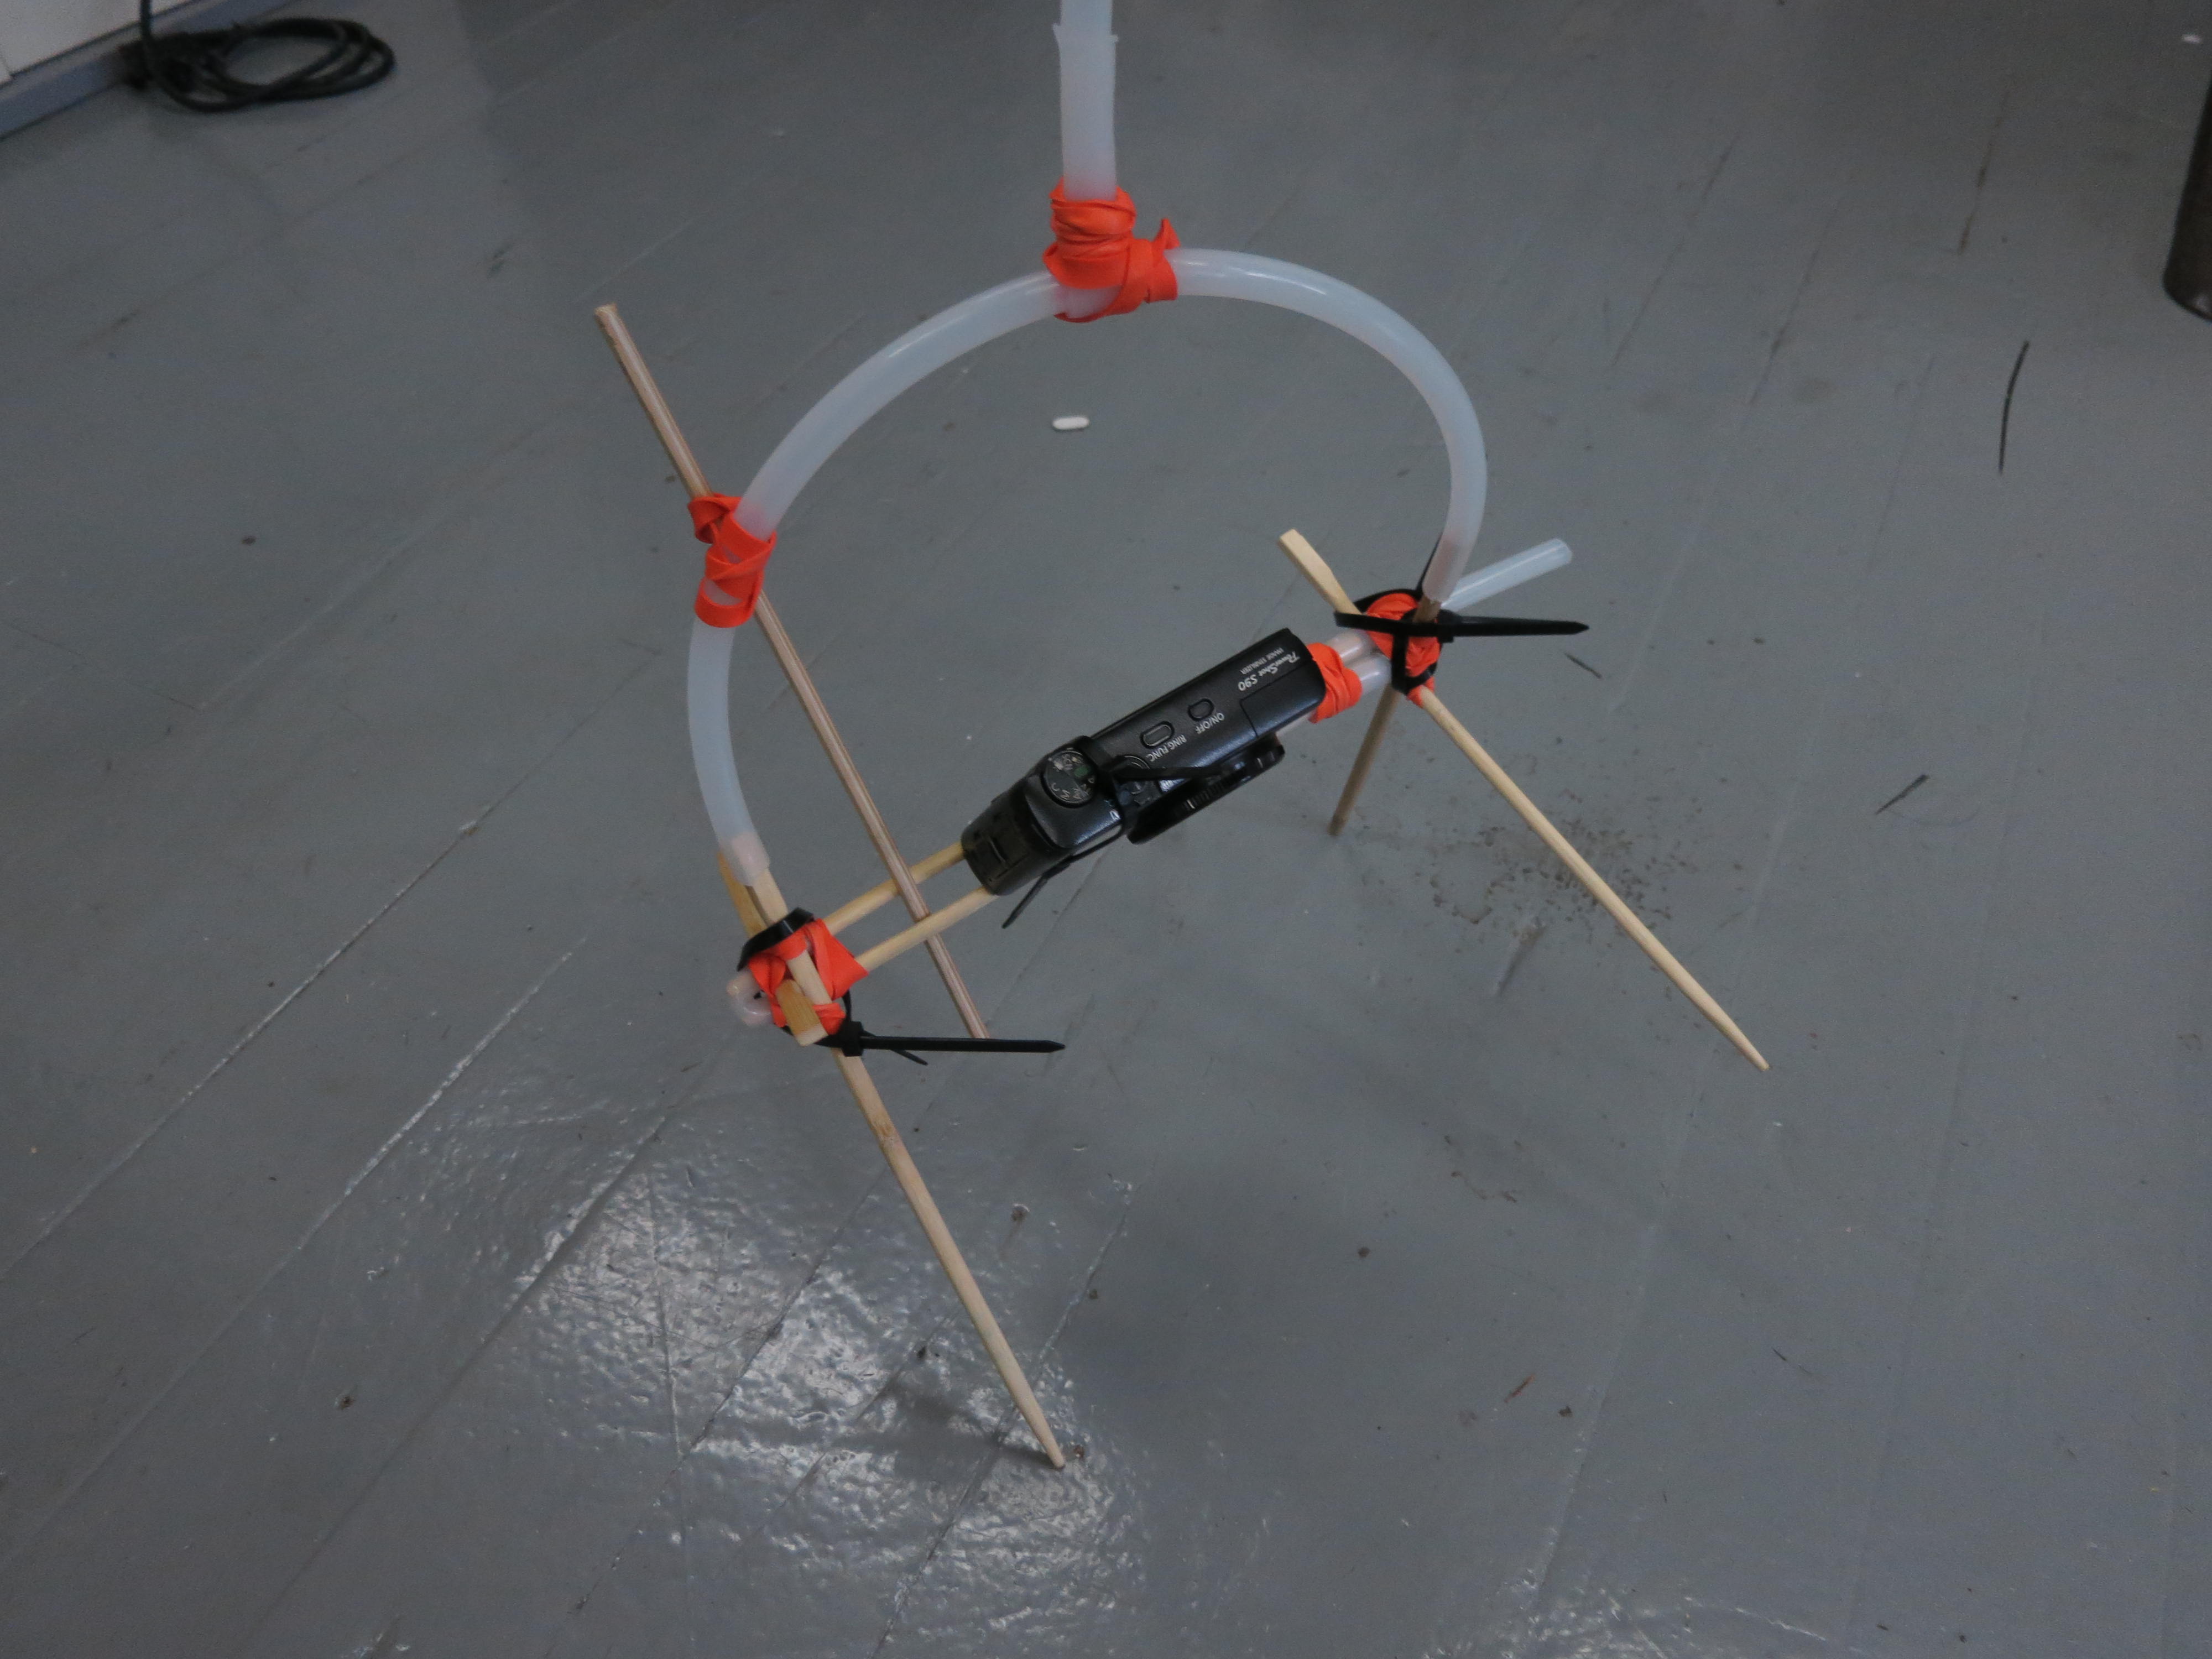
Well, here it is:

The basic design is built around @ranon's two-rail chassis, using two parallel chopsticks as a base to allow you to mount a camera using thumbscrew and washer from below. The basic design allows you to balance the camera by sliding it around to find the balance point, as opposed to drilling a hole in a rigid base.
I will add more photos detailing construction as comments.
The BOM includes:
- 3 pairs bamboo chopsticks
- polyethylene tubing of both 5/16" OD and 7/16"OD
- reusable zip ties
- rubber bands
- 1/2" thumb screw
- appropriate washer
tools required:
- scissors
- craft knife, for cutting notch in wood and tubing
- pliers, for reefing on things as needed
Total weight of assembled rig: 116g The best part of this is the unintended bonus that you can adjust the camera angle simply by positioning it as you like, relying on the flexibility of the bamboo and friction of the rig to hold it in place.
In this video, you'll see me adjust the camera between oblique and flat. Then I use a stick between the rails to lever it into an oblique position, then lock it in place. This keeps it from slopping around during a rough flight.
I did drop tests with the camera in the oblique position.
One at 10' height, straight down.
And one at 7' height with it landing at worst possible angle.
It survived...huzzah!
The bounce comes from the legs, which are a pair of chopsticks held into an "X" by rubber bands, then giving a rigid "stop" by using two zip ties. The rubber bands hold the sticks in place, but the zip ties prevent the X from collapsing beyond a certain amount, depending on where you set them. On impact, the rubber bands slow it a bit, then the zip ties apply the real brakes.

The top piece is a single curved piece of polyethylene tubing, connecting the tops of two opposite sticks. Doesn't really matter which.
Then the connection to the pendulum is made using what I call the "papasan" joint, which is based on ratan joinery I saw on crappy dorm furniture.

This joint is made by using scissors to cut down the end of the tubing, one side-wall at a time, to form a half-tube for a few inches. Then the half tube is folded back and rubber banded to itself. Also possible to use an awl and wire to make a more secure joint, but this does very well.
I passed a single strand of rubber band material through the interior of the joint to give it some bite so it didn't twist around. This still can be repositioned for balance, but won't move unless you want it to.
It looks janky, but it is incredibly strong.
Another idea was a method for attaching the rig to the pendulum drop. I simply cut a bypass in the tubing to allow a zip tie to fit inside, then notched a "ㄥ" into the dowel using a craft knife. The combined joint will hold a small person.

Why I'm interested
I want to include a rig with the kite kits and balloon kits and to provide a model anyone could make with no additional tools, and minimal time. Also, it's cool to watch it crash.
Next Steps
- Flight test.
- Build instructions with stills.
- Send flexible tubing to existing "pendulum materials bundle" kit customers, and add to the kit. Invite people to build and test this version.
1 Comments
Improvements for next round:
shorter tube for top piece, the length that connects to the top chopsticks. By shortening, will cut down weight, but also will cause legs to angle slightly out for better stance. /----\ as opposed to |----|
use smaller tubing for top pieces. Point chopsticks for legs in opposite direction: square, fat ends downward, thin ends upward. This will cut down on weight and hopefully improve strength of legs by putting mass where it's most needed.
Add reinforcement in form of notch/zip-tie to connect top tube to the legs. Don't trust such a critical joint to friction alone.
add a thin lanyard from camera directly up to the kite line for redundant safety reasons
Reply to this comment...
Log in to comment
Login to comment.