What I Want to Do
Building on a conversation that @NShapiro, @Warren, and @DanBeavers and I have been having in Nick's note on his DIY Formaldehyde testing kit and our desire to lower the barriers to testing by mailing around air pumps in our lending library.
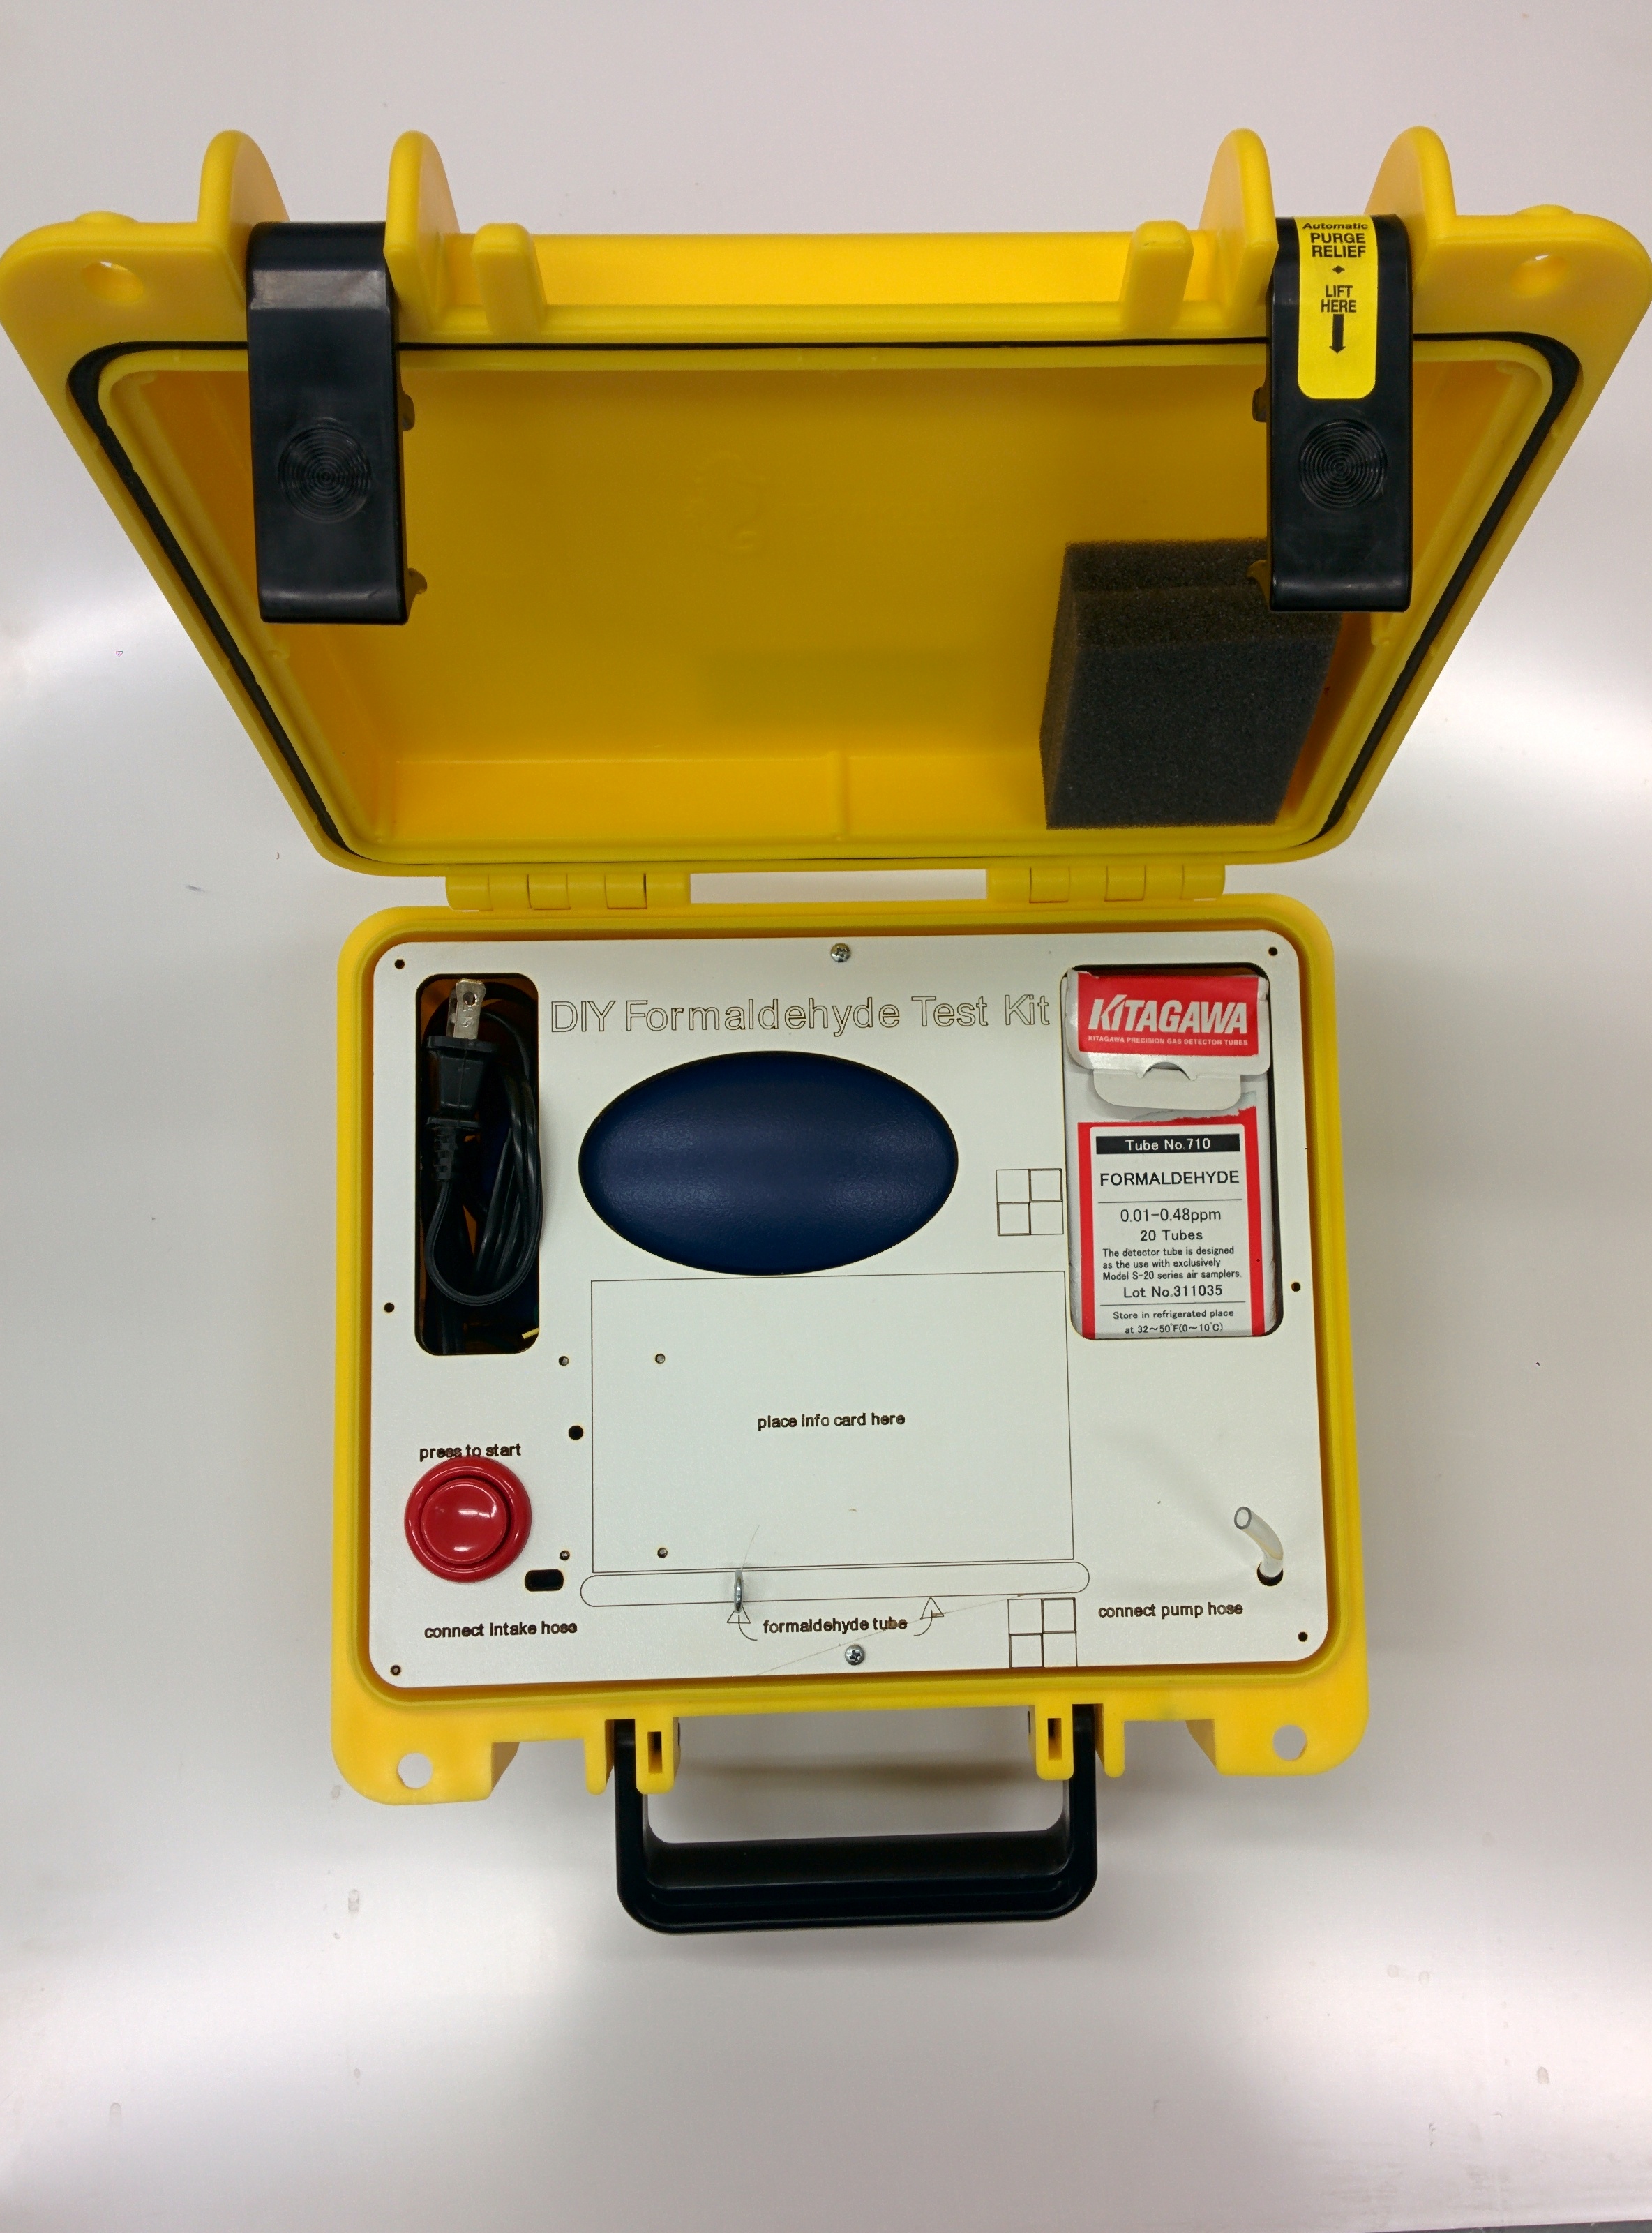
My goals are three-fold: make the kit robust and easily shippable, prevent user error with automatic shutoff, and (potentially) remove the most expensive component, the flow control valve.
My additions
In addition to @nshapiro's parts list I've added:
- an arcade-style big red button
- a timed relay
- a hard case (Seahorse SE300)
- a laser-cut 1/4" thick case panel file (the red lines are cut lines, blue are markings)
The panel is held on with 3/4" long #4 screws, the relay is held in place with 1" #4 bolts, and the formaldehyde tube is held in place with a 3/8" screw hook.
Unfinished bits:
- there is a place for a 3" x 5" info card but no card. *there should be a thermometer and hygrometer in the lower right
- there is no flow-restrictor on the intake valve, as I discussed in @nshapiro's note's comments
- Ionically, the material I had around to laser cut was MDF, a material well-known to off-gas formaldehyde. I'll find something else soon.


5 Comments
This looks great! What does it weigh? I wonder if loosing the blue plastic shell on the pump would lighten the load in any more cost-efficient way.
Is this a question? Click here to post it to the Questions page.
Reply to this comment...
Log in to comment
To be a little more precise about "(potentially) remove the most expensive component, the flow control valve." I have not priced them but an aquarium pump control valve or a hardware store needle valve should control the flow cheaply. The problem is flowing 9 L of air thru the tube in roughly 30 minutes in an accurate, inexpensive, reliable, and easy manner.
Reply to this comment...
Log in to comment
@nshapiro- 5lbs 12oz, so for mailing purposes 6lbs. Unless the blue plastic weighs 12 oz I'm tempted to keep it-- the oval cutout in the top panel holds it in place very well, and the little rubber feet keep it quiet.
@danbeavers I have a few of those as well and we can probably include them-- they are cheap. I also got some brass rod stock to mill small apertures through to test the concept of controlling the intake aperture below the potential size of the break in the glass tube. I'll have some updates on that when I get a flow meter to see what actually happens with those components in the line.
Reply to this comment...
Log in to comment
@Mathew I just added a note from a mechanical engineer friend about orifice size to the http://publiclab.org/notes/nshapiro/11-03-2014/diy-formaldehyde-test-kit page.
Reply to this comment...
Log in to comment
After further discussions with my mechanical engineer friend: If you use the manometer with tees and an orifice between them the orifice should be close to 0.0198" to have a differential reading on the manometer of about 3" for a flow rate of 0.3lpm. That would all need to be calibrated of course. The operation would then be 1) verify the manometer is vertical [important] 2) verify an appropriate level of water in the manometer. 3) place the scale 0 on the meniscus with the pump turned off [The scale can be calibrated to use 1/2 the differential reading for easier use.] 4) prepare tube 5) turn on pump 6) adjust needle valve so meniscus moves to the calibrated 0.3lpm mark 5) . . .
That is of course if this approach is pursued.
Reply to this comment...
Log in to comment
Login to comment.