An area of concern for me in rebuilding my spectrometer has been the camera focus. The spectrometer's slit provides pseudo-collimated light so the camera lens should be focused on the slit for best resolution. This is more difficult than it might appear. So, I'm posting two sets of observations:
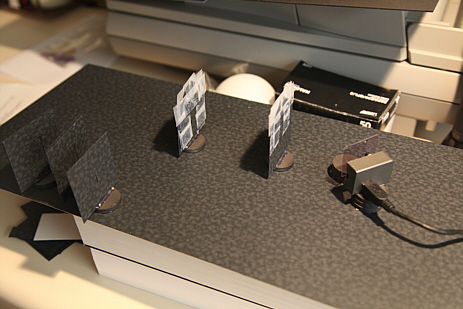
Setup: - My prototype "bench" setup where I can move components mounted on magnets - movable but stable (what's not shown in the photo is the black cloth cover) - A CFL (EcoSmart 5000k 27W at 5-ft) - A very narrow slit (exacto-blade prototype) - The camera positioned immediately next to the dvd grating - The default Syba camera viewer software with resolution set to 1280x1024
1) First, I used the default technique of the kit to adjust the Syba lens for "9 inches" using room light and small-font text on a card -- the DOF is high so this is very hard to do with any accuracy, so it was just my best guess. Then, I adjusted the slit distance while observing the spectrum. The first attached photo shows that the optimal slit distance for this specific default focus is actually close to 4-inches. This is about double the distance provided by the kit.

[Caveat: I did not take the additional step to re-adjust the intensity for each distance to make them all uniform amplitude. This likely is the reason for the general intensity change over this extreme distance range. I expect to re-test and compensate for this. However I still believe there is enough evidence to support obtaining a good focus.]
2) Then, I did a series of lens adjustments based on using a mechanical reference -- the point where the lens "bottoms out" in it's travel. I plotted the adjustment position (# turns) vs distance to the slit where the spectra shows the best resolution. The second attached image shows a simple data plot. Note that a) there are downsides to both ends of the adjustment range and b) the mid-point of the more linear adjustment region turns out to be a 6-inch focus. A very narrow slit helps considerably with saturation and appears to provide the best resolution at 6-inches from the dvd grating.

My own conclusion is that since manufacturing methods for mass produced parts, like the optics for the webcam, are very repeatable, adjusting the lens focus by noting the # turns (or partial turn in this case) from a mechanical stop is a much more precise means for setting focus. As this experiment suggests, setting a proper focus at an optimal distance for the slit of abut 6-inches can be rewarded with better spectral resolution.
With a bit more work, this adjustment can likely be refined and improved but hopefully this is a good first step.
Dave
16 Comments
Hi, Dave - a few thoughts --
I've taken this as a very good thing -- as in, the large DOF means the spectra will be sharp in a wide range of focuses.
the original kit said 3" and many people showed that that was not very sharp. We redid it a few times and settled on 9" as an OK medium. You'll notice that both 6" and 9" show both a double green line and a double yellow line, indicating sharp focus. There is however a sharper region in the red, a double line which seems to show better at 9", no?
We'll have to double check for the SANM camera too, of course, but it's great to see this clear presentation of focus.
Congrats on a great note!
Is this a question? Click here to post it to the Questions page.
Reply to this comment...
Log in to comment
Yes, a large DOF can mean a less precise focus adjustment requirement, but near "infinity" the webcam just seemed out of focus over a wide DOF. That said, my main concern was falling into the trap of an increasing DOF with distance which did not provide the desired result of having the lens actually focused on the slit.
So, my objective is the combination of 1) a very narrow slit and 2) a sharp focus on that slit while avoiding focus issues at both ends of the focus range. That pointed toward what appears to be a more linear focusing adjustment region -- about 4-6 inches out. I also wanted a method to set the focus which reduced the amount of trial and error -- assuming the distance to the slit is a fixed value (i.e. it's harder to build with an adjustable slit distance). If devices have widely varying focus, their resolutions will vary as well and the measured data value will diminish.
Thanks for the positive feedback.
Dave
Reply to this comment...
Log in to comment
I have the v3.0 kit but can't get a focused spectrum no matter how far I turn the focus ring clockwise or counter clockwise. The diffraction grating is right in front of the camera and the slit is in its standard holder 200mm away. Can anyone help?
Is this a question? Click here to post it to the Questions page.
Reply to this comment...
Log in to comment
Hmmm. Well, I'd agree the above image seems "fuzzy" but I'm also not clear as to what light the spectrum is representing. It also looks very over-exposed and I'd guess the RGB channels are all clipping.
Try this first: Place a CFL source 6-10 feet away, adjust the 'line' (up/dn) for capturing the pixel data near the spectral band center, set the spectrometer orientation (or adjust the distance to the CFL) such that none of the RGB channels have clipping. You should be able to resolve a narrow double-peak for the middle green peak. If the peaks are clearly visible but also rather broad (not a sharp green peak) then it might be focus, but it also might be the slit or slit width. I use a 0.45mm slit width in my PLab Proto V3.
If you're really having trouble with the camera's actual focus, you may need to open the spectrometer, move the diffraction grating (DVD) (or the camera) out of the way, point the camera at something with detail (a photo, paper with text, etc.) and look at the camera's image with everything under normal room light. You should be able to find the approximate lens focus fairly easily -- it will not be a very precise focus (about 1-2 in DOF) but. Mine is at about 6 in (150mm). Hope this helps.
Reply to this comment...
Log in to comment
Thanks for your reply @stoft. The light source is a fluorescent tube (there aren't any CFLs available here). I also have a green flashlight and my phone's white flashlight which give different (blurry) spectra. Moving the spectrometer further away from the source doesn't seem to diminish the width or blurriness of the peaks, just reduce their intensity (which is still a good thing). I'm using the 0.4mm acetate slit included in the kit and a DVD diffraction grating that I washed with ethanol to remove the purple pigment.
I've adjusted the camera's focus with a barcode such that it's focused around the slit distance, but it's a bit difficult to do due to the low resolution of the camera (there's a point where the barcode isn't clearly visible because there aren't enough pixels, not actually due to the focus). Out of desperation I've gradually rotated the focus on each side of that focal point with no success. I followed the instructions manual and it's a pretty simple thing, I just don't understand why it won't resolve into peaks like all the spectra I've seen posted with the instrument. The only thing I can think of to try is cut out another piece of the DVD.
This is an unclipped spectrum of my phone's white flashlight
Reply to this comment...
Log in to comment
Hmm, I can't see any spectra on your profile at https://spectralworkbench.org/profile/smurpau
Are you sure the earlier spectrum you posted was a fluorescent tube? Such a tube should work; see https://publiclab.org/notes/warren/02-04-2016/tube-fluorescent-lamps-for-spectrometer-calibration
Any chance your slit fell out of something? A very very large aperature can look like this.
Is this a question? Click here to post it to the Questions page.
Reply to this comment...
Log in to comment
I think the best plan may be to try focusing the webcam with the spec open and using a webcam program. It should be focused as it ships, actually.
Reply to this comment...
Log in to comment
Yes, this is the fluorescent tube
0.4mm slit
diffraction grating and webcam
As I said I've focused the webcam without the diffraction grating and slit onto a barcode ~22cm away as recommended, since it was stated that the webcam was not correctly focused as shipped (and indeed it was blurry before i started changing the focus as well). I then focused it away clockwise and counter-clockwise in small increments, with no success.
Reply to this comment...
Log in to comment
Quick question .... in your photo above (of the 0.4mm slit) it looks like there is a gap between the slit film and the paper holder for that film. (The slit films are actaully too narrow and are therefore difficult to completely cover the hole in the paper carrier. IF there were a gap there, you would essentially have two slits and, with a large area CFL source of light, that could really mess up the diffraction to the camera.
Reply to this comment...
Log in to comment
Is this the paper holder you mean? I can't see any real gap from the front or back. I tried the spectrometer with the slit reversed as well (I'll try anything at this point) but no dice.
Is this a question? Click here to post it to the Questions page.
Reply to this comment...
Log in to comment
Ok, it was just a reflection in the earlier photo. Just good to check. Could there be any issue with the DVD as a diffraction grating having been affected by the ethanol. I do remember folks talking about using it to remove some of the film, but the layer on the DVD which forms the grating has a few atoms thickness with 740nm lines and spaces so it's a delicate surface. I've always just found a piece where the film separated nicely. I suppose looking at the film in reflective mode, using the fluorescent source, you should see something reasonable reflected to your eye -- no spectrometer hardware involved. Just a thought.
Reply to this comment...
Log in to comment
You know what, you're right. I don't see anything reflected from either side through the ethanol-washed piece, but I do through the original purple tinted piece. I'll cut out another one and report back.
Reply to this comment...
Log in to comment
Welp, still no luck, although the purple tint does appear to reduce the clipping (presumably just by absorbing some of the incident light)
Reply to this comment...
Log in to comment
Ok, still a mystery; but I'll bet it's something simple that's overlooked. Let's double-check the obvious. In room light, the webcam by itself should give you a typical webcam-image of things -- the desk, can of soup, etc and should have an obvious focal point. (However, it will not be a sharp focal point as the DOF is large. Also, the idea is to focus on the slit, but it's a webcam so it will still be a little fuzzy (noisy + 640x480 resolution). Right? Next, the DVD grating should be about as close to the webcam as possible (on the older model, it was actually mounted to the web cam housing.). RIght? Next, there should be no extraneous light sources to the grating and camera -- just the light from the slit. (Ideally the webcam is parallel to the diffraction grating and that pair is at 45 deg to the slit. Note: I disagree with what the kit shows.) If the paper enclosure is closed, that should be good enough. Right? If you can, make a simple baffle out of cardboard or something with 2-in or so home in it. Place that between the flourescent light and the spectrometer -- at a distance from the spectrometer. The idea is to reduce your big tube effective area down to a small "CFL-like" light source -- i.e. to eliminate light sources from other angles.
Is this a question? Click here to post it to the Questions page.
Reply to this comment...
Log in to comment
Yeah, the webcam itself gives a good image and is focused. Moving the diffraction grating from 60 degrees to 45 degrees on top of the webcam gave this (no noticeable difference?)
The enclosure blocks all other light, so that's not the problem. I can't make a baffle with the ceiling light, but I thought the collimation slit was meant to block light from other angles anyway?
Is this a question? Click here to post it to the Questions page.
Reply to this comment...
Log in to comment
Since you appear to have verified all the individual elements, the solution must be that your overhead "fluorescent" ceiling lights are not the typical fluorescent light. Both my CFL and my small-size fluorescent desk lamp both give similar signatures, but your's looks much more like a halogen in that the spectrum is three broad bands. I believe there are "cool white" T12 type overhead "fluorescent" tubes which have been designed to have much broader spectrums and so do not exhibit the typical spikes of a CFL. If possible, you could find out what the replacement "fluorescent" tubes are and maybe find a plot of their spectrum. The other, less likely, thought is that there are now T12 size "fluorescent" tubes which actually contain a large number of white light LEDs -- which would not exhibit a CFL spectrum and might have some broad banding. As another test, you might try pointing the spectrometer at a very bright red LED on some piece of equipment if you can find one. Indicator LEDs have a relatively sharp signature. You might have to get the spectrometer up fairly close, but such an LED should not just have a very wide fuzzy band -- it should be a narrow peak.
Reply to this comment...
Log in to comment
Login to comment.