I’ve been interested in DIY rain gauges. The ones we used for the stormwater workshop series in New Orleans are really nice, but still between $30-40. There are some cheaper ones you can buy, but I found some neat models you can make with just a plastic bottle. However, the directions for a lot of them are just to add a ruler on the side after you cut off and invert the top, but that doesn't really create an accurate rain gauge because most of the bottles aren’t a strait cylinder, and it also doesn't account for the radius of the bottle and how much rainfall would take to make 1in of water in your gauge. So, I’ve done some examining on the more expensive rain gauge and the plastic bottle models and came up with this idea:
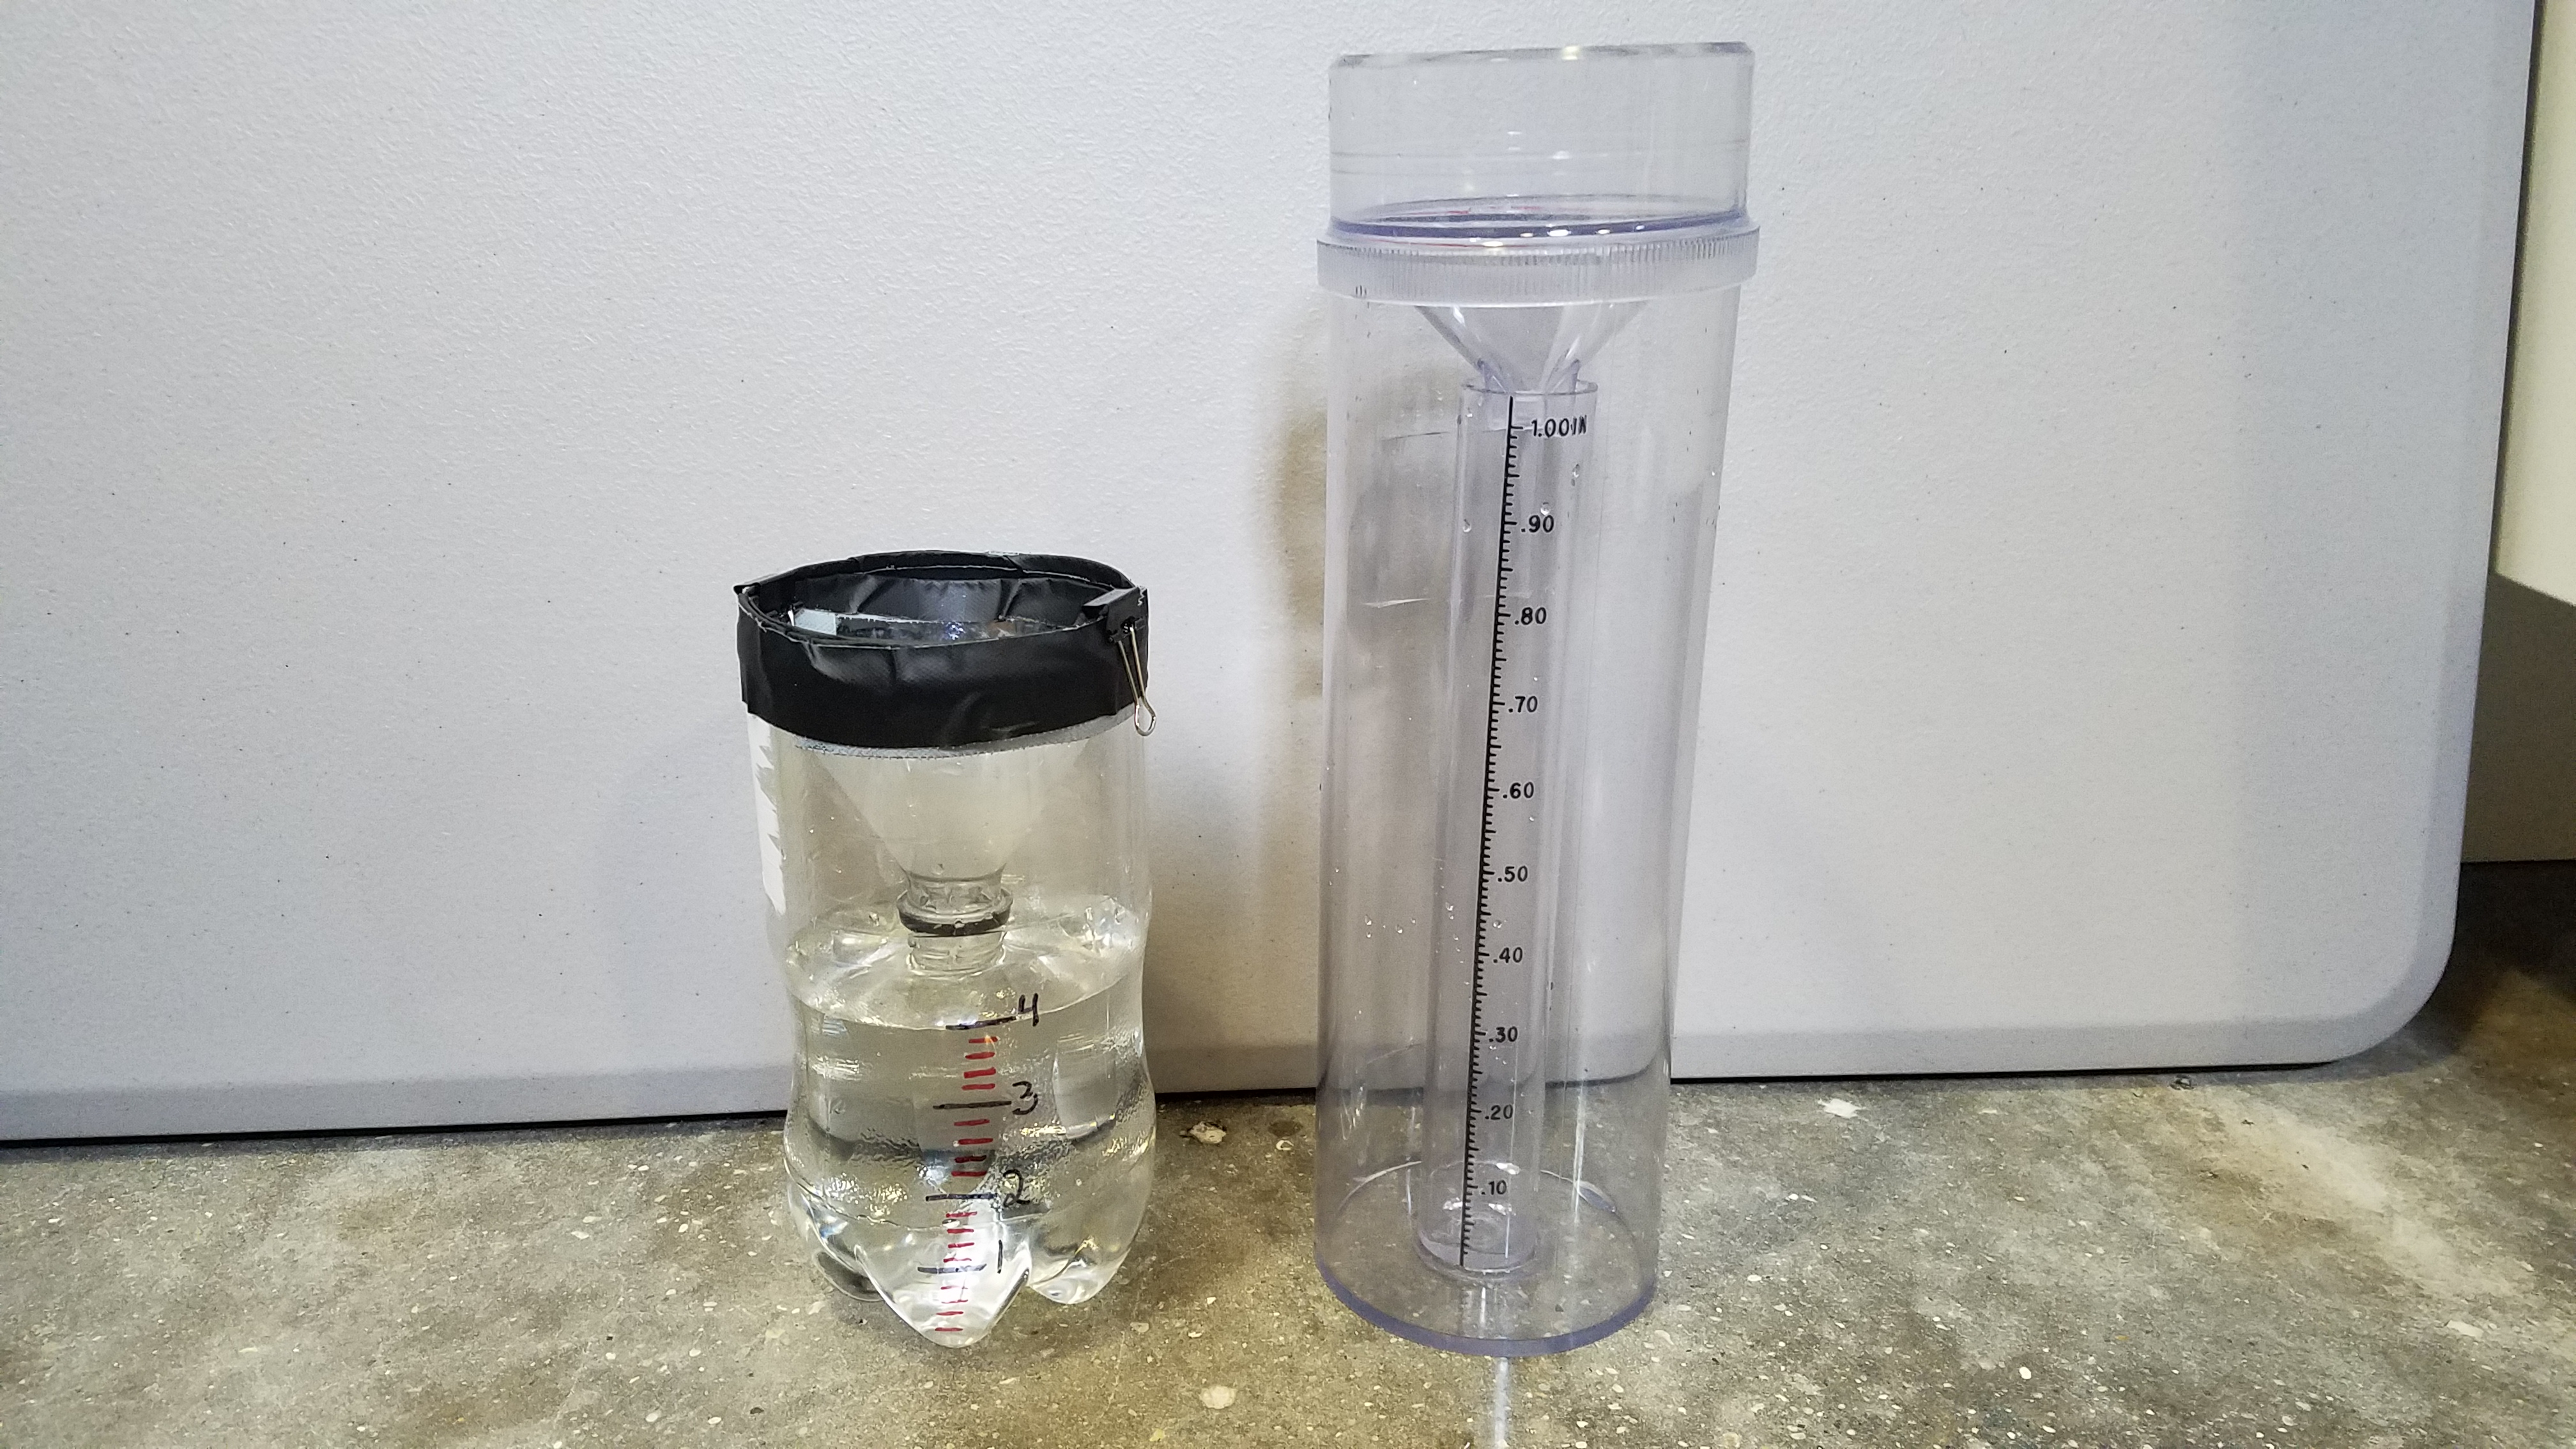
The expensive rain gauge has an opening at the top that’s 4in in diameter, essentially, if you make your plastic bottle have the same circumference, then what would go into making the measurements on the container would be the same.
Here are the materials you would need:
- A 2L plastic bottle (I used a minute maid bottle)
- A sharpie
- A ruler
- Scissors or an exacto knife,
- Duct or electrical tape,
- 2 small binder clips
- A liquid measuring cup
- Water
What I did
I inverted my soda bottle in the expensive rain gauge to measure where their circumferences would be the same.

It turns out, that on my soda bottle (are these things standardized?), that circumferences was exactly 4.5in from the top of the bottle (measured with the cap on). If you have a different shape soda bottle, find where the circumference is 12.56in. This will also make a 4in diameter opening.

I then cut around the top of the bottle where my line was with an exacto knife. This worked well, but I found two problems, one when I inverted my top into my bottle, like many of the other directions show, the top fell in, second the edges were pretty sharp. So I lined both raw edges of the bottle bottom and top with electrical tape which both created more of a cushion for the top to sit nicely and fixed my edges.

Then I used two small binder clips to hold the top in place.

I used the measuring unit provided by the more expensive rain gauge to measure out .2in of water and used to make it easier, I put it in a plastic cup and marked off on the cup where that came up to. I then put the .2in of water in the bottle and started to draw marks on my bottle where that amount of water came up to on my bottle. Side note: I will measure this amount out in liquid oz so others can do this with a liquid measuring cup.

I continued to measure out .2in of water and marking it off on my plastic bottle adding in the 1in mark every 5 hashes.
.jpg")
It turned out, on my bottle, except for the first inch of water, the one inch water marks ended up being about 1in apart, so the ruler does provide a pretty good approximation except for that first inch of water. On the bottle I used, the first inch of water covered about an inch and a half of space in the bottle.

This saved me some math anyway! But if you have a different size bottle, here are some calculations you can use to make your bottle rain gauge accurate (warning this one is in metric..) . Also, if you use a perfect cylinder or rectangle, you won't need to do all the individual measurements on the side once you do the first one, they'd all be the same (think Fiji or Smart water bottles, also I've seen some pepsi bottles like this?)
4 Comments
I needed this written out in PDF form for a workshop. Here it is if anyone else finds it useful! I also included a spot for some questions and feedback. It would be great to hear what others think on it if you do it! Making_an_accuraten_Rain_Gauge.pdf
Reply to this comment...
Log in to comment
A couple edits and suggestions that came from the workshop we hosted on 6/16/18.
Edits on directions:
Ideas:
People shared ideas on where to put the rain gauges and how to get them up. Some suggestions included using sign posts and zip ties. Another idea was to put it in a flower pot and stand it up outside. Another note of importance is that here in New Orleans, we have mosquitos that carry diseases. To keep them from breeding in your rain gauge, you can add a small piece of screen to the opening of the bottle (the small part of the funnel).
Great thanks for the tips. Mosquito prevention is an important thing to remember.
You can poke holes in the soda bottle's top to make a screen, though it would be hard to remove to clean depending on your design. Great for a one-time experiment, though.
You can also make an improvised rain catcher by attaching a small gardening tray without holes to the top and drilling drainage holes into the bottle.
Reply to this comment...
Log in to comment
So cool to see dyi rain gauge sessions! 7th ward, let the NOLA community know what rainfall your gauges catch in your neighborhood on ISeeChange! https://www.iseechange.org/neworleans
Reply to this comment...
Log in to comment
Login to comment.