Most of the data logging I did this summer and fall was to learn how to make a data logger operate longer on small batteries. It's not too hard to coax an Arduino-based logger to last for a week, but making it last three weeks involves a list of modifications and coding tricks. So it was very gratifying to finally see a Mini Pearl Logger last for eight weeks. To make that happen, some of the things I had to check on the longevity list are:
- Use an Arduino without a USB port (they waste power)
- Put the Arduino to sleep between logging events
- There are special code libraries for this (e.g., LowPower.h)
- A real-time clock with alarms is required to wake up the Arduino
- Use a 3.3 volt microSD card module (not a 3v/5v one)
- Remove some resistors from the SD module
- Use a small capacity microSD card (ones larger than 1GB often don't sleep well)
- Use a better microSD card library (e.g., SdFat.h)
- Disable the LEDs on the Arduino and real-time clock
- Use a longer logging interval to let the logger sleep more
- Use sensors which are low power (3.3v only instead of 3v/5v)
- Use fewer sensors on each logger
- Use bigger batteries
This list includes some non-trivial hardware operations like removing resistors from PCBs with a soldering iron. It also includes adding lots of code to the sketches running on the Arduino. In my standard sketch for the Mini Pearl Logger there are 35 lines of code related to sleeping and waking and low power stuff, which can make a logging sketch 40% longer and a lot harder to understand. So preparing a data logger to operate on its own for several weeks involves both hardware and software effort which could put this goal out of the reach of many.
.

Figure 1. The Adafruit Low Power Timer does one thing really well.
.
I was therefore intrigued to learn about an Adafruit product called the TPL5110 Low Power Timer. This is a tiny $5.00 breakout board which can turn things on and off at any interval between about 100 milliseconds and two hours. The idea is that instead of coaxing an Arduino to use less current, just turn it off when it's not logging data. The timer itself uses only about 30 microamps (30µA = 0.03 milliamps [mA]). So when the Arduino logger is waiting for the next logging event, which is what it typically does almost all the time, a really tiny amount of power is consumed.
.

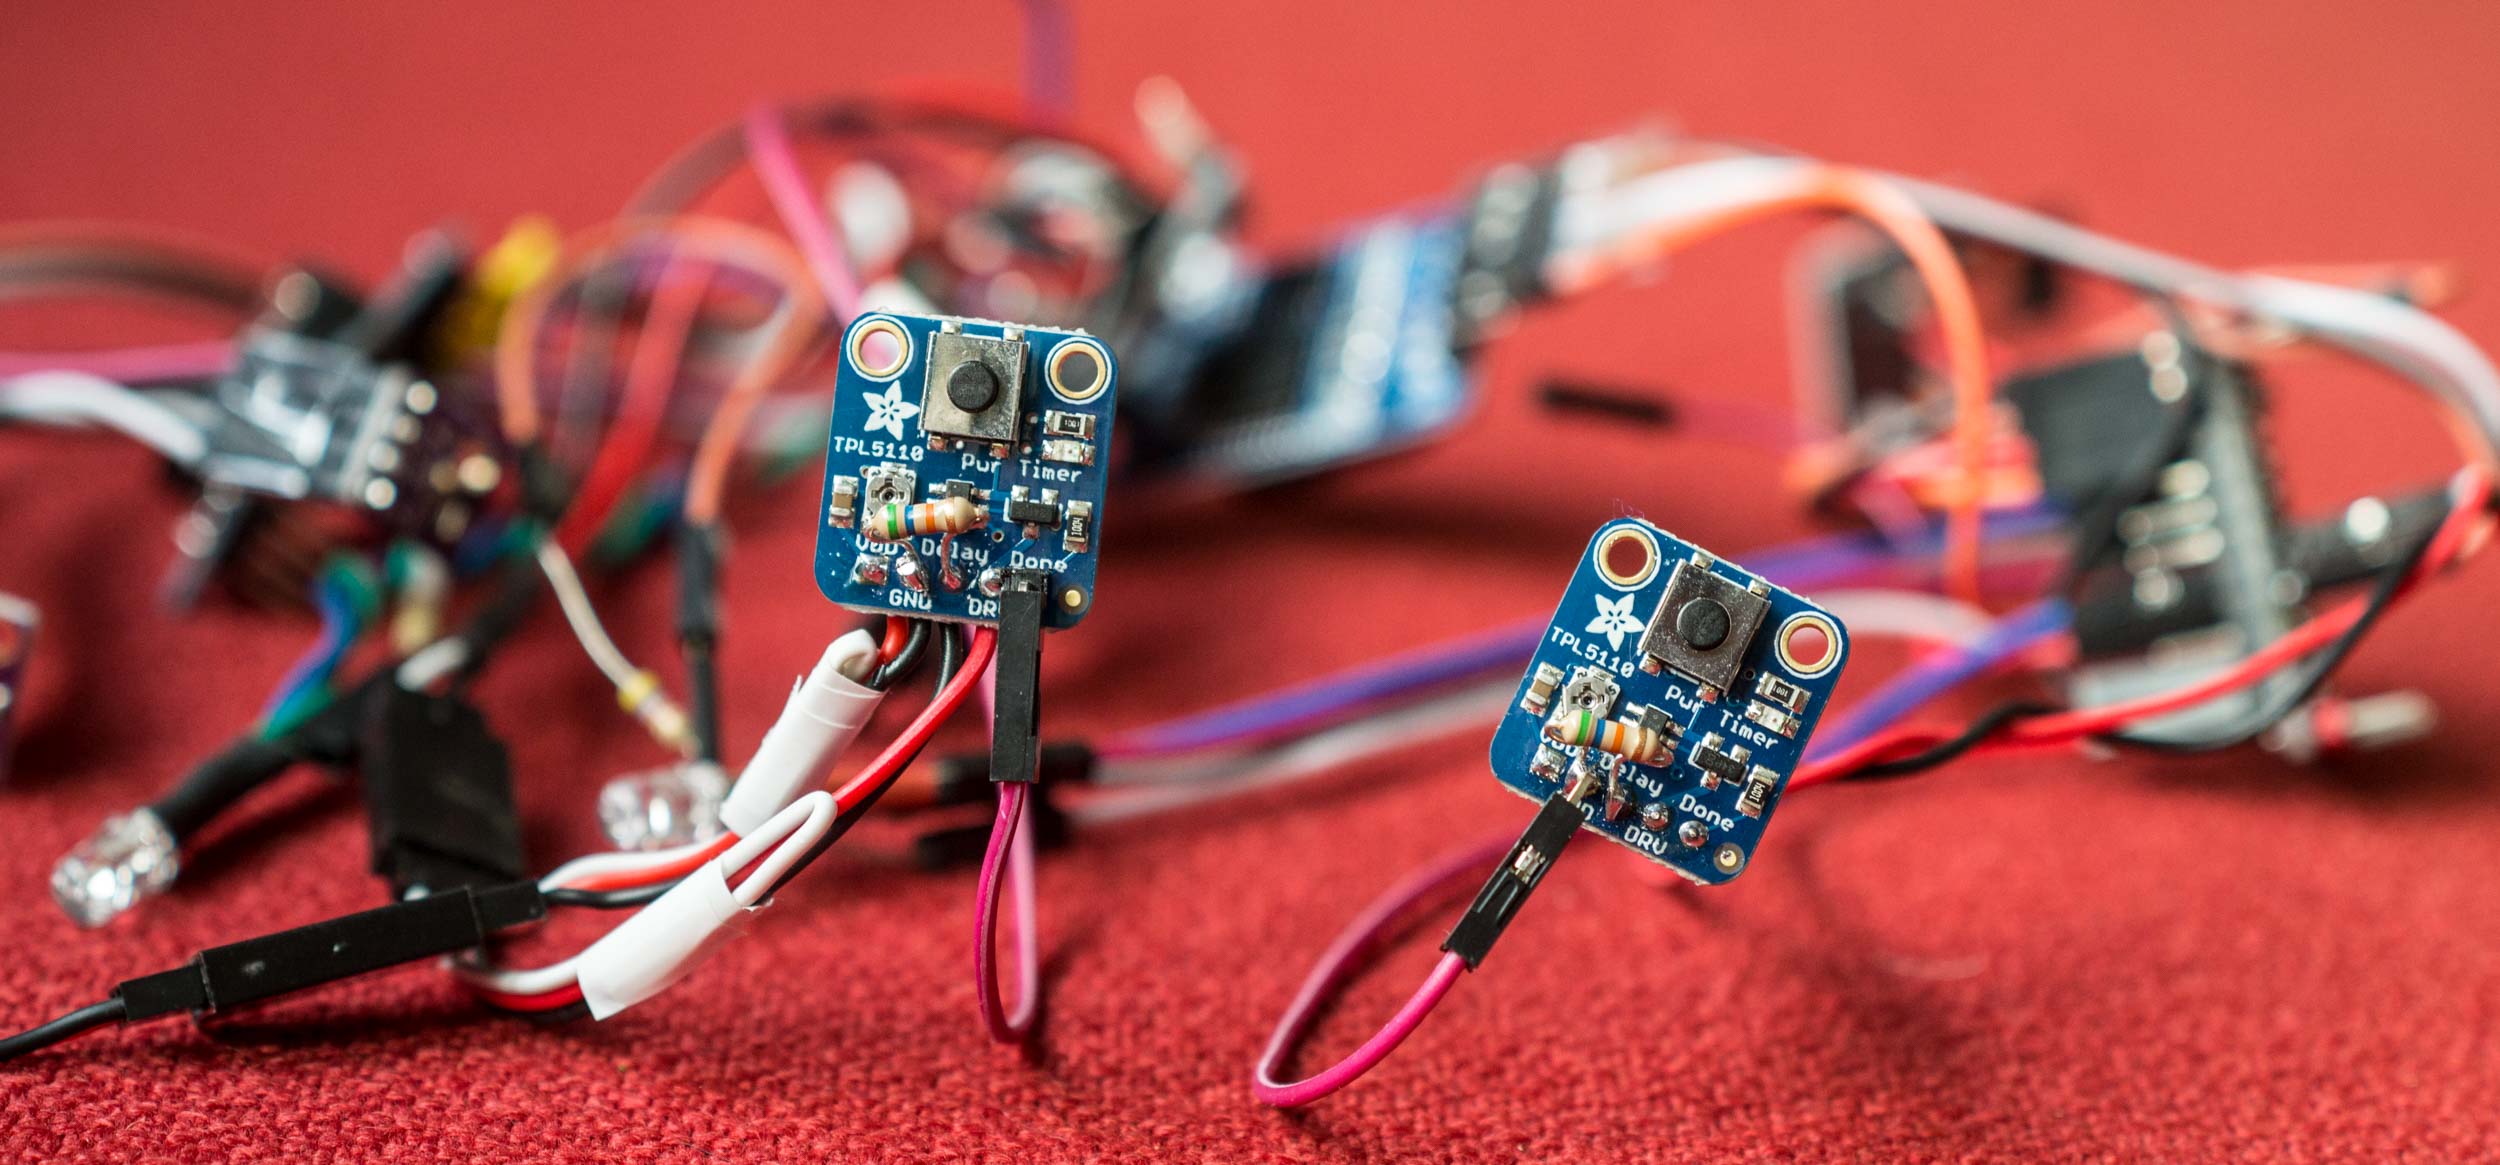
Figure 2. The TPL5110 timer can turn on a data logger at an interval of your choice. A trimpot on the board (looks like a Phillips head screw) can be turned to set the timer anywhere from less than a second to two hours.
.
My rough calculations suggest that the Mini Pearl Logger that lasted eight weeks would last for a full year if I used a TPL5110 timer. When my sketch puts the logger into sleep mode it still uses about 1mA of current which is 30 times more than the TPL5110 uses. The logger is sleeping almost all the time (all but four seconds every 15 minutes). If it uses 25mA for the four seconds of logging data, then the average long-term current draw will be about 1.1mA. The average when only the TPL5110 uses power between logging events is about 0.13mA, or 87% less. If my batteries have a capacity of 1500 mAh (mA hours), that computes to 57 days ((1500mAh/1.1mA)/24hrs)) which is exactly how long the batteries lasted when the logger slept between logging. The same computation for using the TPL5110 gives the result 481 days ((1500mAh/0.13mA)/24hrs)). That's plenty long.
.

Figure 3. The trimpot is easy to use but it's hard to know what interval is set without waiting to see how long it takes. Instead, you can disable the trimpot and add a resistor. This 56 kΩ resistor produces an interval of 9 minutes and 6 seconds.
This all remains untested, and some loggers can sleep at a lower current (maybe 0.3mA) than I am sleeping the Mini Pearl Logger, so the benefit would be less. But greatly extended longevity is only one of the advantages of using this external timer because a lot of those things in the checklist above are a pain to do. That list represents a substantial obstacle to long-term data logging for many people. Careful sourcing of components, modifying PCBs, adding alarm interrupt code to otherwise friendly sketches all require effort and expertise that probably scare some away from the activity. When the TPL5110 is added to the logger, that list gets a lot shorter.
.

Figure 4. The little copper trace under "Trim Enable" has been cut disabling the trimpot. I will eventually cut the trace under "LED Enable" to disable the LED. The LED is only on when the timer is sending power to the logger, but nobody sees it when the logger is deployed on a critical scientific mission, so why waste the power.
For example, because the TPL5110 does all the timing, the sketch running on the Arduino can be crazy simple. When the Arduino is powered up at each logging interval (e.g., every 15 minutes), the sketch must do only three things: initialize and read the sensors, write data to the SD card, and send a signal to the TPL5110 to turn the power off. Below is the main loop of a sketch which does these things. Only 12 lines of code are required to write the time, temperature, and pressure to microSD card and tell the TPL5110 to cut power until next time. The setup section of this sketch has only seven lines of code. __ Here is the entire sketch.
.

Figure 5. The entire main loop of a sketch which logs data from a BMP280 sensor. It does three things: read the sensor and real-time clock, write data to the SD card, and tell the timer to cut the power. This is so much nicer than the sketch I have been wrestling onto the Mini Pearl Logger.
The operation of the external timer is as simple as it seems. Batteries power the timer, not the Arduino logger. The timer decides when to send power to the logger. The interval can be set with a screwdriver (trimpot). At each interval, the timer flips a switch (mosfet) to let power flow to the Arduino. The Arduino turns on and runs the sketch, at the end of which is a command to send a signal to the timer to cut power. The Arduino then loses power and shuts down.
.

Figure 6. Fritzing circuit diagram of a Mini Pearl Logger with a TPL5110 Low Power Timer included. All power passes through the TPL5110 first, and most of the time the only component that uses any power at all is the timer. Power waste between logging events is minimized.
That might seem like rough handing of the Arduino, but that's how they always operate. There is no power-down procedure for Arduinos, you just apply power and remove power. There might be some kinds of data logging that can't work this way, for example if a sensor needs to have some power all the time, or takes a long time to heat up or something. If data from a GPS receiver are being logged, especially if the logger is moving, it can take a couple of minutes to get a GPS fix, so considerable efficiency could be lost. Or if you need to sample very frequently (once per second) this approach might not help much. But for typical long-term data logging, this seems like a promising solution.
.

Figure 7. Limor Fried thinks of everything, and she included a tactile button on the board (top). If you can't wait for the next data logging interval, push the button to make it happen NOW. I think this also resets the timer so it starts measuring the interval again.
Although you can buy the TPL5110 chip itself for less than $1.00, a ready-to-use breakout board costs $5.00 (from Adafruit or a less elegant version from LowPowerLab). This adds 35% to the BOM for a Mini Pearl Logger, so the cost is not trivial. It seems that the perfect use for a TPL5110 is to build one into a Riffle or Mayfly logger. These dedicated data logging boards are intended for autonomous long-term logging. Integrating the timer circuit into those boards should make them considerably more useful to a lot of users. This might add only a dollar or two to the BOM of those loggers.
I have two Mini Pearl Loggers outfitted with TPL5110 timers and ready to start logging data every nine minutes. It was very easy to add the timers to the loggers and make them work as advertised. Adafruit has excellent documentation including a fact-filled 30 minute video with Limor Fried who developed the timer breakout.
I will report back when I learn how my newly battery-friendly loggers perform, although I hope that will be many, many months from now.
__Here is the sketch running on the two Mini Pearl Loggers with TPL5110 timers.
7 Comments
Wow, this is really cool. I'm thinking about how to break out some of this info into a low-power-data-logging section or something. Would it be helpful to have a Questions section for low power applications?
I especially like how this kind of modularizes the problem of power management. Instead of writing code, you kind of wrap the whole system in a timer.
Is this a question? Click here to post it to the Questions page.
Reply to this comment...
Log in to comment
Yes, I agree that this is a different approach to an issue that has had a lot of effort directed at software solutions. This is a purely hardware solution that sort of turns the whole problem of long-term logging upside down. It seems to be a breakthrough because it could allow a lot more people to be successful logging environmental data for many months at a time.
There is a lot more to do with this. I don't know the best way to organize it. Some of the things that might be considered are:
Is this a question? Click here to post it to the Questions page.
Reply to this comment...
Log in to comment
@cfastie Cool project. I'm try to create a diagram similar to Figure 6. How did you go about creating that?
Is this a question? Click here to post it to the Questions page.
Reply to this comment...
Log in to comment
Fig. 6 was created using Fritzing (http://fritzing.org/home/). The annotations and some editing were then done in PhotoShop.
Reply to this comment...
Log in to comment
Obviously kind of an old article, but I am just getting into arduino and electronics in general. My question is I have a similar project to this and I like the idea of using a resistor to bypass the trim pot but I don't know the original resistance of the existing trimpot on this / understand Ohms law etc. Is it ridiculous to try extending out the delay on the timer to be more like 8 hours using a different resistor?
Is this a question? Click here to post it to the Questions page.
The specs for the TPL-5110 timer IC say it can time intervals up to 7200 seconds (2 hours). It seems unlikely that it could be extended beyond that.
However, it is probably possible to time an eight hour interval by using a TPL5110 to wake up an Arduino every two hours and having it check a variable saved in flash memory, then incrementing and saving that variable back to flash memory before proceeding to the rest of the sketch where a decision is made about whether eight hours have elapsed.
Chris
Oh, that's awesome - That gives me the info I was looking for, thank you very much, really helpful!
Reply to this comment...
Log in to comment
Login to comment.