Authors: Lydia, Conor, Jane Link that helped us with our project: http://kap.ced.berkeley.edu/kaptoc.html Introduction Our group set out to find a viable way to map areas of Golden Trout to assess grazing for the donkeys, surface water flow, foot trails, and other necessary information. Because Golden Trout Camp (henceforth GTC) is around an eight hour drive from Ojai, we were unable to put these methods to practice, so our goal was to create a simulation for something to be replicated there. This will help GTC, an 80 acre area in the Sierras with dense sections of forests, over 100 ft. tall trees, large elevation changes, and large meadows/clearings, by providing a simple and low cost DIY method to take detailed aerial images to address conditions in remote locations such as Golden Trout Camp. Additionally, this method is easily replicated to find changes over time, either short or long term. We had the ability to see the current map of GTC, which provided us with some information about the area as well as different difficulties that could arise. From this, we were able to find similarities between GTC and where we were flying our kite. This allowed us to get an accurate simulation of what it would be like at GTC. Aerial mapping is a good way to contribute to this because up-to-date images and maps are vital to the function of GTC. It would allow up-to-date images of different foot trails, grazing areas, wildlife, plants, and surface water, which would help day-to-day functions at the camp.
Methods Equipment G-Sky Hi Sky Delta 7 x 3.5 ft. kite (note: significant wind necessary to keep kite airborne) Canon PowerShot A490 camera and memory card Top of plastic juice container (stabilizing contraption) Laptop (to load photos onto) String Rock (to hold down shutter) Rubber bands Gathering data Procedure Find open location and judge wind strength Set up kite Turn on camera Put camera in the rubber band contraption (4 rubber bands tied together, as seen in image below) Secure small rock above the shutter so that the camera will continuously take photos Take camera with rubber bands attached and place it in container, with the lens facing downwards Stretching the rubber bands, secure the camera in its container by attaching the string to the outside of the container.
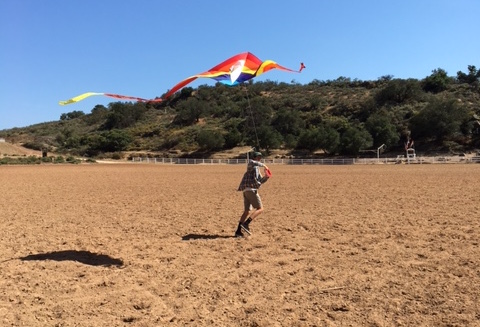
Attaching the camera Attach the container, with the secured camera, to the kite string hanging approximately 10 ft. below the actual kite. (We originally attempted to attach the camera directly to the kite, however this caused the kite to be weighed down.) Have one person hold onto the kite giving around 30 ft. of slack.
Preparing to launch the kite Another person, holding the string, walks backwards to help launch the kite When the string is taut, the person holding the kite releases it, and the person with the string starts to run backwards, in order for the kite to gain elevation. However, if there is a lack of wind, use an ATV or other motorized vehicle in order to pick up speed and allow the kite to gain elevation.
Conor beginning his drive around the Gymkhana Field Slowly let the string out to raise the kite to the desired height Using the wind, maneuver the kite, to find the best location for taking your photos
Kite visible very high over the ridge If possible, use different kite flying maneuvers in order to stabilize the kite and camera. This will lead to clearer and more useful images.. After desired amount of time (we suggest 20-30 minutes), slowly reel in your kite looking out for any potential obstacles When the kite reaches the ground, remove rock, turn off camera, and download photos on to computer.
We were able to gather data through uploading the hundreds of images from the camera’s memory card onto a laptop and looking through them. Although many of the images were not helpful (because they were taken during the setup, were blurry, etc.) a large amount of them were very clear and useful. Because of the height that the kite reached, we were able to gather photos of a wide area that included fields, trees, and roads.
Area that we were mapping for the simulation
Analysis With the photos that we took, we determined some of the beneficial aspects of kite mapping, as well as some of its limitations. We found that kite mapping is ideal for places that are hard to access, as helium is unnecessary, as well as for taking pictures of large areas with many obstacles. In areas with dense forests, beginning the flight of either a kite or balloon can be extremely difficult and dangerous to the equipment. With a kite, however, you can find an area to launch, then using wind direction, maneuver the kite above the area that you initially wanted to launch (densely forested areas, etc.). Despite these benefits, kite mapping can be problematic when there is a lack of wind, lack of an open location to launch the kite, or too much wind, where you will not be able to stabilize your kite and camera, resulting in bad photos. Kite mapping, when used correctly, can be a great solution to problems that may come from normal aerial mapping, using a balloon and helium.
Results
What worked and what didn’t?
Which Kite To Use
Through multiple test runs, we were able to determine which kite to use depending on wind conditions. When there was not much wind, the large kite is the the better one to use, as it will be easier to keep in the air. However, when the wind is severe, the smaller kite better stabilized the camera, resulting in clearer photos.
How To Counteract Wind Problems
One of the largest and most obvious problems that comes with aerial mapping using a kite is the lack of wind. The larger the kite, the easier it is to get it in the air as well as stabilize to get good images.
Why Kite Mapping is Useful in the Backcountry
One reason that aerial mapping is ideal for Golden Trout Camp is that by using the direction that the wind is traveling, you can angle your kite to fly above dense sections of trees, where launching either a balloon or kite would be very difficult.
Problems with Elevation Change
One potential problem with using aerial mapping in a place like Golden Trout is that it is difficult to see the changes in elevation. In our test location, the Gymkhana Field, we found it difficult to notice the elevation change from the field to the top of the hill. We estimate that the difference in elevation is approximately 120 ft. A simple solution to this problem is to lower your kite. However, at Golden Trout the Lodgepole Pine Trees make it impossible to lower your kite far enough. That being said, a steep elevation change is noticeable on the camera, which should be sufficient enough to create a grazing plan. Generally speaking, the maneuverability of the kite should be large enough to get images of most of the 80 acres. These images are extremely clear and will allow you to see the riparian corridors, perimeters, and common paths easily, while the sheer elevation makes it difficult to identify plant species. One other problem with kite mapping is that it can make it difficult to combine the photos you receive into a map. Because of the wind, the kite will be moving fairly consistently, giving you many shots from different angles and locations making it difficult to create a map.
What did you learn?
Throughout this experiment, the lens of kite mapping prompted many new experiences and lessons, as we had never done anything like it. We were able to figure out what the best kite is to use, how to fully take advantage of the uniqueness of kites, the strengths and limitations of kite mapping, as well as how to best apply these ideas in obscure locations, that we are not able to travel to.
Sample photos
Recommendations Equipment (Link to aerial mapping kit used: https://publiclab.myshopify.com/products/kite-mapping-pack ) For this project, the necessary pieces of equipment are a large kite, long string for the kite, a camera with the ability to take constant photos or something that aids that, and a plastic holder for the camera (see materials list for comprehensive version). We recommend observing how utilizing the different tails of the kites affect their flights (we did not have the time to complete these observations). Replications over time In order to replicate this, all that would be necessary is good kite-flying conditions. If this is achievable, replication is easy. In order to get the best results, it is best to get the kite very high so the camera covers a larger area. We had hoped to map other areas as well, such as Thacher Creek, the Cow arena, and possibly an athletic field such as the New Field or Upper Field. We were unable to map these areas because of limited time, but we were able to get enough information from the flight we did because of the mount of high quality photos we got. Future directions (improvements or additions to the methods, additional studies this makes you think of) After our first flight, we found that tying the camera lower on the line resulted in a more successful flight. When we did this, we got the kite over 600 feet in the air and were able to get many good and clear photos of areas we wouldn’t be able to photograph otherwise. We also found that using different
Reflections Through this project, we learned that the nature of kite mapping requires a lot of trial and error, and sometimes is not feasible due to conditions outside of our control. We learned how to overcome these obstacles by thinking outside of the box and employing other methods to capture our photos. Because of this hard work, we were able to attain images that aided us in our goal of providing Mr. Spaulding with information helpful to using a kite to establish a viable grazing plan and locate various ecological features of the land (riparian corridors, common paths, and perimeters) in a location that poses some difficulties, GTC.
2 Comments
Hi there, Great post! Mind it I tag it to the Public Lab Blog?
Is this a question? Click here to post it to the Questions page.
Reply to this comment...
Log in to comment
Please do. Thanks for the feedback.
Reply to this comment...
Log in to comment
Login to comment.