I started this project to create a NDVI camera that could stream video over IP and directly output via SD video. I choose the raspberry pi because it's cheap, readily available, and has tons of support. I've managed to make some good progress by following guides around the internet.
This is a very complex project and might not be suitable for new users. If you get stuck on a step, please google it, there's lots of information out there.
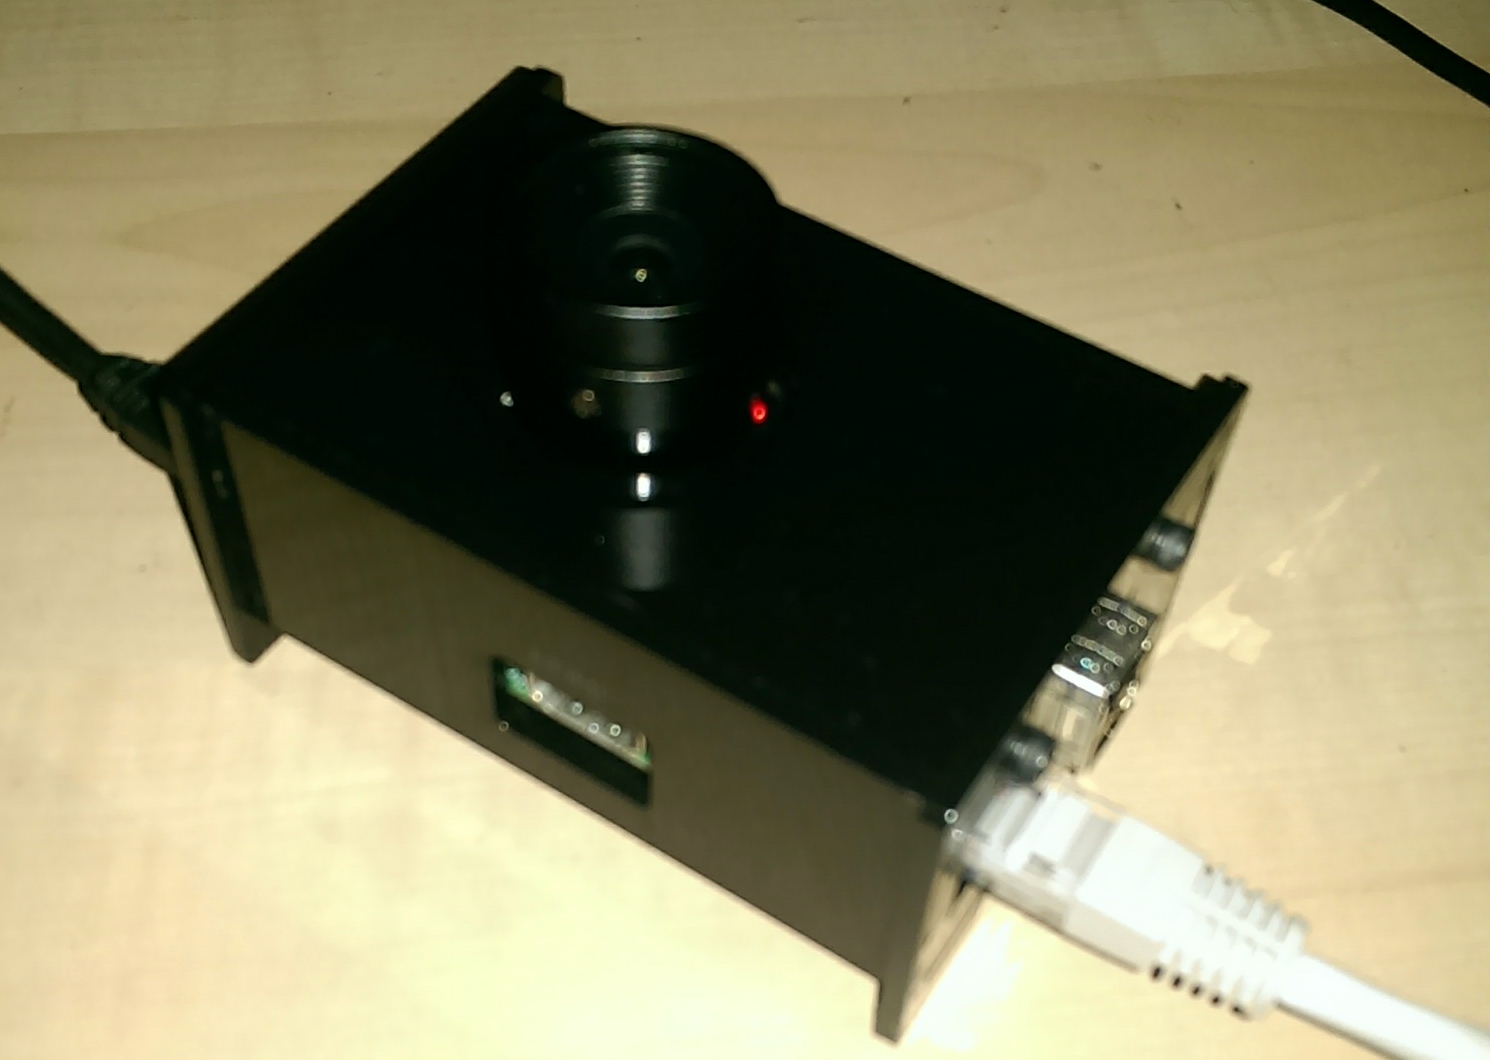
Step 1: Hardware
- Raspberry Pi
- SD Card
- Ethernet Cable
- Micro USB Power Source
- Pi NOIR Camera or Knock-off
- CS Lens
- Filter
After trying to find a good cs lens mount, I eventually just bought a knock-off camera board with everything included. The official camera board has 21mm hole spacing, which is apparently very uncommon. It also has a ribbon that interferes with proper seating of a lens mount. The knock-off seems to work well, and has the same specs.
Step 2: Raspberry Pi Setup
- Connect the camera to the pi using the ribbon cable- metal contacts away from Ethernet connector.
- Burn an image of Raspiban to a SD card, I recommend at least 8GB
- Use raspi-config to change these settings:
- Enable Camera
- Disable Desktop
- Enable SSH
- Change root password
- From here on out, you can SSH into your pi using it's IP address.
- Use your router to give your pi a static IP address...it's easier that way.
- Install RPi Cam Web Interface
- This software was developed by Silvan Melchior and it works great
- Use this Guide to install it
Step 3: Testing
- Restart your Pi
- After it has booted, a red light should be lit on the camera
- Start a web browser on your computer and enter the IP of your RPi.
- You should see a live stream of the camera and a bunch of controls.
Step 4: Hardware Finalization
- Cut a piece of filter and drop it in behind the CS lens. Having a screw on lens allows you to play around with different filters and lenses. CS lenses are very inexpensive and have a large aperture.
- Download this Corel Draw file and lasercut yourself a case.
- You'll need 4 M3x16mm bolts/screws and the appropriate nuts.
- The knock off board will attach with 4-40 screws, the official board is weird...again.
- Designs for the stock camera board and the knock-off are included.
- This case is based on Built-to-Spec's case I found on Thingiverse
- Assemble it all together and you have a nice packaged case you can stream filtered NIR.
- You may want to use a small wifi dongle to make it wireless. Set that up to connect automatically.
Step 5: GSM This part is a little tricky. I haven't quite perfected it, but here's the basic idea:
- Setup a server in the DMZ of your router (This can be another Raspberry Pi)
- Buy a GSM USB Modem and connect it to your camera Pi, toil with drivers until it works
- Write a script to:
- Connect to the internet through the modem (recommend sakis3g, it works and has support)
- Establish a reverse ssh tunnel to your server: ssh -N -R 2222:localhost:80 [IP of Server]
- Mobile providers rarely provide an external IP address for their devices, so in order to navigate their complex NAT, you need to establish this tunnel to your server. When you establish it, all connections to your server on port 2222 are routed to port 80 of the camera Pi via the reverse ssh tunnel.
Next Steps
- The GSM connect process is in its infancy, but it would allow you to drop one of these things anywhere there's cell coverage and monitor plants. I hope to put it on the bottom of a quadcopter to monitor crops.Currently the latentcy over GSM is .4 seconds. Over direct Ethernet connection it's even faster.
- This project establishes a web server that hosts an image that's constantly refreshing so fast that it looks like video (Motion Jpeg). I want to be able to process those images real-time. I'd like to use client-side javascript to offload the processing to the computer that's viewing the images. Basically, on the image load, send it off first to get processed as NDVI and false colored. I need to figure out how to use infragrammer to do that.
- The Raspberry Pi has the ability to write images directly to the frame buffer. I need to figure out how to do this concurrently with the picture taking so I get a nice SD or HDMI output of the camera.
5 Comments
Great writeup!
Reply to this comment...
Log in to comment
this is really cool, and moving towards an autonomous trap camera! I'm really glad to see you working on the GSM modem.
Reply to this comment...
Log in to comment
I believe the WebRTC video api can use a remote stream as a video source instead of Infragram.org's use of a local webcam. I bet it could be set up to connect to a remote video stream and do live NDVI!
You might look at PeerConnect, as in this project: https://github.com/rhinobird/rhinobird-web
Reply to this comment...
Log in to comment
cool!
Reply to this comment...
Log in to comment
Excellent! Ideal or sensor observation in a stand off fashion if installed on a UGV or dangling from a kite or pole.
Reply to this comment...
Log in to comment
Login to comment.