Oil Testing Kit
Alpha program
We've sent out about 20 prototype "alpha" kits to people around the US to give the oil test kit a try, and refine it to get ready for a bigger release. If you have one please share what you've done with it and post any ideas, feedback, complaints, suggestions, questions and modifications you have by using this button:
Post about your alpha oil testing kit
Photo walkthrough
Collect everything shown above: mineral oil, swabs, jars, dropper, and a desktop spectrometer.
Use the dropper to fill a jar with mineral oil.
The dropper can become the oil jar's new top! Convenient. Don't get that dropper dirty!
Swab and slightly dissolve some residue, which could be on the ground, on a beach, by a sewer drain, and put it in the jar. Where possible, try not to put too much sand or other stuff in the jar. Wear gloves. It helps if the swab is first wet with mineral oil.
You can move the swab around to dissolve the residue. You're going for a nearly clear color, with just a slight brown tinge.
Seal the bottle, and gently turn it over a bunch of times to help the residue dissolve into the mineral oil.
You may then have to wait for the sediment to settle out. You want the liquid to be quite transparent, with the chunky stuff settled to the bottom.
Shine the blue/violet/UV laser through to see if the material now fluoresces. This sample worked really well!
Label the jar and take good notes about where you got the material and when.
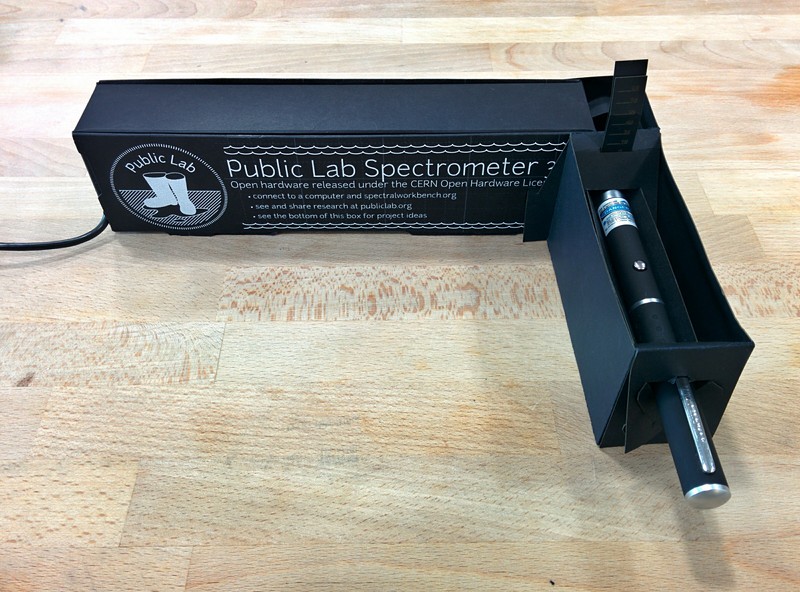
Place it in a box (you can use the desktop spectrometer box itself -- see Mathew L's research note) and illuminate it with the laser again, and save the result in SpectralWorkbench.org.
Coming soon: save the spectrum and try to get it bright enough for the highest point of the curve to fall between 25-75% intensity.
Illustrations
For the illustrated guide:
Related link to spectral challenge draft graphics: https://github.com/jywarren/spectralchallenge/issues/4
Parts list
Possible upgrade: nail polish bottles, with built-in bottlecap-swabs. An all-in-one, one-use pre-filled with mineral oil! Maybe you break off the swab and throw it away, or maybe it doesn't matter.
5oz mineral oil (baby oil -- the added fragrance doesn't fluoresce): $3 - http://www.amazon.com/Johnson-Baby-Oil-Kids-Ounce/dp/B000GCJM06/
- an eyedropper: $0.05 0 http://www.sciplus.com/p/CAP-WDROPPER_39038
- a 405nm blue/violet laser pen: $3 http://www.alibaba.com/product-gs/700677050/well_tested_405_nm_blue_laser.html, or http://www.ebay.com/itm/like/350812684726?lpid=82 to buy just one cuvettes
- 4 flat-sided jars: $0.35 each - http://www.sciplus.com/p/WHITCAP-BOTTLE_48212
- cotton swabs: $0.10
- olive oil test sample: $0.17
- paper instructions (yet to be made)
Draft instructions
The basic instructions will be something like:
- Put on latex or nitrile gloves
- Wet a cotton swab with mineral oil
- Rub it on the sample -- a suspected tarball or lump of oily residue -- until it gets brownish (it could take a little while for it to dissolve)
- Dip the dirty swab (that's like a pirate insult... :-P) in one of the square bottles which has been filled 2/3 with mineral oil, and repeatedly and gently dunk it until the brown stuff dissolves and "taints" the mineral oil.
- Keep dunking until it looks like a very very weak tea -- so you can see the coloration. We need to come up with a standard way to determine how dark... maybe a printed comparison strip?
- Cap the square jar and throw away the cotton swab (bag it if it's really gross).
- Throw away the gloves and wash your hands
Then, inside your spectrometer box (to reduce stray light and to protect your eyes from the laser light):
- Without looking at the laser light directly (it's bad for your eyes!!!), shine the laser through a hole in your box, so the laser shines through your jar perpendicular to the spectrometer opening. We'll illustrate this better but look at the Parts & Crafts note above.
- Move the laser up and down until you see both the bright laser peak on your SpectralWorkbench.org graph, as well as the broader range of colors that are the fluorescence.
NE Barnraising brainstorm
We had a session to reinvent the oil test kit guide at the Northeast Barnraising. More details soon!


