Purpose
This is a guide for connecting the DF Robot ORP (Oxygen Reduction Potential) Sensor to the Simple Water Sensor Platform described here.
This is part of a series of guides for the DF Robot series of analog liquid sensors. The general process for assembling and using these sensors is described in "Building the Simple Water Sensor Platform". These guides detail any sensor-specific considerations or steps in the process.
Materials
Step 1: Plug in Sensor Probe and Wiring
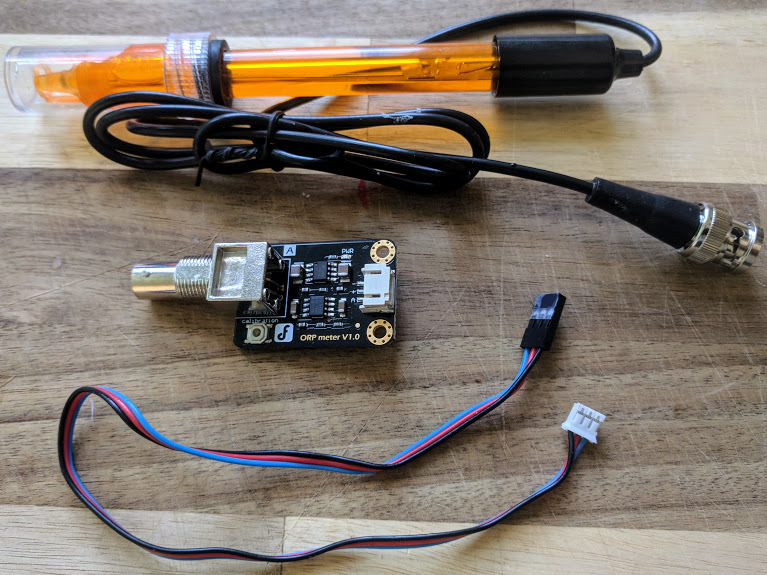
The ORP Sensor Consists of 3 parts:
- Sensor Probe
- Circuit Board
- Connecting Wires with Plug (BLACK, RED, BLUE)

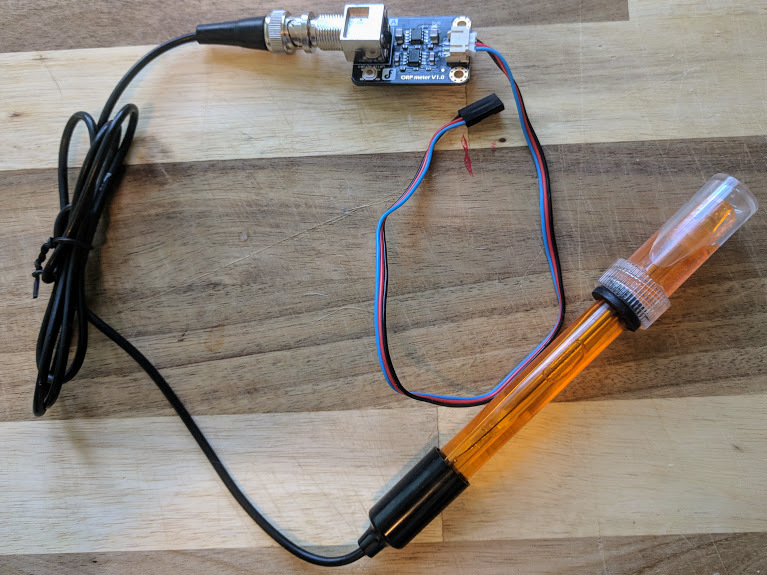
Connect the probe to the metal barrel connector on the circuit board by inserting it and twisting it in place.
Then plug the wires into the socket on the circuit board. It /should/ only plug in one-way. If you are looking at the board with the writing right-side-up, the wire colors should go, from the top down:
BLACK RED BLUE

Step 2: Connect Sensor Circuit Board to Arduino
The BLACK-RED-BLUE wiring cable connects the sensor-probe to our sensor-platform through the circuit board. See step 3 in the general build guide for details.
Step 3: Connect the Sensor-Select Jumper Wire
This kit is designed to be used with any of the different DF Robot Liquid Sensors and comes pre-loaded with software that can collect data from any of them.
This software needs to know which sensor you have plugged in, though, and it can't figure it out itself. To tell it what sensor we are using we will connect a jumper wire from "Pin 3" on the Arduino to one of the other digital i/o pins.
To select the pH sensor, we will connect a jumper wire from Pin 3 to Pin 5 on our Arduino.

Addendum: Testing and Calibrating Your Sensor
If you plug in your sensor to your computer using a USB cable, open up a spreadsheet, and turn the switch "On" it should start typing out data that looks something like this:
More information on the use and calibration of the sensor can be found on the DF Robot Wiki.
At the moment, if you want to follow these calibration instructions you will need to modify the source code of the Arduino program and upload it to your board. For more information on how to do this see "How to Set up and Test an Arduino."

0 Comments
Login to comment.