Folks have been using Raspberry Pi Zero boards with cameras as aerial photography setups more and more recently. Our #pi-builder software has made getting started really easy - just put in the card, plug in the camera and battery, and it starts up a WiFi network; you can start a timelapse by connecting to it from a smartphone or laptop.
Get one of these cameras here: https://store.publiclab.org/collections/diy-infrared-photography/
But what's the best way to suspend the camera from a kite or balloon? Well, "best" means different things to different people, but I am often looking for:
- cheap
- very portable (letter-sized, flat packing even!)
- easy to make/assemble
- wind stabilizing (so it doesn't spin)
- modifiable (so it can keep evolving and improving!)
I've started using Coroplast to make simple "fin" type rigs which are smaller than a letter-sized sheet of paper, store flat, and are pretty lightweight. They're not perfect, but I'm hoping people run with this idea to refine it a bit with the above goals in mind.
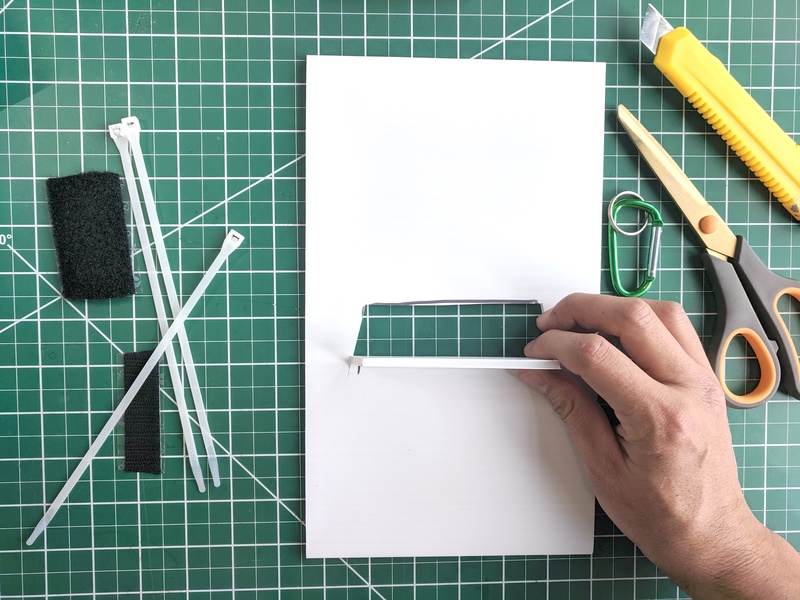
Here are the steps; start by taking a roughly 10x7 inch sheet (could be a bit bigger even -- letter sized is a good reference) and tracing a U shape around the Pi camera.

Cut the shape out and slice halfway through the Coroplast (i.e. through only one layer) on one side, so you can bend a "shelf" down as shown below.

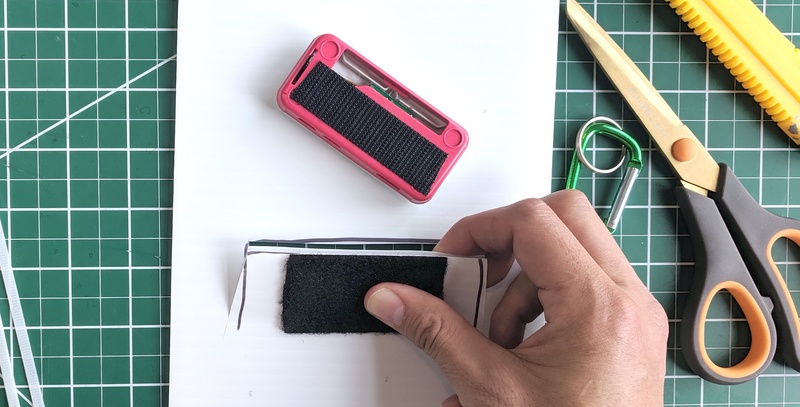
Put adhesive velcro on the bottom of the Pi camera and on the bottom side of the "shelf":

Attach the Pi with the cable ports facing outwards.

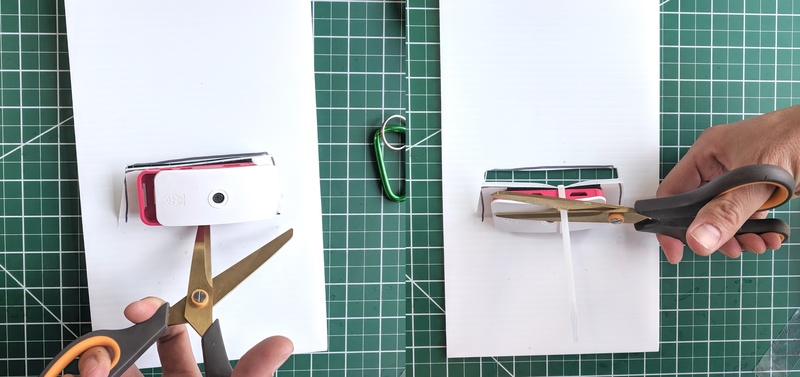
OPTIONAL: Use scissors to poke a hole under it (don't cut yourself!) and use a zip tie to fix the Pi in place. Don't cover the ports or the camera!

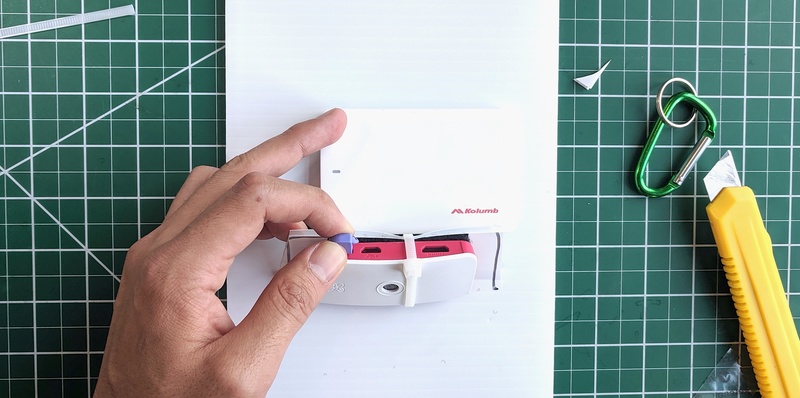
Now, use double-sided tape or velcro to attach the battery (we use these really nice flat batteries) but be sure the power plug reaches the Pi!

Now in the upper left corner, make 2 holes about 1 inch from the edge and 1 inch apart, vertically. Slide 2 zip ties through the holes and use them to trap a small carabiner against the edge of the Coroplast sheet as shown:


I leave a keychain ring on there because I often use a fishing swivel on there to let it spin freely; the swivel won't usually fit onto the carabiner directly though.

Now you're ready to fly! With #pi-builder, the camera turns on and is ready to be put in Timelapse mode (over WiFi) when you plug it in.
As shown in the top image, this makes the camera tilted a bit. I'm not sure if it's a problem, but you could try angling the "shelf" in the opposite direction from the carabiner to compensate.
If you use this, please tell me how it goes!

4 Comments
@molangmuir10 @silentsairam @kayrufty take a look at this post -- this is not super elegant but just looking for fast and very lightweight ways to do this.
Also thinking of if and how a bottle could be incorporated, maybe like in https://publiclab.org/notes/cfastie/07-05-2017/a-sweet-way-to-attach-a-camera-to-a-kite-or-balloon-line ?
Is this a question? Click here to post it to the Questions page.
This looks great! I will try this at my next mapping on Wednesday - I used the plastic bottle rig in the mapping handbook so would be good to experiment with different rigs!! I'll get the group to think of ways we can combat spinning/incorporate a bottle and try some things out together. Will let you know how it goes!
Reply to this comment...
Log in to comment
I did this! Here's what i changed: - the cord on the battery was so short i had to velcro it directly on top of the flap that the camera was velcroed to underneath - instead of zip ties to hold the camera, i used two rubber bands that wrapped around the camera and battery together - i cut an arc on the bottom of the coroplast so that the lens wasn't capturing a white edge in the picture frame.
Thanks to Eymund Diegel (@eymund) and Ada Li for being the flight team in NYC's Central Park on Friday July 26!
Is this a question? Click here to post it to the Questions page.
Looks like it worked well!
Reply to this comment...
Log in to comment
Login to comment.