Our Pi Camera and Infragram Pi kits are simple-to-use cameras designed for #timelapse, #balloon-mapping, or #kite-mapping. They're built using the Raspberry Pi educational mini-computer, but whereas usually you have to program and configure these, we've used Pi Builder (#pi-builder) to make this as simple and plug-and-play as possible. Here, we'll show how to start using one of these cameras, whether you got one pre-assembled or not.
In the following photos, I'm showing setup that works for either kit, but there are some minor variations depending on the camera version. But, the red film shown in front of the camera is just the extra filter used in the Infragram version of the kit, so if yours is the regular camera, just ignore it!

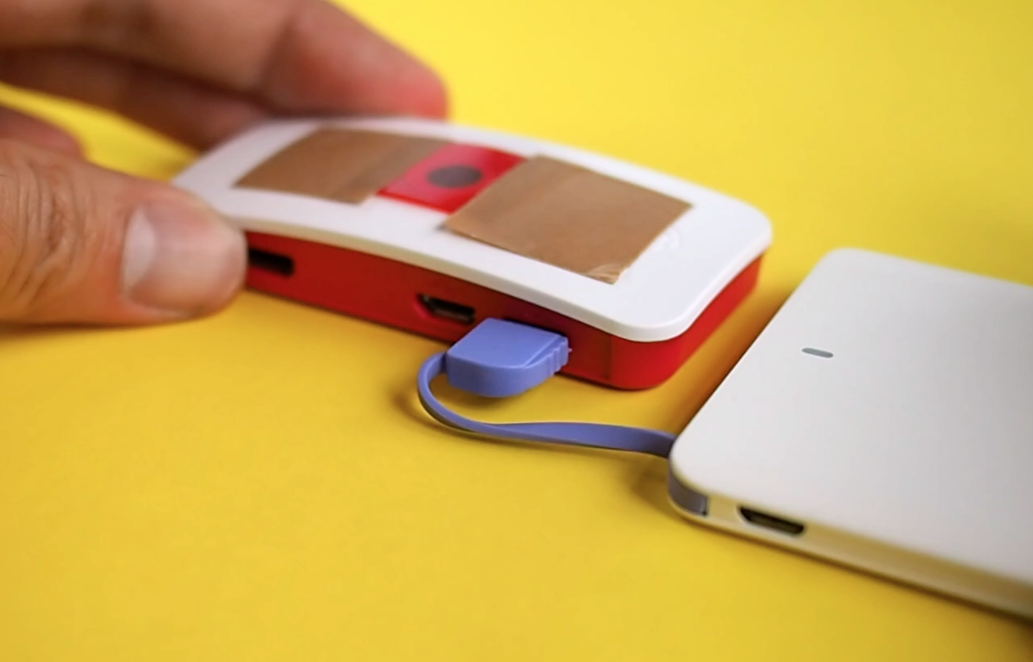
Plugging in the camera - step one, if it's already assembled.
Connecting to the camera
This camera is designed to work over WiFi - once plugged in, it'll start a WiFi network called 00-PiCamera, with password "publiclab", and you just need to connect to it with a laptop or smartphone.
If you need to assemble the camera, see the end of this post, where we walk through it step by step.
The camera will start up a new WiFi network, but it can take a couple minutes to show up. It should be at or near the top of the list:

Once you've connected, you may see a popup showing the following welcome menu. However, this can also be opened in a browser window by going to the following address:

Click Access the camera to begin, and you should see the live video streaming as shown below.
Note to iPhone/iPad users: Apple doesn't seem to like to let you stay connected to this so if you close the popup and open this in a browser, it doesn't seem to stay connected to the network. You can just keep using it in the popup, but we haven't found a way around this yet -- chime in on this issue if you have suggestions! In the meantime, you can use a laptop without too much trouble.

Note that the camera I used was out of focus. See "Focus" below to fix this.
Focus
Some of the cameras come from the factory a little out of focus. These tend to be the Infragram versions (the Pi Noir camera) -- and there should be a white plastic ring in your camera box, which you can use to focus the camera while looking through it.

Timelapse
The timelapse start button below the video feed, at the center of the page, will start a timelapse that takes a photo every second. The settings for this (like how often it snaps a photo) can be modified by clicking on Camera Settings.

Note: The built-in timelapse feature seems to work reliably. But when you stop the timelapse and go to download the images, sometimes the camera gets stalled because it wants to generate a video from the images, and it's often just too many images for this to work well. In this case, the easiest thing may be to carefully open the Pi Camera and pull out the SD card, and copy them that way. We're trying to think of solutions for this too.
For Infragram photos
If you have the Infragram version you may want to read more at https://publiclab.org/infragram and https://publiclab.org/infragram-pi. But the Access Infragram software link should open up a live streaming Infragram NDVI video you can use as you would the normal Infragram website.
Assembly
We're selling kits that are pre-assembled, so if you have one of these, just skip this section. But assembling these isn't super hard; there are only 4 pieces plus the case, or 5 if you have the Infragram filtered version of the camera.
You'll need (and all of this comes in our kits):
- a Raspberry Pi Zero W
- a Raspberry Pi camera
- an adaptor cable from a wider camera ribbon cable to the narrower Pi Zero width (the orange piece below)
- a Raspberry Pi case (or, just tape or screw it all to something?)
- a micro SD card with the Pi Builder default image: these come with your kit, can be bought separately, or see https://publiclab.org/pi-builder to download it
Here's everything except the SD card:

Assembling your Pi Camera or Infragram Pi Camera is just a few steps. First, plug in the micro SD card, as shown here:

Then, attach the small "adaptor" ribbon cable - the one with 2 different sized ends - by pulling out the black strip to "open" the slot. You can use your fingernails to pull where the two blue arrows indicate in the next image -- pull in the direction shown.
When inserting the ribbon, be sure the metallic pads are "facing" the green circuit board. In this image, they're facing down towards the board, and we see the black, non-metallic side facing towards us. Once it's inserted, you can push the black bar back into place, trapping the ribbon against the green circuitboard. Be sure the ribbon is all the way in - in this image, I'm still pushing it into place. 
Now we can pull the longer ribbon cable off of the camera, as shown in the next image. You can do the same "opening" of the black bar to release the ribbon:

Now, replace that ribbon with the fat end of the short ribbon cable, connecting the camera to the board:
Now take the whole board + camera, connected by the short ribbon cable, and line up the ports with the matching holes in the bottom of the case, like this, angling the board to get it to pop in (you can press on the middle of the board and it'll "click" into place, but it's a bit tricky):
Now, align the holes in the camera with the matching holes in the top part of the case, and snap those into place too. For a v2 camera, it'll snap in and hold snugly. For older v1 camera boards, the fit is not as good; I've secured it with tape in some cases; the pegs align with the holes, but if you push it all the way in, the really tiny ribbon cable holding the camera in place gets unplugged. 
Once it's properly seated, you'll be able to close up the case like this:

If you're using a normal Raspberry Pi Camera kit, you're done - just plug it in and follow the instructions at the start of this post.
Infragram Pi
If you're using an Infragram Pi camera kit, you'll need to do just one more step; adding a red filter (or a blue one, but we recommend red) to the front of your camera. It's pretty easy; just cut out a square of the red filter, trying not to get fingerprints or dust on it:

Then, tape it in place. If you'd like to protect it better, you could try adding some kind of ring in front, but carrying this in a soft bag has been enough to keep it in good shape, in my experience. 
Now you're done!
Turn it on
Now, just plug in the camera with a Micro-USB cable, and wait for it to start up. See "Connecting to the camera" above for how to take photos!
This work was supported in part by NASA through the AREN project, which focuses on educational uses of kite aerial photography for photographic and sensor data collection. Read more at #aren.
19 Comments
@molangmuir10 @silentsairam @kayrufty check this out!
This is great! And so much simpler. I didn't realise they were 'plug-and-play'! I tried to program and configure mine, so I over-wrote your programming. The wifi network doesn't come up. Is there anyway I can re-download the original software?
Is this a question? Click here to post it to the Questions page.
Hi @molangmuir10 -- yes! You can get to the software from this page here: https://publiclab.org/wiki/pi-builder
Let us know how it goes! FYI, sometimes it takes a little while for the wifi network to pop up, so don't panic if you don't see it right away.
Hi Bronwen, great! I will try this afternoon and let you know!
Hi Bronwen - I posted you the below question because it wasn't working but then after about half an hour the pi wifi connected!! So all good :) Despite your FYI I didn't realise it would be that long to connect! Thanks
I followed your link to the public lab pi builder site. I then followed the download link to GitHub https://github.com/publiclab/pi-builder/pull/53.
I followed jywarren's download instructions through to gitlab. (I have never used gitlab before so this is probably where I went wrong!)
I downloaded the artifacts zip entitled 'camera_web' which gave me a zip file and an img.zip.sha256 file.
I unzipped the other and used belenaEtcher to flash these onto my SD card.
I waited 10 mins from plugging in my raspi for the network but nothing showed.
I've attached screenshots of my process - any ideas where I've gone wrong?
Is this a question? Click here to post it to the Questions page.
Hi, sorry I missed this one too, but glad it worked! I've usually seen it take about five minutes so I was surprised to hear 30m. But also, we copied a download link at a slightly more convenient place in this comment here:
https://github.com/publiclab/pi-builder/pull/53#issuecomment-439666474
Which is the one we've been using. But we're soon going to publish a new version and we'll try to find a more clear place to put the link. One concern I had was that we need to be sure wherever we're posting it we update each time we make a new version. So I guess we should put the date in the filename or something...
Reply to this comment...
Log in to comment
Hey @warren! I did a test using the r-pi to take photos in my room, downloaded the images and it worked fine. I then did a mapping with a school last week and have not been able to download a zip of the photos we took. This time a pop up comes up every time I type it saying it is unsecure but I click send anyway. I've done a screen recording so you can see. The circle loads but nothing downloads.
Any idea how I can get to the photos?
Is this a question? Click here to post it to the Questions page.
Hi! Ok not sure what's happening but it's some issue with the camera software we chose. I'll try to take a look later today but the easiest thing at this point might be to pull out the SD card and download them that way?
Thanks, Mo!
Is this a question? Click here to post it to the Questions page.
Hi @warren @molangmuir10
Ensure the Wifi Network name is 00-Pi-Camera while connecting and downloading the Images and Videos.
Attached video for reference. Hope this helps.
Hi @silentsairam I did all of those steps but it didn't work! I think @warren is right - although it is strange that when I test ran it I could download a zip of my 10 photos very easily. I did try putting the SD card in directly but there is no DCIM file or jpegs or anything that is recognised by my laptop as photo files. I'm assuming I'll need to convert them but do you know what file format they would be in?
Is this a question? Click here to post it to the Questions page.
Oh hm..... maybe there's an issue with the drive format! Ugh... i think there should be 2 partitions that show up. But maybe your computer can't read the one with the images on it? What OS are you using?
Sorry, this is not great!!!
Is this a question? Click here to post it to the Questions page.
I could see only 1 partition on my Laptop. OS: Windows 7. Will test with Linux tomorrow and update.
I'm OS Mojave 10.14, this is what comes up on the SD card...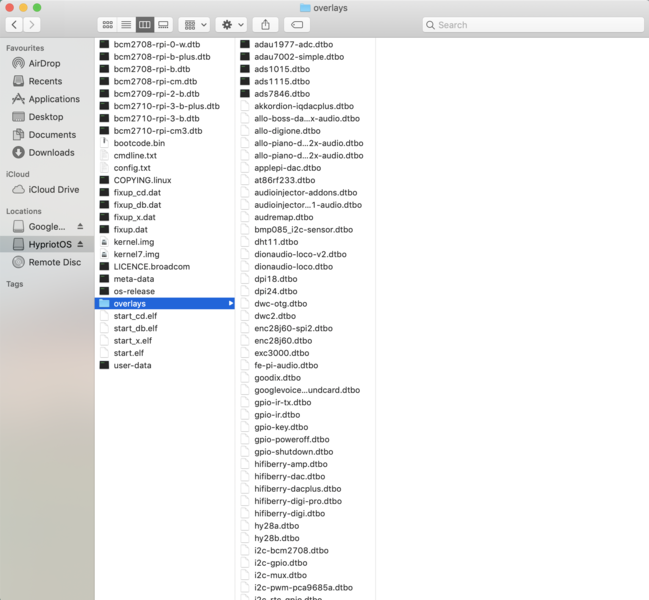
Is this a question? Click here to post it to the Questions page.
Ok, I'm sorry this is taking so long. I found some command line instructions for Mac OS, the basic issue is that the partition is in a format (ext I think) that Mac and Windows don't read by default. I think maybe we need to work this problem at the pi-builder level, if only by making the images downloadable more directly over WiFi, but for now I'll share some links to try to get your photos off quickly.
https://raspberrypi.stackexchange.com/questions/13437/how-to-mount-a-raspbian-sd-card-on-a-mac#81865
This may be an alternative on Windows: https://www.howtogeek.com/112888/3-ways-to-access-your-linux-partitions-from-windows/
I wish there were a relatively plug and play way to mount an Ext filesystem on a Mac. It seems kind of ridiculous for people to use filesystems that aren't compatible. Maybe we can ask @icarito if there is a way around this... I'll open a question?
Is this a question? Click here to post it to the Questions page.
Reply to this comment...
Log in to comment
Hi @warren When I recently tried connecting to Camera Module with RPi, I shows the below message as in image.
Is the fault in Camera module or should I upload the Pi Builder interface again?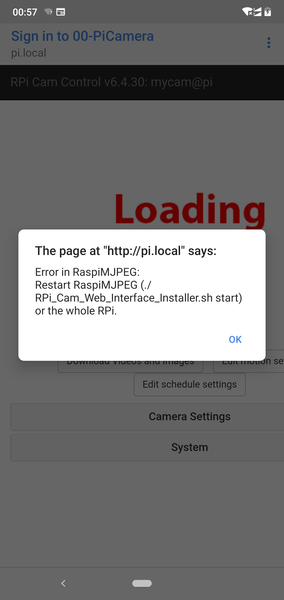
Is this a question? Click here to post it to the Questions page.
Hi Sairam, this could be the camera cable getting disconnected, can you try checking all the ribbon cables?
Is this a question? Click here to post it to the Questions page.
Reply to this comment...
Log in to comment
Hi -- Went through the assembly instructions, briefly got it to work by securing the ribbons with the black bars (instructions not clear) but don't see the "00-PiCamera" network anymore. Do I have to reinstall the software? Would be good to get some help with this. Thanks!
Is this a question? Click here to post it to the Questions page.
Reply to this comment...
Log in to comment
Hi, сolleagues. Does this camera need to remove the IR unit?
Is this a question? Click here to post it to the Questions page.
Reply to this comment...
Log in to comment
hi all! I downloaded the image successfully and get to connect to the wifi. the problem is that neither the popup nor the browser are allowing me to see the images. how can I solve this issue? images attached!
Is this a question? Click here to post it to the Questions page.
Reply to this comment...
Log in to comment
Login to comment.