Finally got around to designing a more accurate and easier to use cuvette add-on ,same overall design but modified how the light samples attaches to the cuvette holder. Also changed the light source, the dollar general laser was not easy enough to modify so I went to a Walmart flash light which was one a dollar a piece. The circuit board used in the Walmart flashlight was more accurate to modify. I've purchased several flashlights and converted them over to different specific light spectrums such as : RGB led , White Led , UV , IR . The flashlight has 9 leds installed but I remove 8 of them and just modify the center one.
If anyone is interested in trying it out i'm planning on making 2 or 3 of these and will happily send a few out for people a try . ( send me a message looking for feedback )
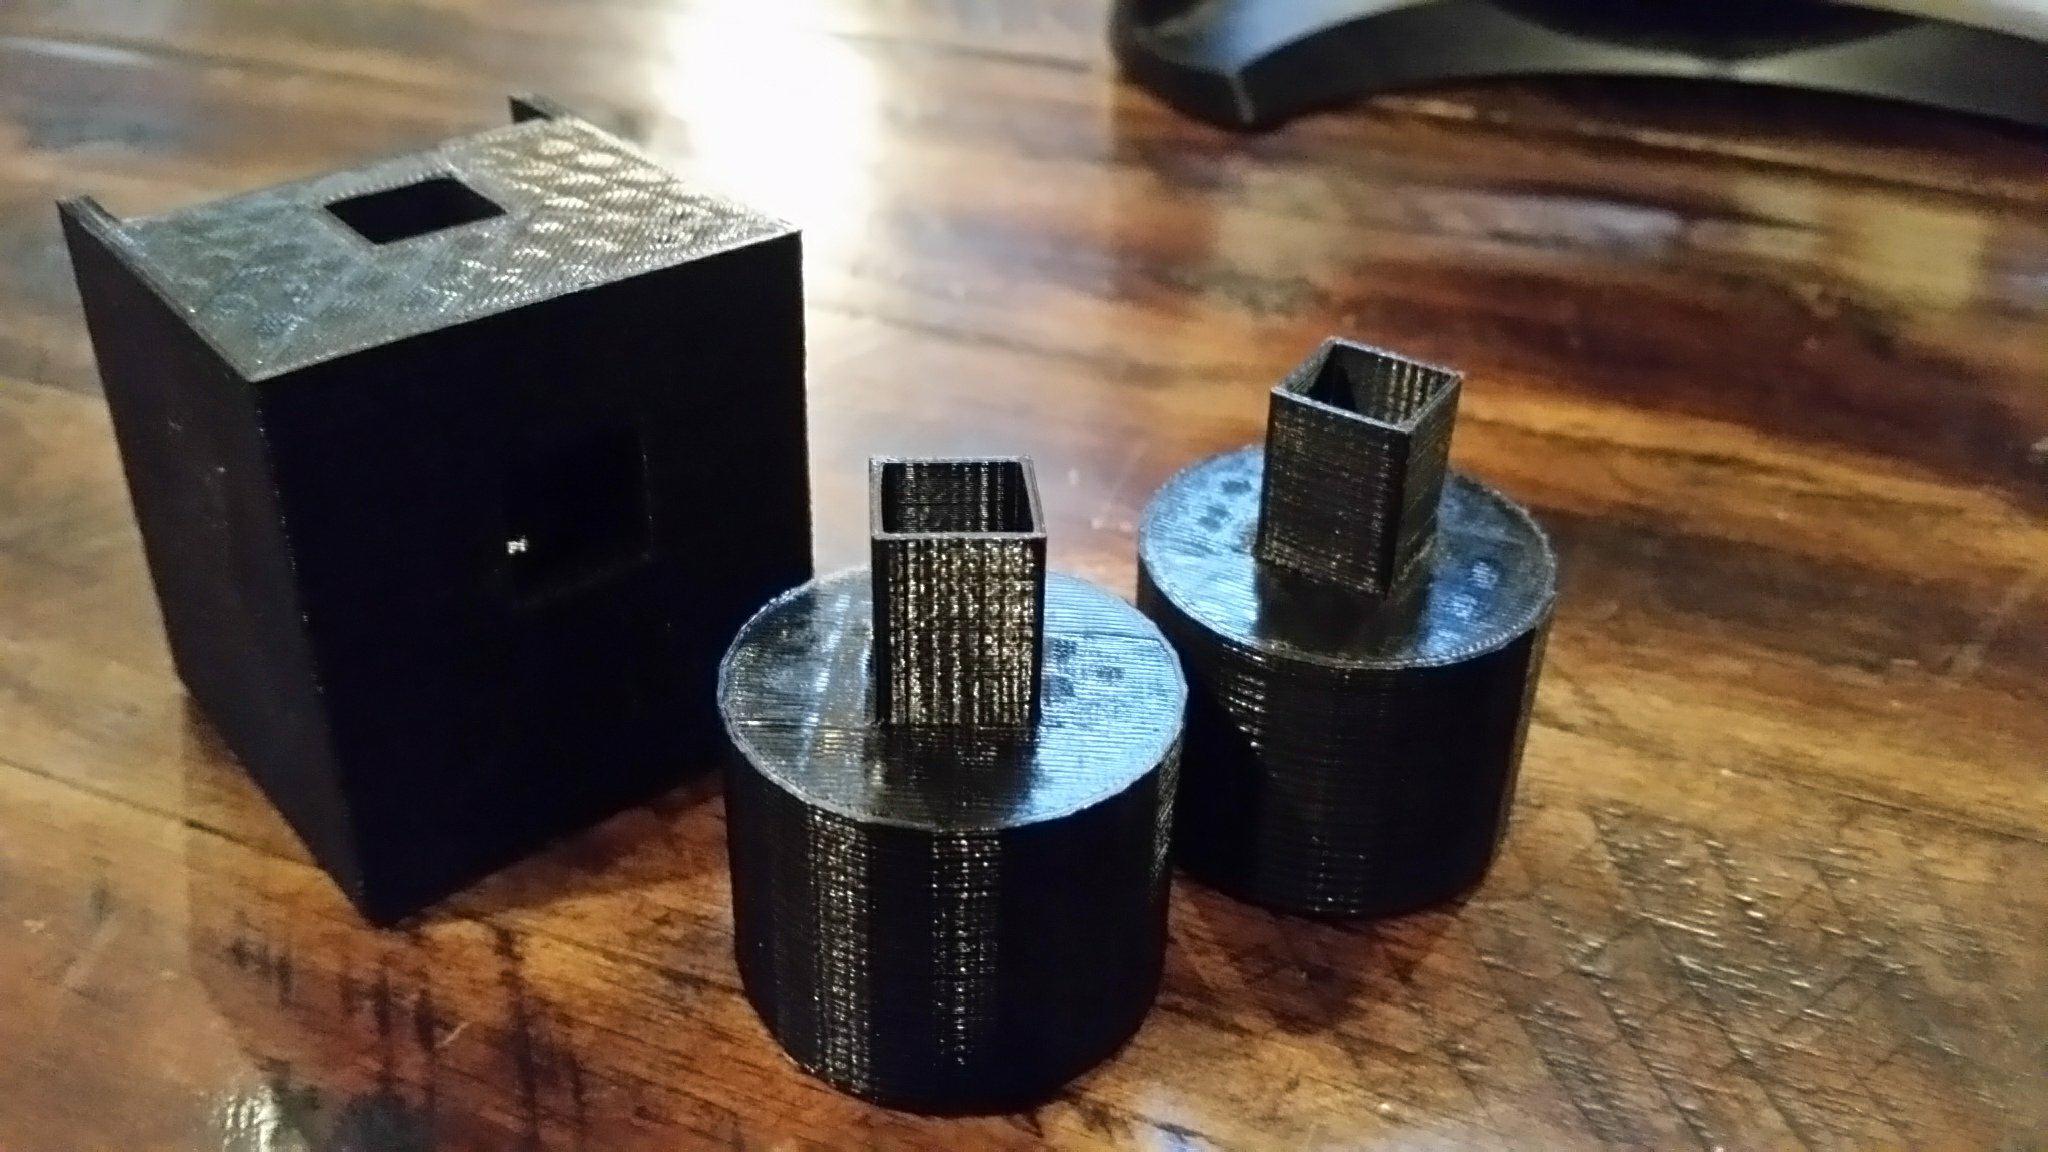
I didnt get a photo of it but this also attaches to the spectrometer with a 3d printed magnet mount.


6 Comments
Hi, this is tremendous, we'd love one at the Kits initiative! Could we trade you for some Lego parts? We're curious if you'd be interested in using the design files up at http://PublicLab.org/lego to offer an alternative mount compatible with the Lego design -- I think I mentioned to you but we'd love to encourage a "standard" attachment point.
I think it could also pair nicely with the magnet connectors because the pins could "index" the connector and the magnets could actually hold it on.
We're at:
Public Lab 55 Cromwell St 1D Providence RI 02907
If you send us one, we'll ship a LEGO kit right back to you. Thanks!
@amanda @bronwen
Is this a question? Click here to post it to the Questions page.
Reply to this comment...
Log in to comment
Hi @warren that sounds great I'll get one printed out and ready for use and should have it on its way within a few days. Your right about the standard method of attachment would be best for everyone once I get the Lego set I'll see if I can design a magnetic attachment without heavily modify the design.
Thanks
Reply to this comment...
Log in to comment
That sounds amazing. Looking forward to seeing it!
Reply to this comment...
Log in to comment
Also, do you have a link to the light you used? Do you use a diffuser of any kind with it, or could you in theory dim the light with a filter to make that step easier? Cool!
Is this a question? Click here to post it to the Questions page.
Reply to this comment...
Log in to comment
Here is a link to the source but its cheaper to purchase at the actual store , for some reason they $1.71 website and only a $1 in store .
https://www.walmart.com/ip/Ozark-Trail-9-LED-Mini-Flashlight/34350005
Unfortunately in my recent purchase of these flashlights the manufacture has for some reason started to put glue on the screw off section of the light making it very hard to modify the light. I have found away around this by actually boiling the flash light for 15 minutes. This breaks apart the glue and has no effect on the works of the flash light. I recommend putting the flashlight in a zip lock bag and just let it boil in the water for a little while. This method worked perfect for me. Once I did this the section that was glued on simply unscrews. I know this is obvious but make sure its dry before putting batteries back in.
From here I would take apart the flashlight and remove the outer 8 leds dimming the light dramatically also I found having all 9 leds really saturates the spectrum and makes it hard to read the data , if a diffuser was needed one could be added where the lens is placed (I normally just remove the filter just to eliminate one more source that could change me results). Now you should have a single led as your light source. I normally flatten the led by lightly sanding the top of it this another method I use to diffuse the light.
@warren I was planning on sending you a light source that I have already modified so you can see the changes. The light source will be a RGB LED, one could change this for UV,IR, just by changing the center led.
Reply to this comment...
Log in to comment
Hi, new user here. Just got word from my water company that their turbidometer has been going offline for a few months. I'm curious if you have uploaded this project to a 3D printing repo? Great work btw.
Is this a question? Click here to post it to the Questions page.
Reply to this comment...
Log in to comment
Login to comment.