Why do we need to calibrate our microscope?
Our goal is to look at dust particles and attempt to identify them by size and shape. In order to do that we'll need to know the actual size of things that we're displaying on our microscope.
How do we do it?
To calibrate our microscope we will use a device called a stage micrometer. A stage micrometer is a tiny ruler mounted on a slide. Our ruler is 1 mm across and is divided into 100 ticks. The distance between each tick is 10 microns.
We got the cheapest one we could get from Amazon -- https://smile.amazon.com/OMAX-0-01mm-Microscope-Calibration-Micrometer/dp/B00FG89F0M?sa-no-redirect=1
We will get the micrometer into focus, take some pictures of it through the microscope and then do some simple analysis of the images to figure out the resolution (pixels per micron) of the resulting image.
Calibrate Your Microscope
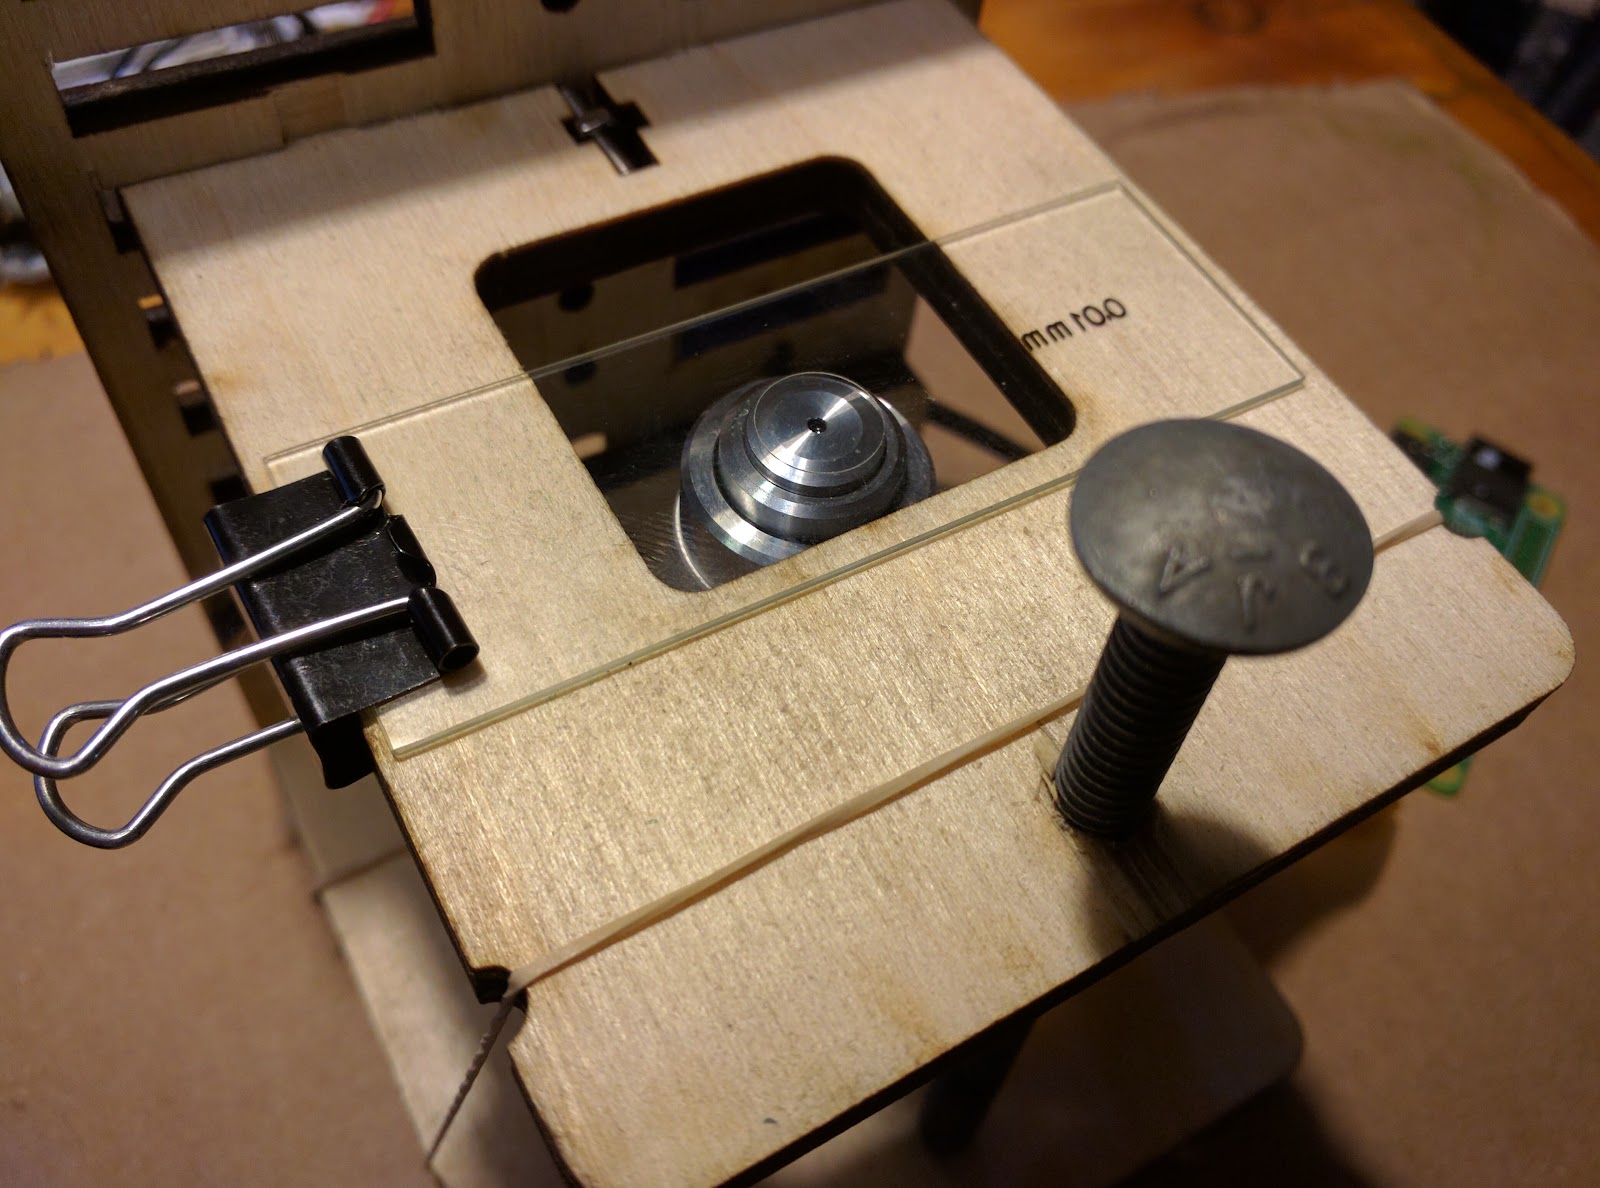
1. Center micrometer on sample stage above objective lens
If you look closely at the stage micrometer you can see a slide cover in the middle. Under that slide cover is another circle about half of the radius of the slide cover itself, and inside of that circle is what appears to be a barely-visible horizontal line.
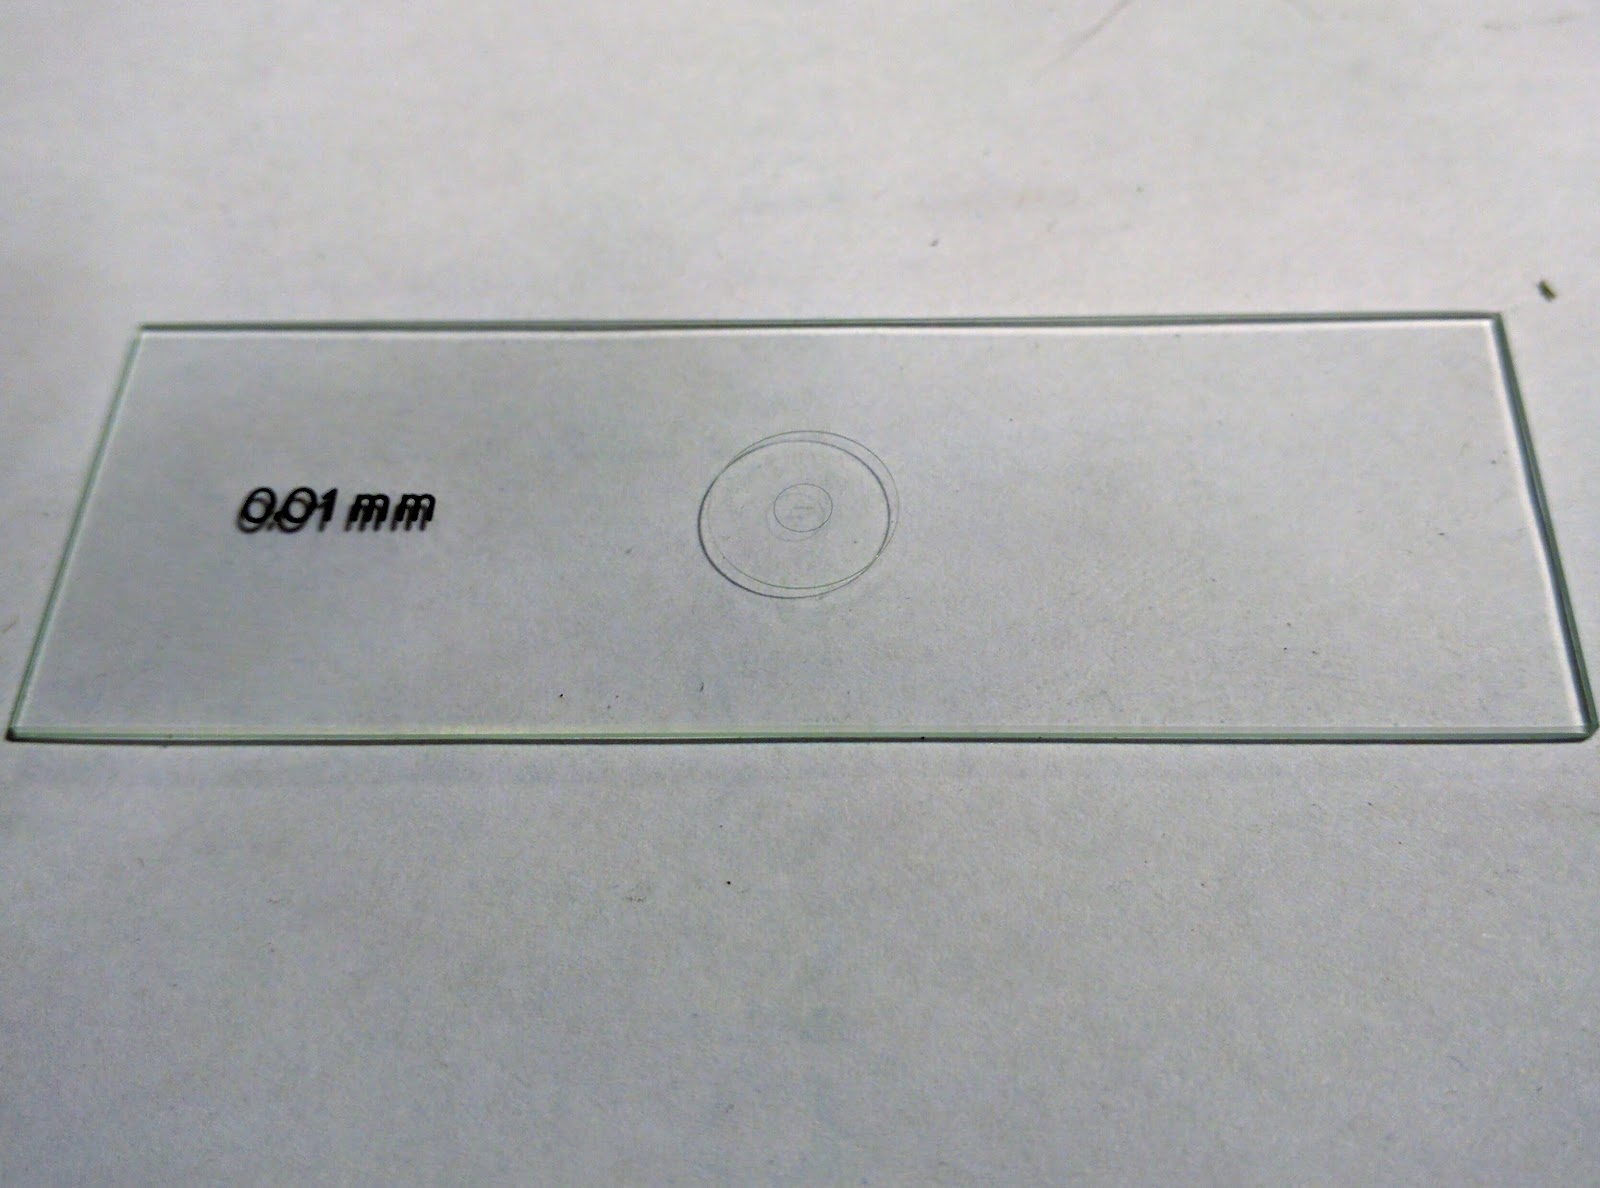
That horizontal line that you can barely see is the ruler portion of the micrometer. It actually consists of a series of vertical lines 10 um apart.
Reverse the slide. Flip your slide upside down so that the slide-cover side is closest to the objective lens. The slide will appear backwards to you because you are looking at it from above but the microscope is looking at it from below.
Line up the slide with the objective. Do your best to place the tiny line of the micrometer-ruler directly above the aperture of the objective lens. We are using a 40x objective lens for this process and we recommend that you get used to focusing with the 40x lens before trying to use the 100x, which views a much smaller area with a much smaller aperture and is much harder to focus and find images with.
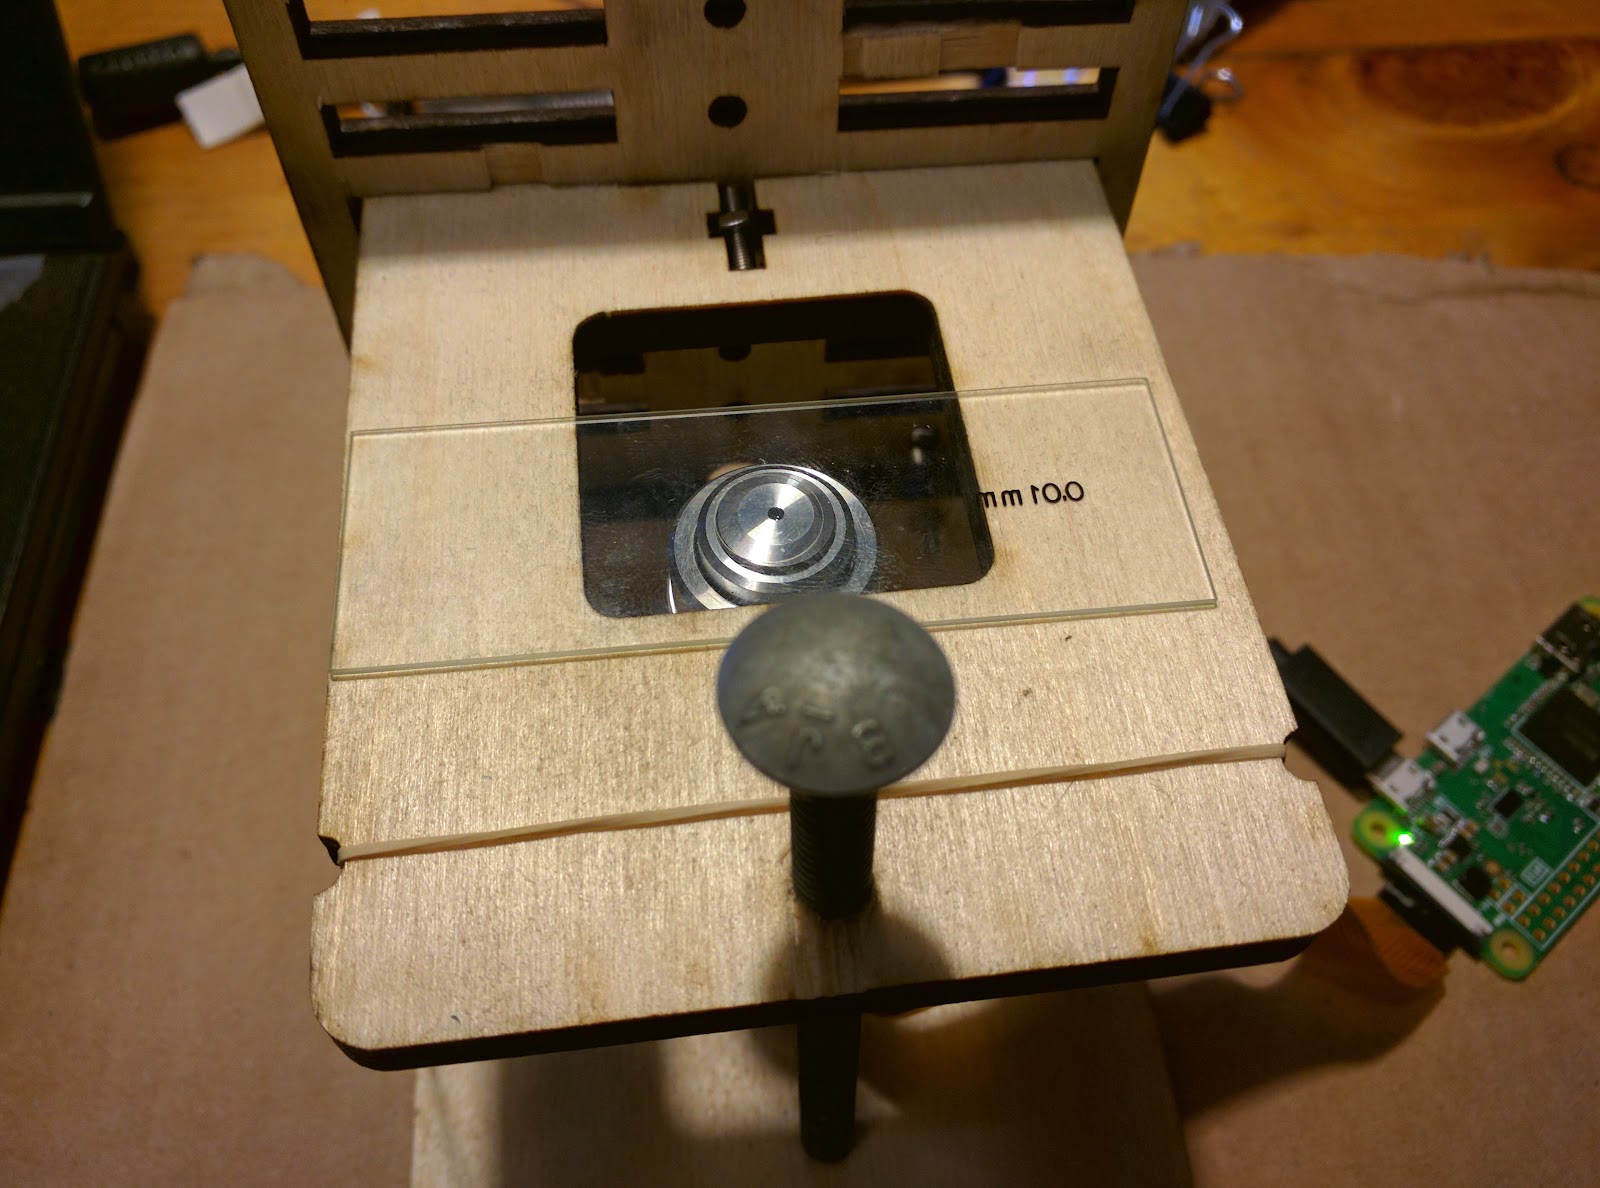
Once you've done this, clip the slide in place. We are using a binder clip to hold it down on one side. Clipping the sample on one side only allows us to more easily nudge it to view different regions.
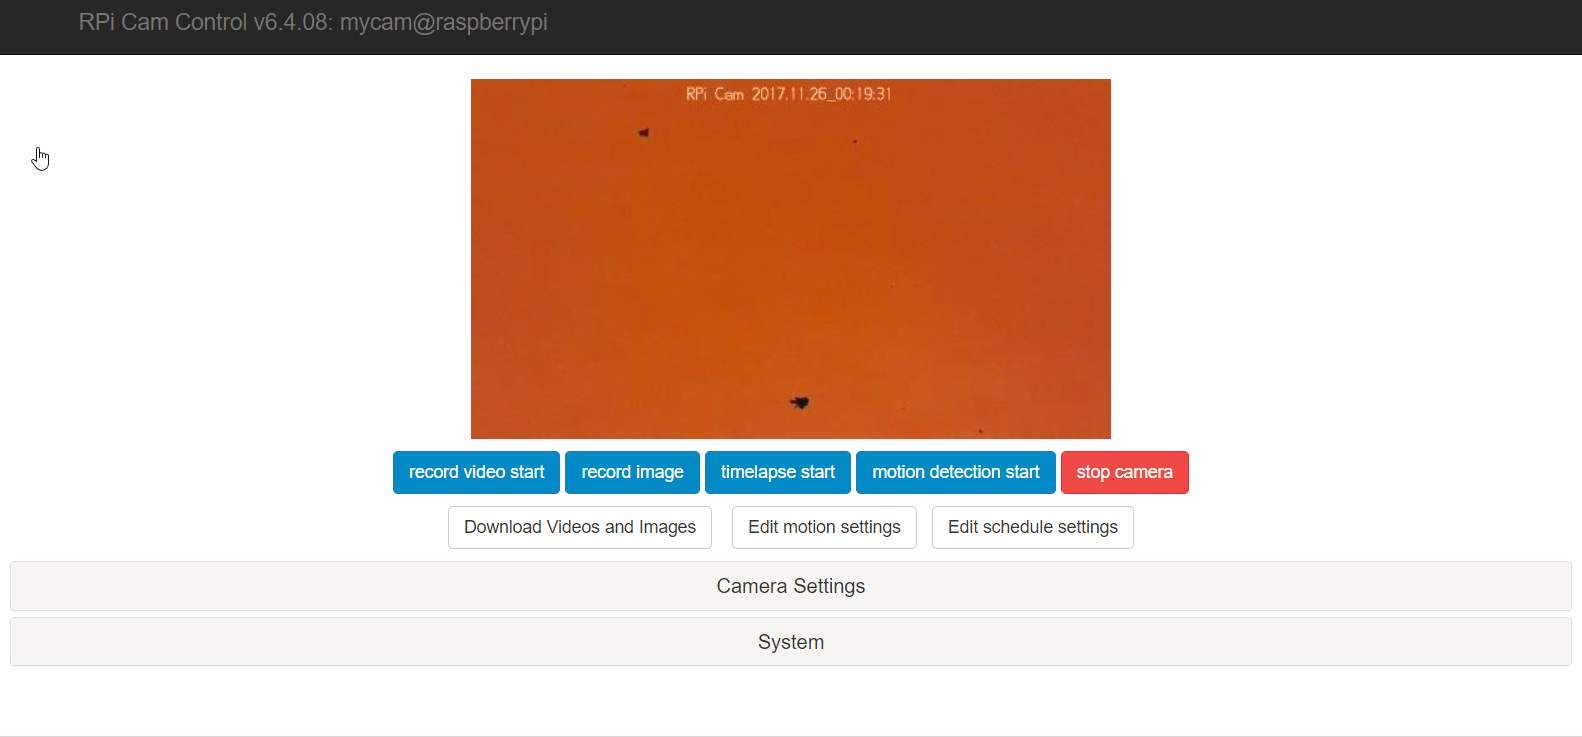
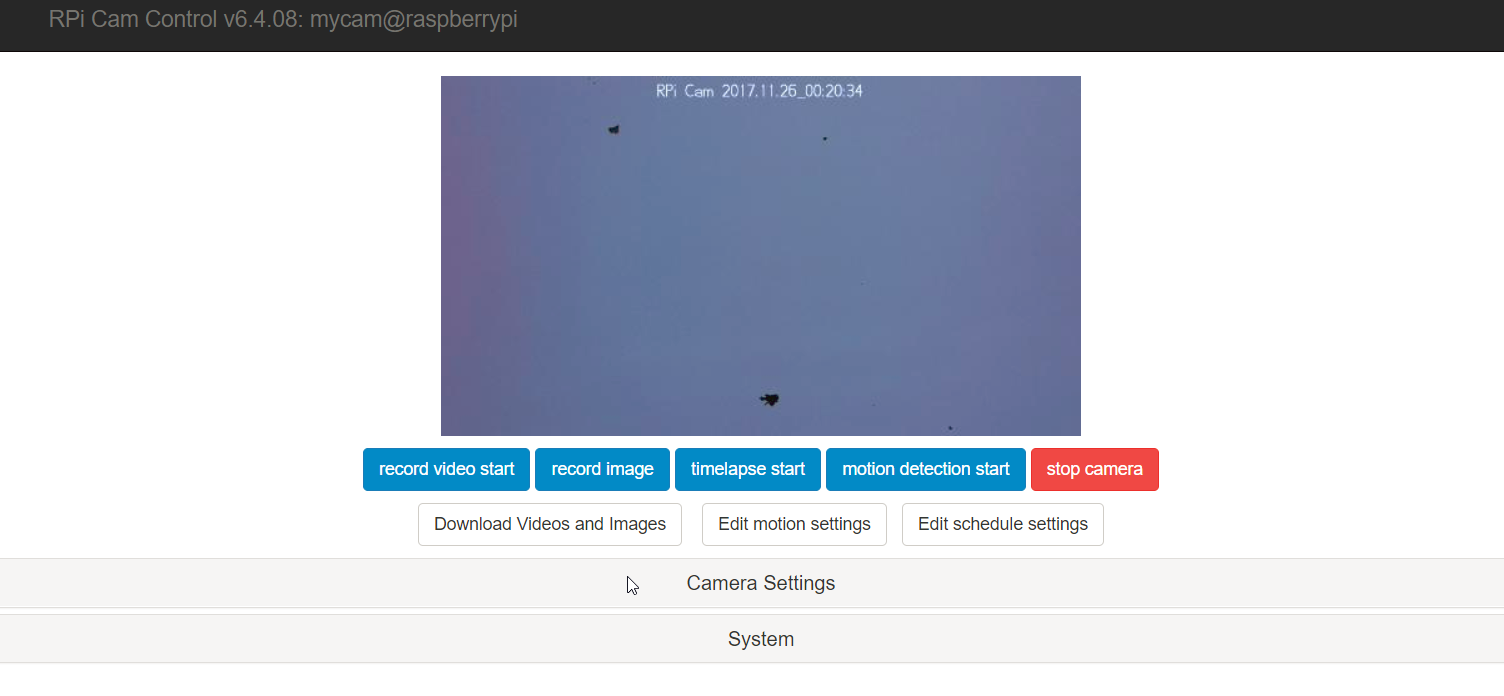
2. Light the sample
Place the light so that it is shining directly down through the slide into the opening of the microscope lens. Plug the microscope in, turn it on, and look at the image by going to http://raspberrypi.local in your web browser. You should see a blurry kind of nothingness.

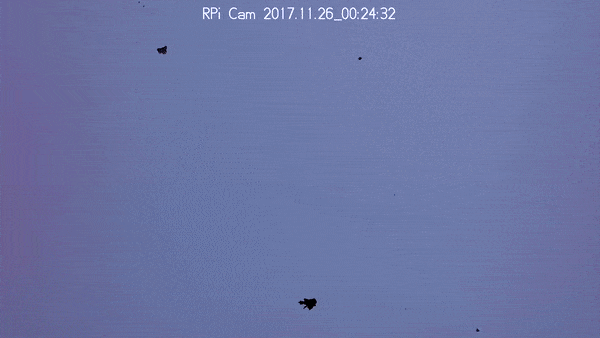
A poorly-illuminated image will look like this:
A well-illuminated image will look like this:
3. Bring the image into focus
By turning the carriage-bolt you can move the stage slightly up and down to bring the image into focus. Start by bringing it down as far as possible so that the objective tip is actually touching the slide, then begin to bring it up again.
You will want to steady the stage with your other hand as you focus.
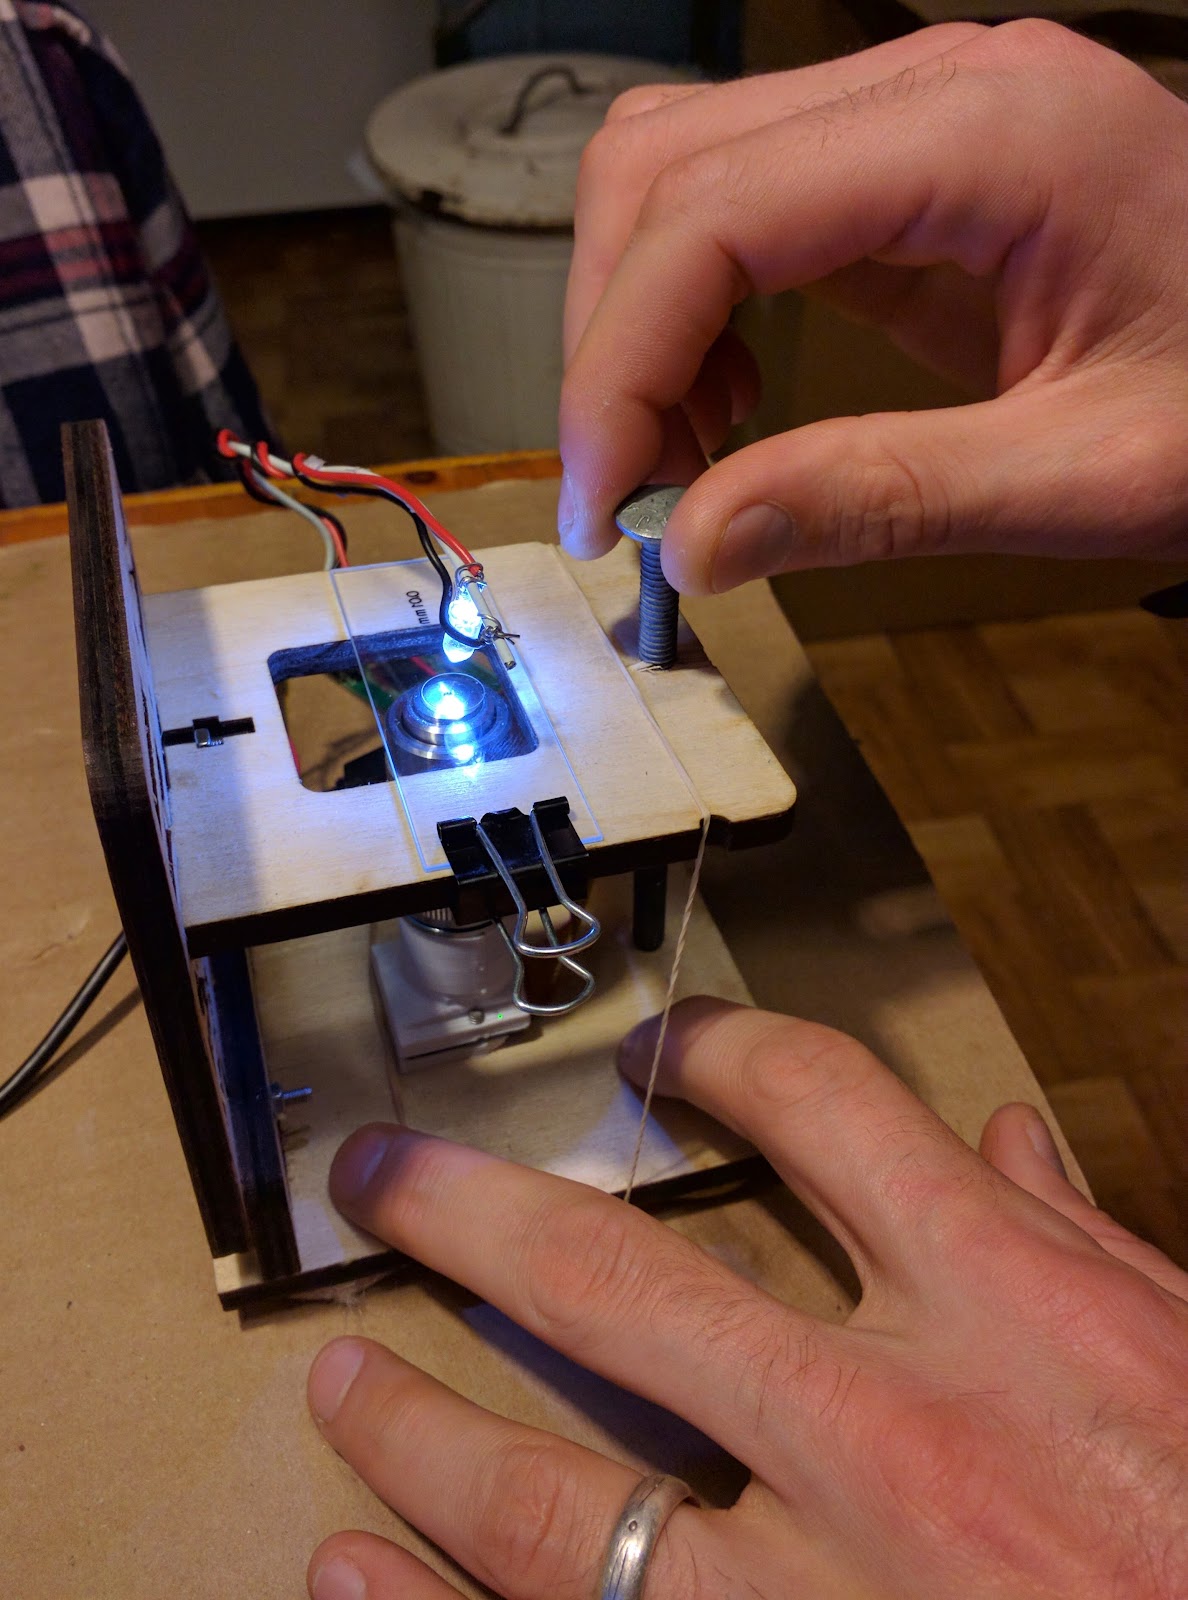
This is an animated gif of a video of me focusing the camera on the micrometer and then nudging it a bit to get it into focus before focusing again and taking a picture.
Make sure that your light is shining straight down on the sample. Some problems that look like they are focusing problems are actually illumination problems because if the light is shining at an angle it will kind of "smear" the image in a direction across the sensor.
These two images were taken with the same focus, but slightly moved lighting.
4. Download images
To take a picture, click on the "record image" button. To take a video use the "record video start" button. To download images that you have saved click on the "download videos and images" button which will take you to a library of your recorded images.
- Analyze them
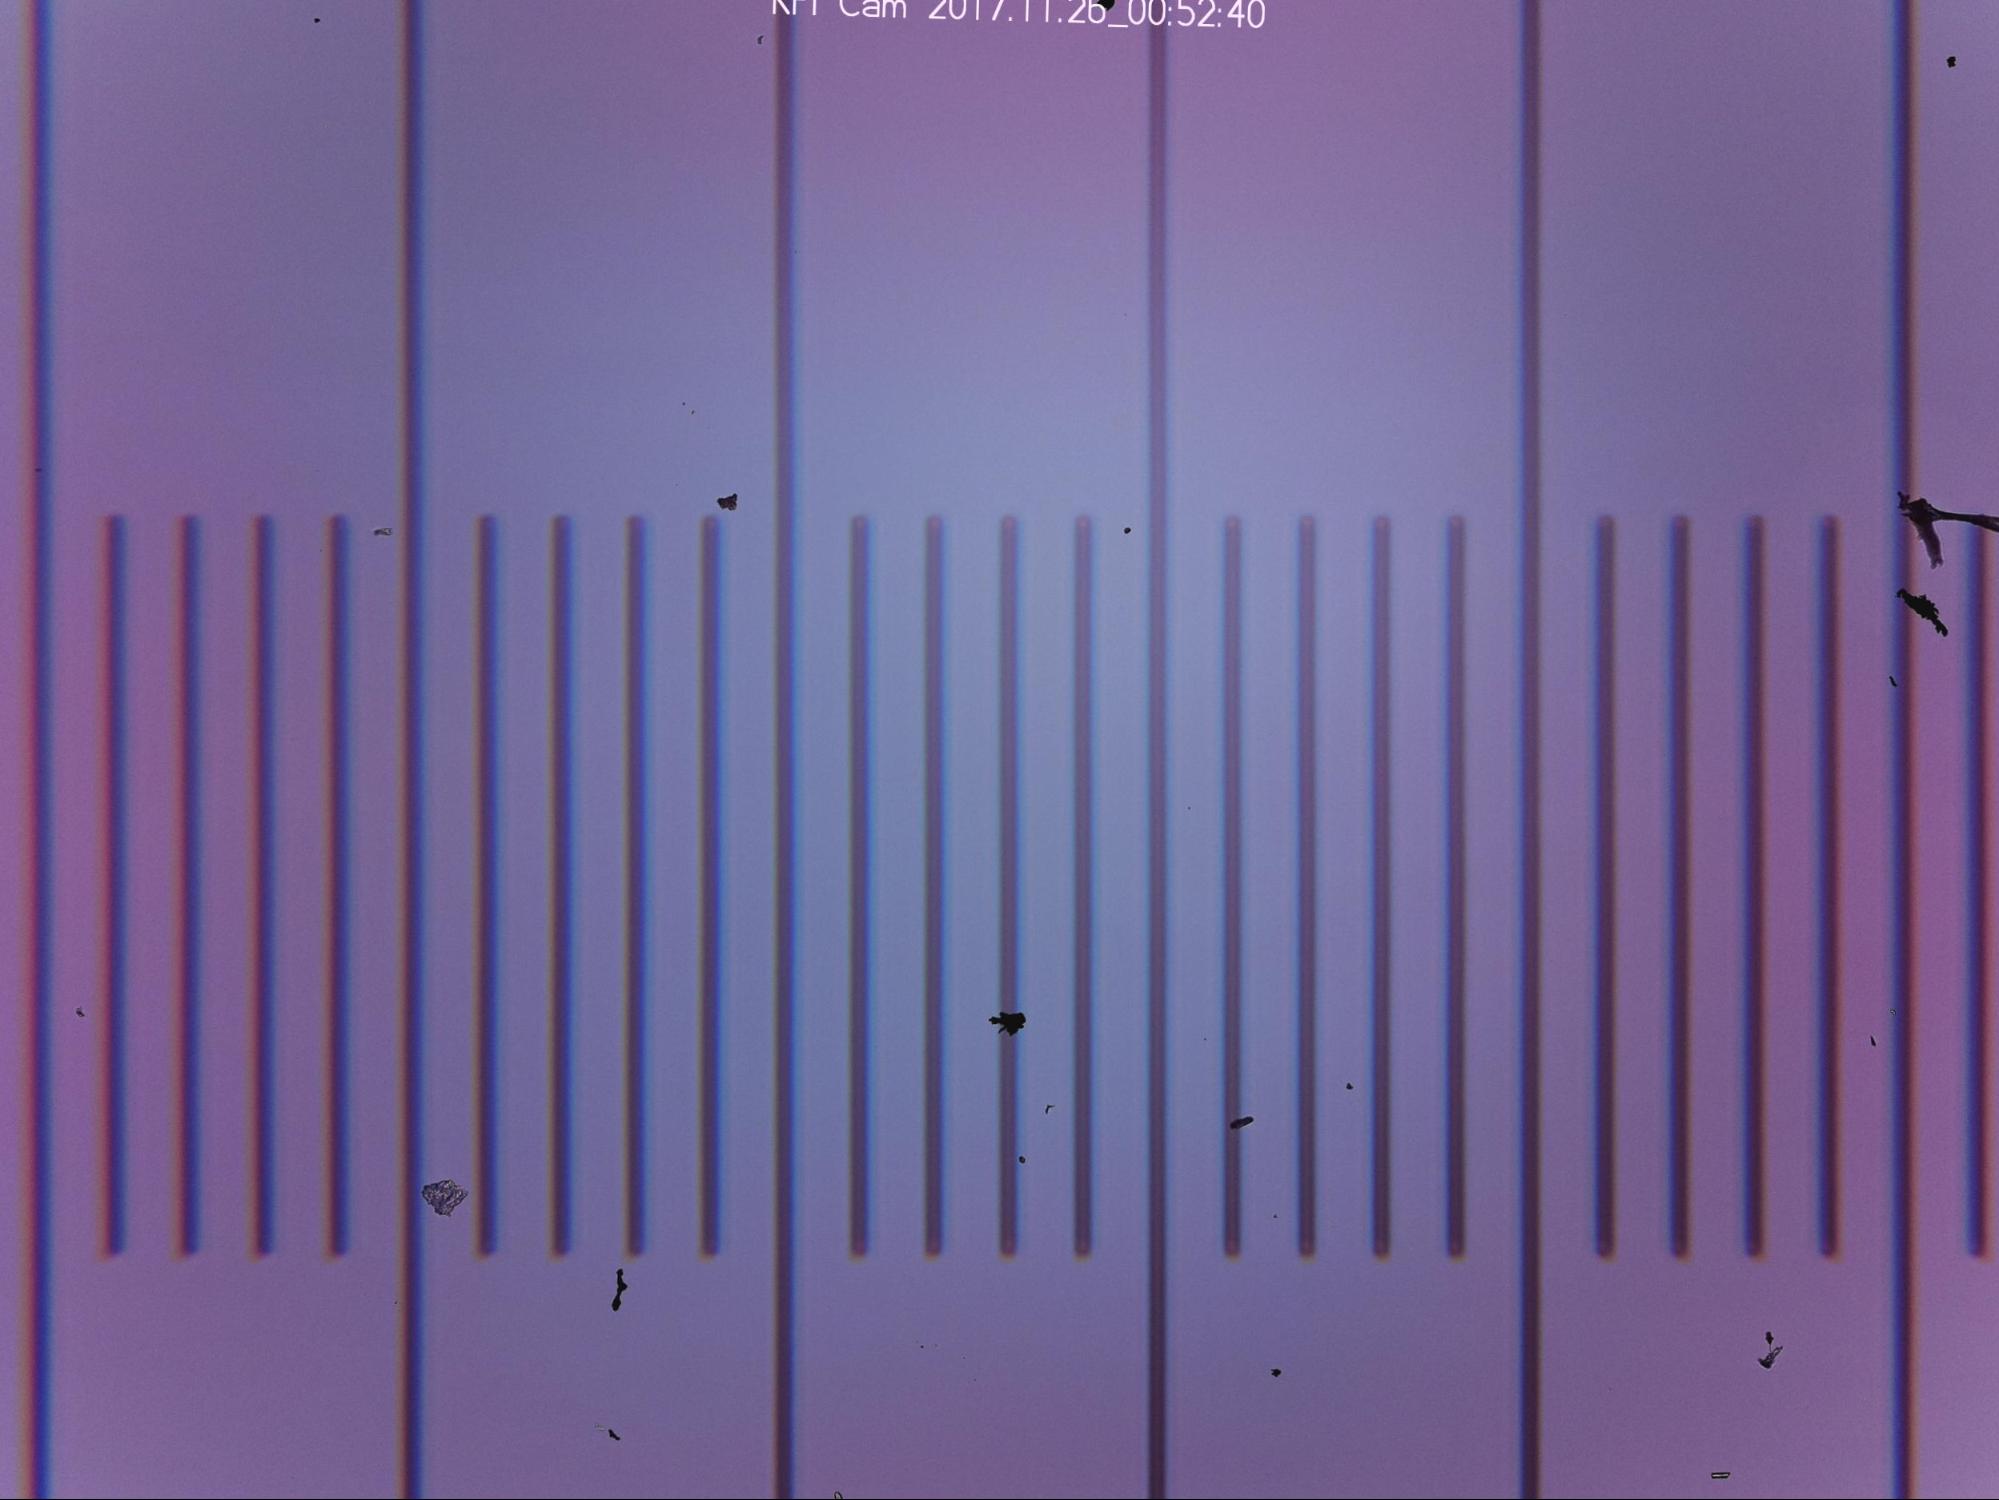
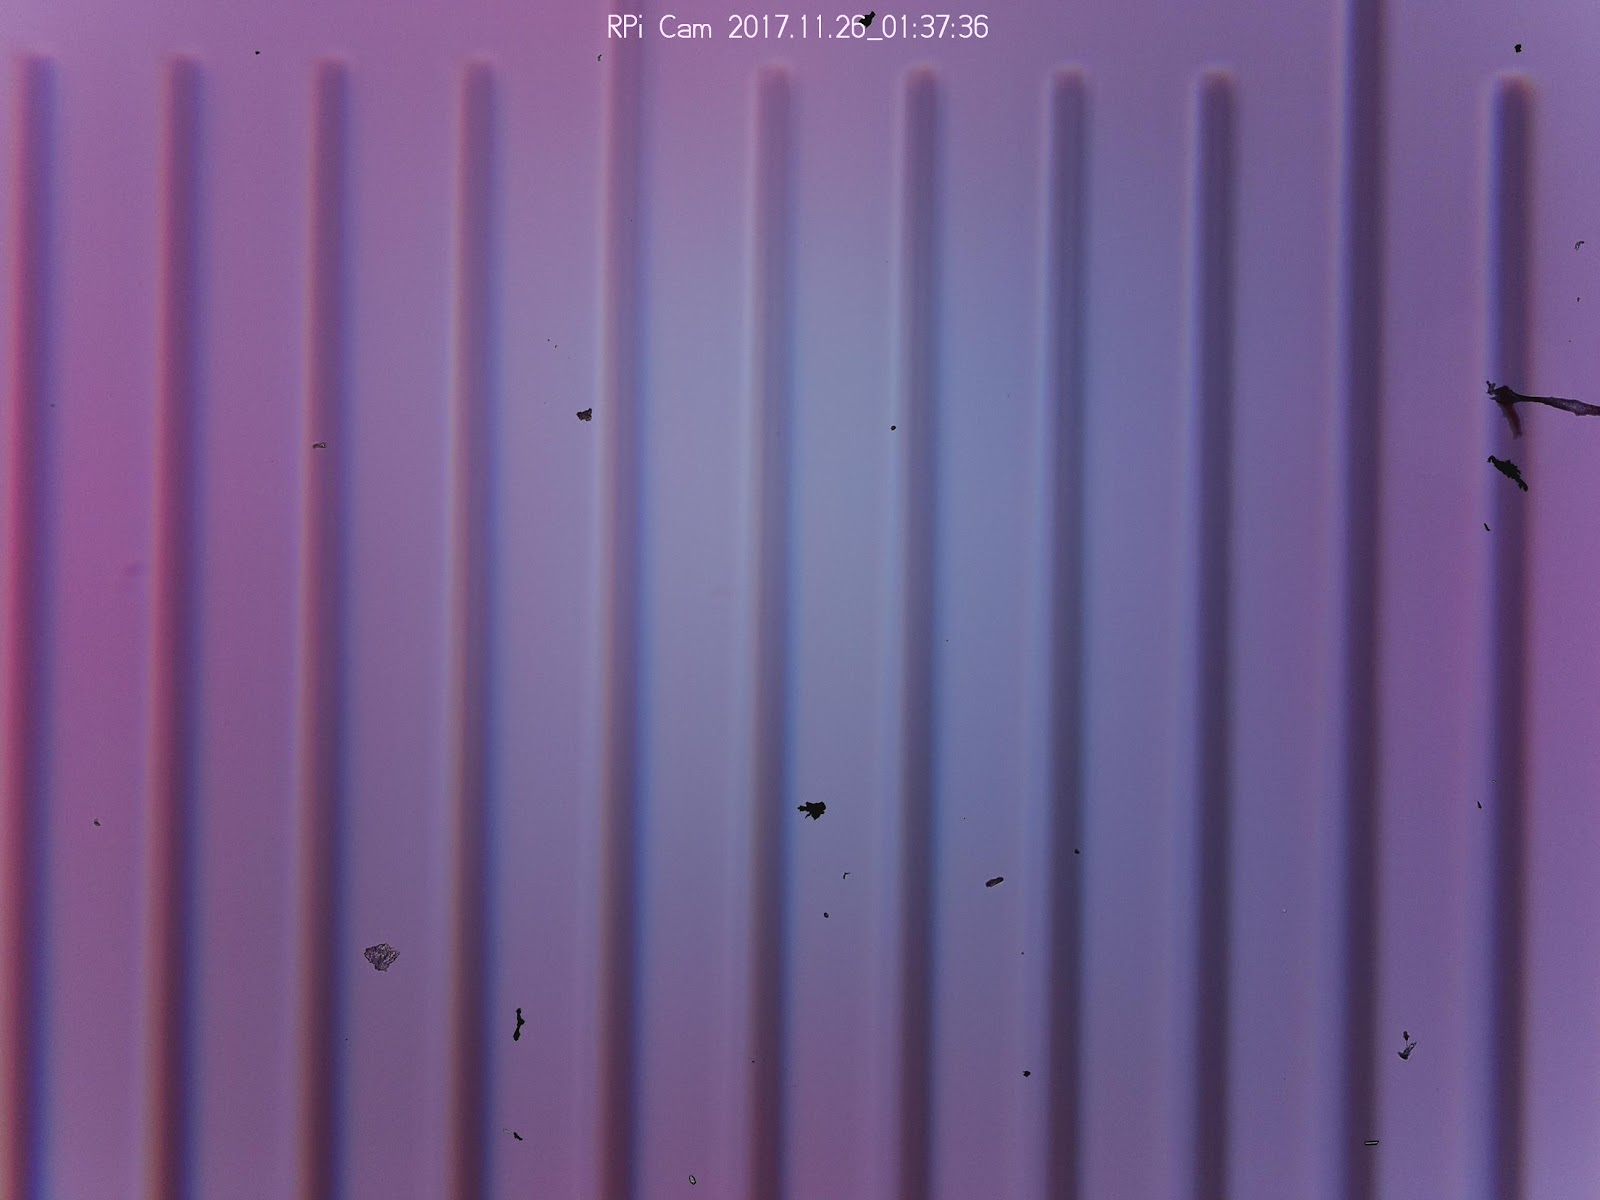
Once we have a good image, we can download it and see what our resolution is. I am going to look at this image:
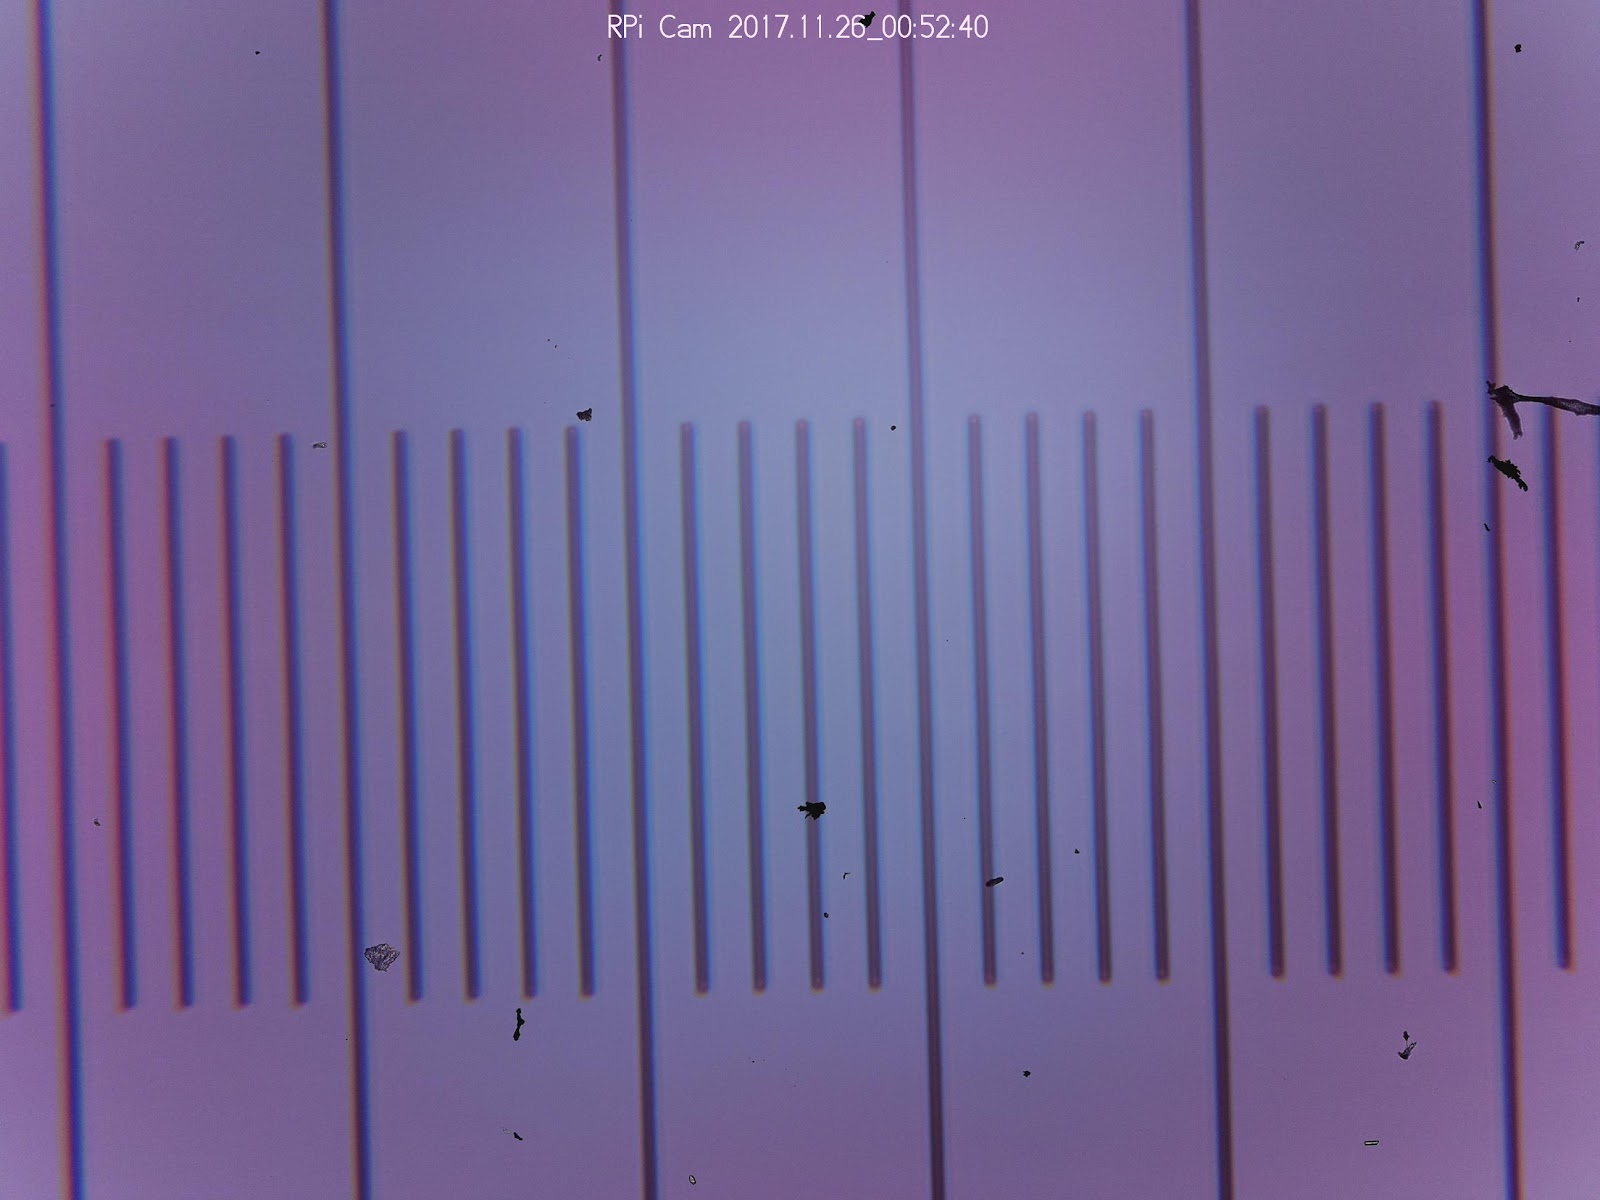
There are a few things to note about this image. First of all, there is a large amount of dust and debris on the sensor of the Raspberry Pi camera. These marks are present on all of our pictures. This is not a surprise -- I have been using this camera in lots of different microscope examples and taking it apart and putting it back together a lot. I will want to get a new camera to use for and take better care of once we have a solid design.
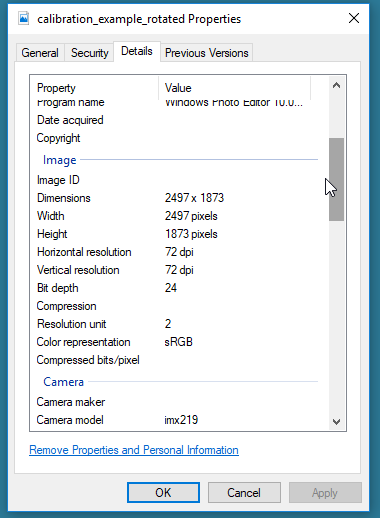
This image is pretty straight, but I'm going to rotate it slight so that the gradations are aligned with the bounding box of the image. This is probably not required for the rought calibration that we're doing, but it will look nicer and make it easier to count pixels. You can rotate it in almost any image editor. I used Windows Photo Viewer and rotated it 2 degrees to get the following:

Now we can count how many lines are on the image. There are 26. Examining the image properties, I see that it is 2497 pixels across.
Since each mark is 10um, we know we have a bit more than 260um displayed on a bit less than 2500 pixels, so we get an image of just over 10 pixels per micron.
We still don't know what the smallest possible thing we can see is (for instance, would a .1 micron sphere be visible as a single pixel?), but this is still a very useful rough estimate of what we're seeing.
Repeating the process with the 100x objective, we get:
Which is about 100 um for 2500 pixels, or about 25 pixels per micron.
0 Comments
Login to comment.