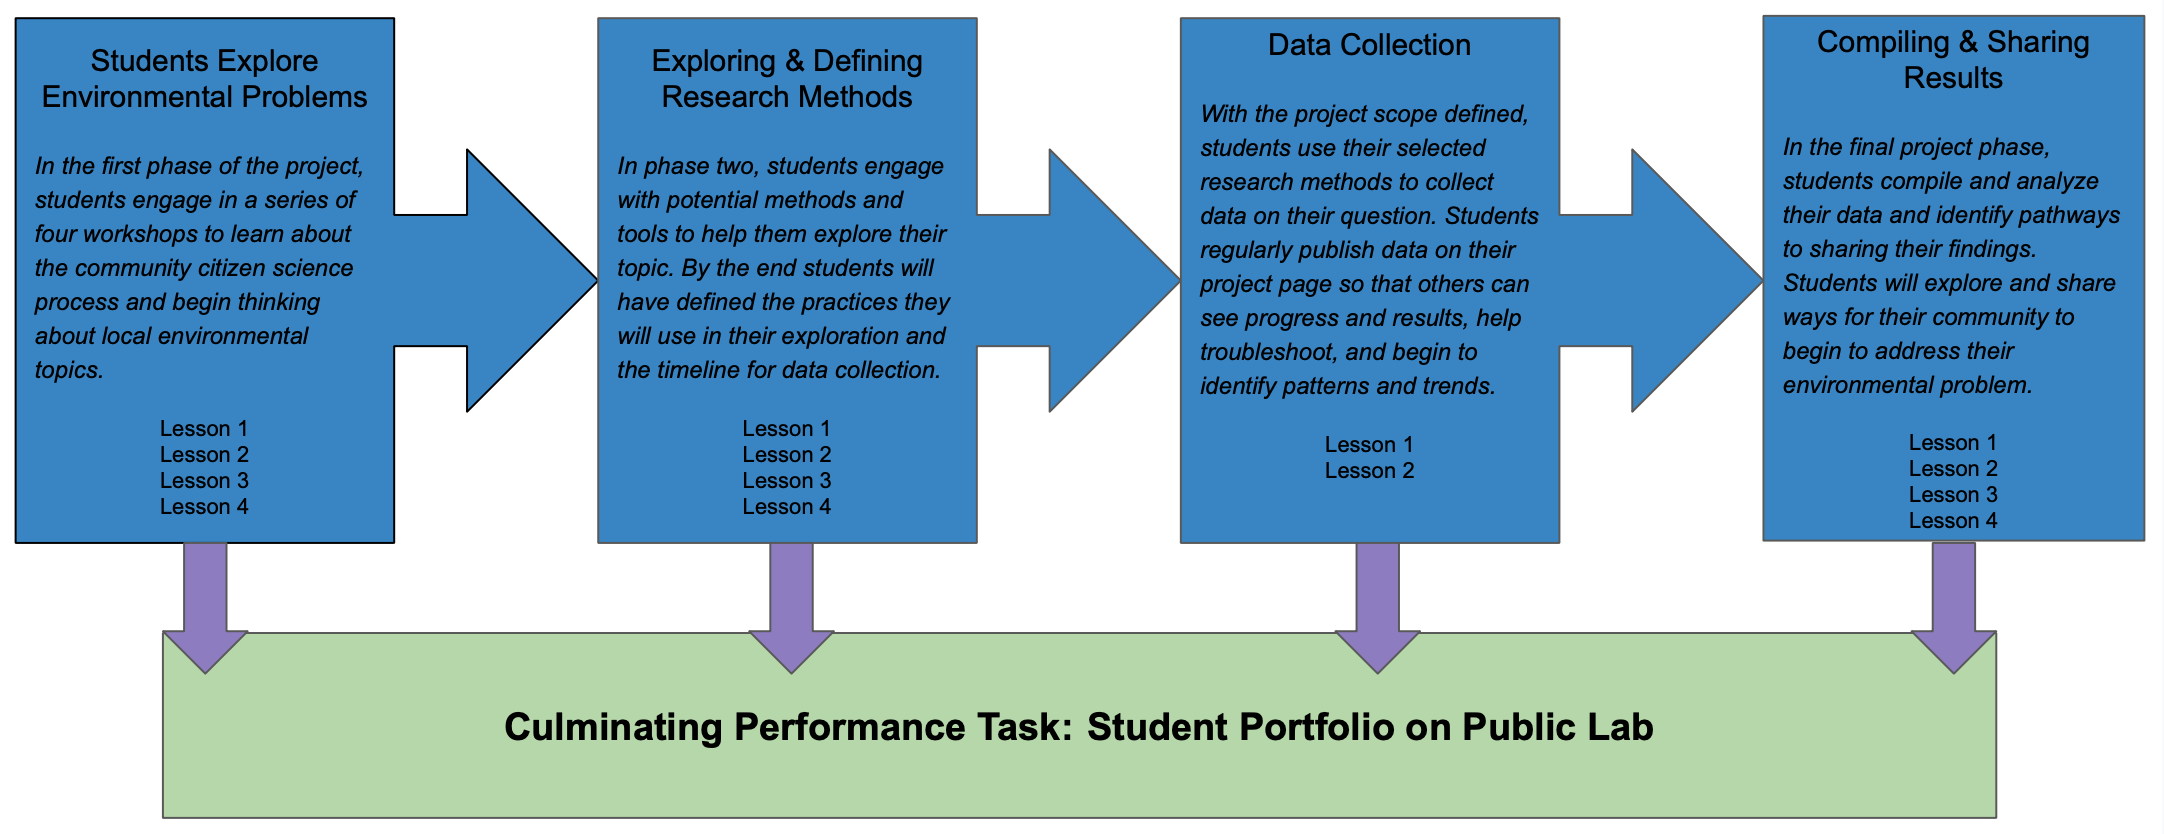
This lesson is part of a series of lessons designed for educators to facilitate student-led inquiry around environmental topics. If there are time constraints, this lesson can be split into two at the Elaborate portion of the lesson. During Phase I of this series, students work towards identifying and learning about environmental topics.
You can learn more about this series here.
You can access this lesson plan as a Google Doc here.
Overview
Time: 120 minutes
Materials:
Satellite image of mapping location* (You can use the USGS Earth Explorer to access free satellite imagery)
Aerial Mapping Kit** (Balloon, Kite, or Pole)
Camera with time-lapse ability
*Imagery can be pulled up for students in advance or students can search for satellite images on their own during class. ** Some prep-work will need to be done to decide how you are going to map your site. Check out this post for more on choosing how to map.
Guiding Question: How will we study our environmental problem?
Objective: Create a map of the area we intend to study and form a deeper understanding of our hyper-local environment.
Engage
Time: 15 minutes
Discussion: Why are maps made?
Ask students to answer the question: why are maps made? Help guide the discussion by asking students about: - Who needs maps? - Natives vs the inexperienced? - Maps are a way that we can concretize and form knowledge of a place. - What can maps show us? - How have maps been used in human history? - Mapping became particularly important in periods of human history associated with the rise of the nation state and colonies. People needed to figure out trade routes, illustrate ownership over places, and coordinate activities at a distance. - Grassroots mapping unsettles some of these dynamics by allowing locals to easily produce maps of their areas which can be used to counter official maps.
Here is a site that has a great overview of the history aerial-photography. From this site, you can create a timeline for students, or get some great true/false or trivia questions for your students.
Explore
Time: 20 minutes
Exploring Satellite Imagery: Pull up satellite image of study site that can be viewed by everyone. Ask students to discuss the following questions: - What does it tell us? - What do we know about the site that isn’t capture here? - What more would we want to see in this image? - What information could it provide to help us design our study? - What information do we need to know to meet our study’s goals?
Students can use their answers to complete a chart like this one:

Explain
Time: 25 minutes
Walk through the steps of mapping with students. You can use this guide to help. - Gather materials - Balloon Mapping - Kite Mapping - Pole Mapping - Choose launch site - Privacy & safety - Wind Conditions - Rigging a Camera - Building a camera capsule - Setting up auto-trigger - Launching your balloon or kite - Filling, closing, & mooring a balloon - Flying your balloon or kite - Attach the string - Attach the camera - Letting go
Students will create a plan to use today’s mapping to help them reach their project’s goals. Students should determine where they’ll map and what type of mapping they’ll be doing. They’ll need to create plans for what additional data they will collect during their mapping outing. This should include ground photography and observations. Students should look back to their charts from the beginning of the lesson to be sure that they are gathering the data they need.
Check In: After creating their mapping plans, students will need to look back and check that their plan: - Reflects the things students have identified as “what we know” - Will provide answers to the things students have identified as “what we need to know” - Connects back to the larger goals of the study design
Elaborate
Time: 60 minutes Mapping the Study Site
There are three major components to this mapping, that can be used to create student groups: - Balloon/Kite Mapping: Taking high-altitude aerial images of the study site. These students will need to inflate their balloon, launch, take photos, and land their balloon. - Pole Mapping: Taking aerial photos from 30 or so feet in the air. This group will create a close-up shots of the study site and should focus on feature of note or locations of interest. - Ground Observation/Photography: The primary focus of this group will be to collect supplementary data to annotate the maps. They’ll write descriptions of the study site and note the location of any features of note, like a pond, garden bed, or standing water. For each feature, students should identify make s note of the location so that it can be added to the annotated maps.
Evaluate
Time: 15 minutes
When students return to the classroom, ask each to use a half sheet of paper and do a short writeup about their mapping experience. Students should talk about what worked well, what they would change about the experience, and how today’s mapping has moved their projects forward.
A compilation of excerpts from these writeups, compiled by the teacher, would make a great update to their Project Page on Public Lab and could be shared as a research note.
1 Comments
@purl has marked @purl as a co-author.
Reply to this comment...
Log in to comment
Login to comment.