Hello! Today I'm going to walk you through the construction of a new pole for pole mapping.
The first time I went out pole mapping with Public Lab, we had kind of a rough day. The weather was great, and the group was enthusiastic, but the pole was droopy. And that is putting it mildly. Several times we almost crashed the camera on the ground pretty hard because there was so much bend in the pole.
Something had to give.
The problem with the pole we were using was two-fold: 1- The 1 inch diameter pipe was bendy all by itself because of the narrow diameter, long length, and thinness of the walls. (There are many thickness of PVC pipe, and this happened to be a thin walled one.)
2- The coupling connecting the sections was meant to be glued in permanently, not duck taped in place.
The solution: a new pole! This one will use a larger diameter pipe and threaded, glued fittings.
If you'd like to build along at home, here is the materials list. The total cost was about $30 (But the cement and primer was about $10-$12 of that and you wouldn't need to buy more to make many more poles.)
Materials:
10 ft of 1-1/2 inch PVC (the thick walled one) example
1-1/2 inch threaded male adapter (2) example
1-1/2 inch threaded female adapter (2) example
1-1/2 inch x 1 inch bushing (adapter to fit 1-1/2 inch pvc to 1 inch pvc) (1)* example
1-1/2 inch coupling* example
1 inch threaded male adapter (1)* example
1 inch threaded female adapter (1)* example
1 inch tee example
PVC Cement example
PVC Cement Primer example
*We are using these pieces because we are attaching the top section of the old pole to this one. If you make yours out of only 1 diameter of pipe you won't need these.
Step 1: Cut the PVC pipe into 3 sections Ours are 3 ft, 3 ft, and 4 ft, but as long as they are roughly equal it doesn't matter too much.
The people at Home Depot were kind enough to cut the PVC for us since we couldn't carry a 10 ft length in the car. Any hacksaw or wood saw will do to cut it. The hardest part is that it is round, so get a friend to hold it steady for you.
Step 2: Plan your fittings Now is the time to plan how you are going to glue your fittings. Once you glue them, they are not coming off.
Lay your pipe out on the ground and gently place the fittings on the ends of the pipe so that there is one male end and one female end facing each other.
The tee goes on the top section to provide a convenient place to tie on the camera mount.

Step 3: Prime your threaded fittings and pipe You probably want to do this one outside or over a tarp.
Open the purple primer (such a fun color!). There is a brush in the can. Swab a nice thick (maybe 2 inches) section of primer onto the outside of the pipe and the inside of the fitting (ie the parts that will touch each other when you attach them).
You can prime all your fittings and pipe at the same time if you like or one by one.

Step 4: Glue the fitting to the pipe This part has to happen fairly quickly. You might want a second set of hands.
Swab on the cement over the primer on both the fitting and pipe. Now shove them together securely. Pushing into the ground helps. You only have about 20 seconds before everything sets so be sure you know what you are doing before you start.
The glue will set fully in 3 - 5 hours, but it will be good enough to try out in about 20 minutes.
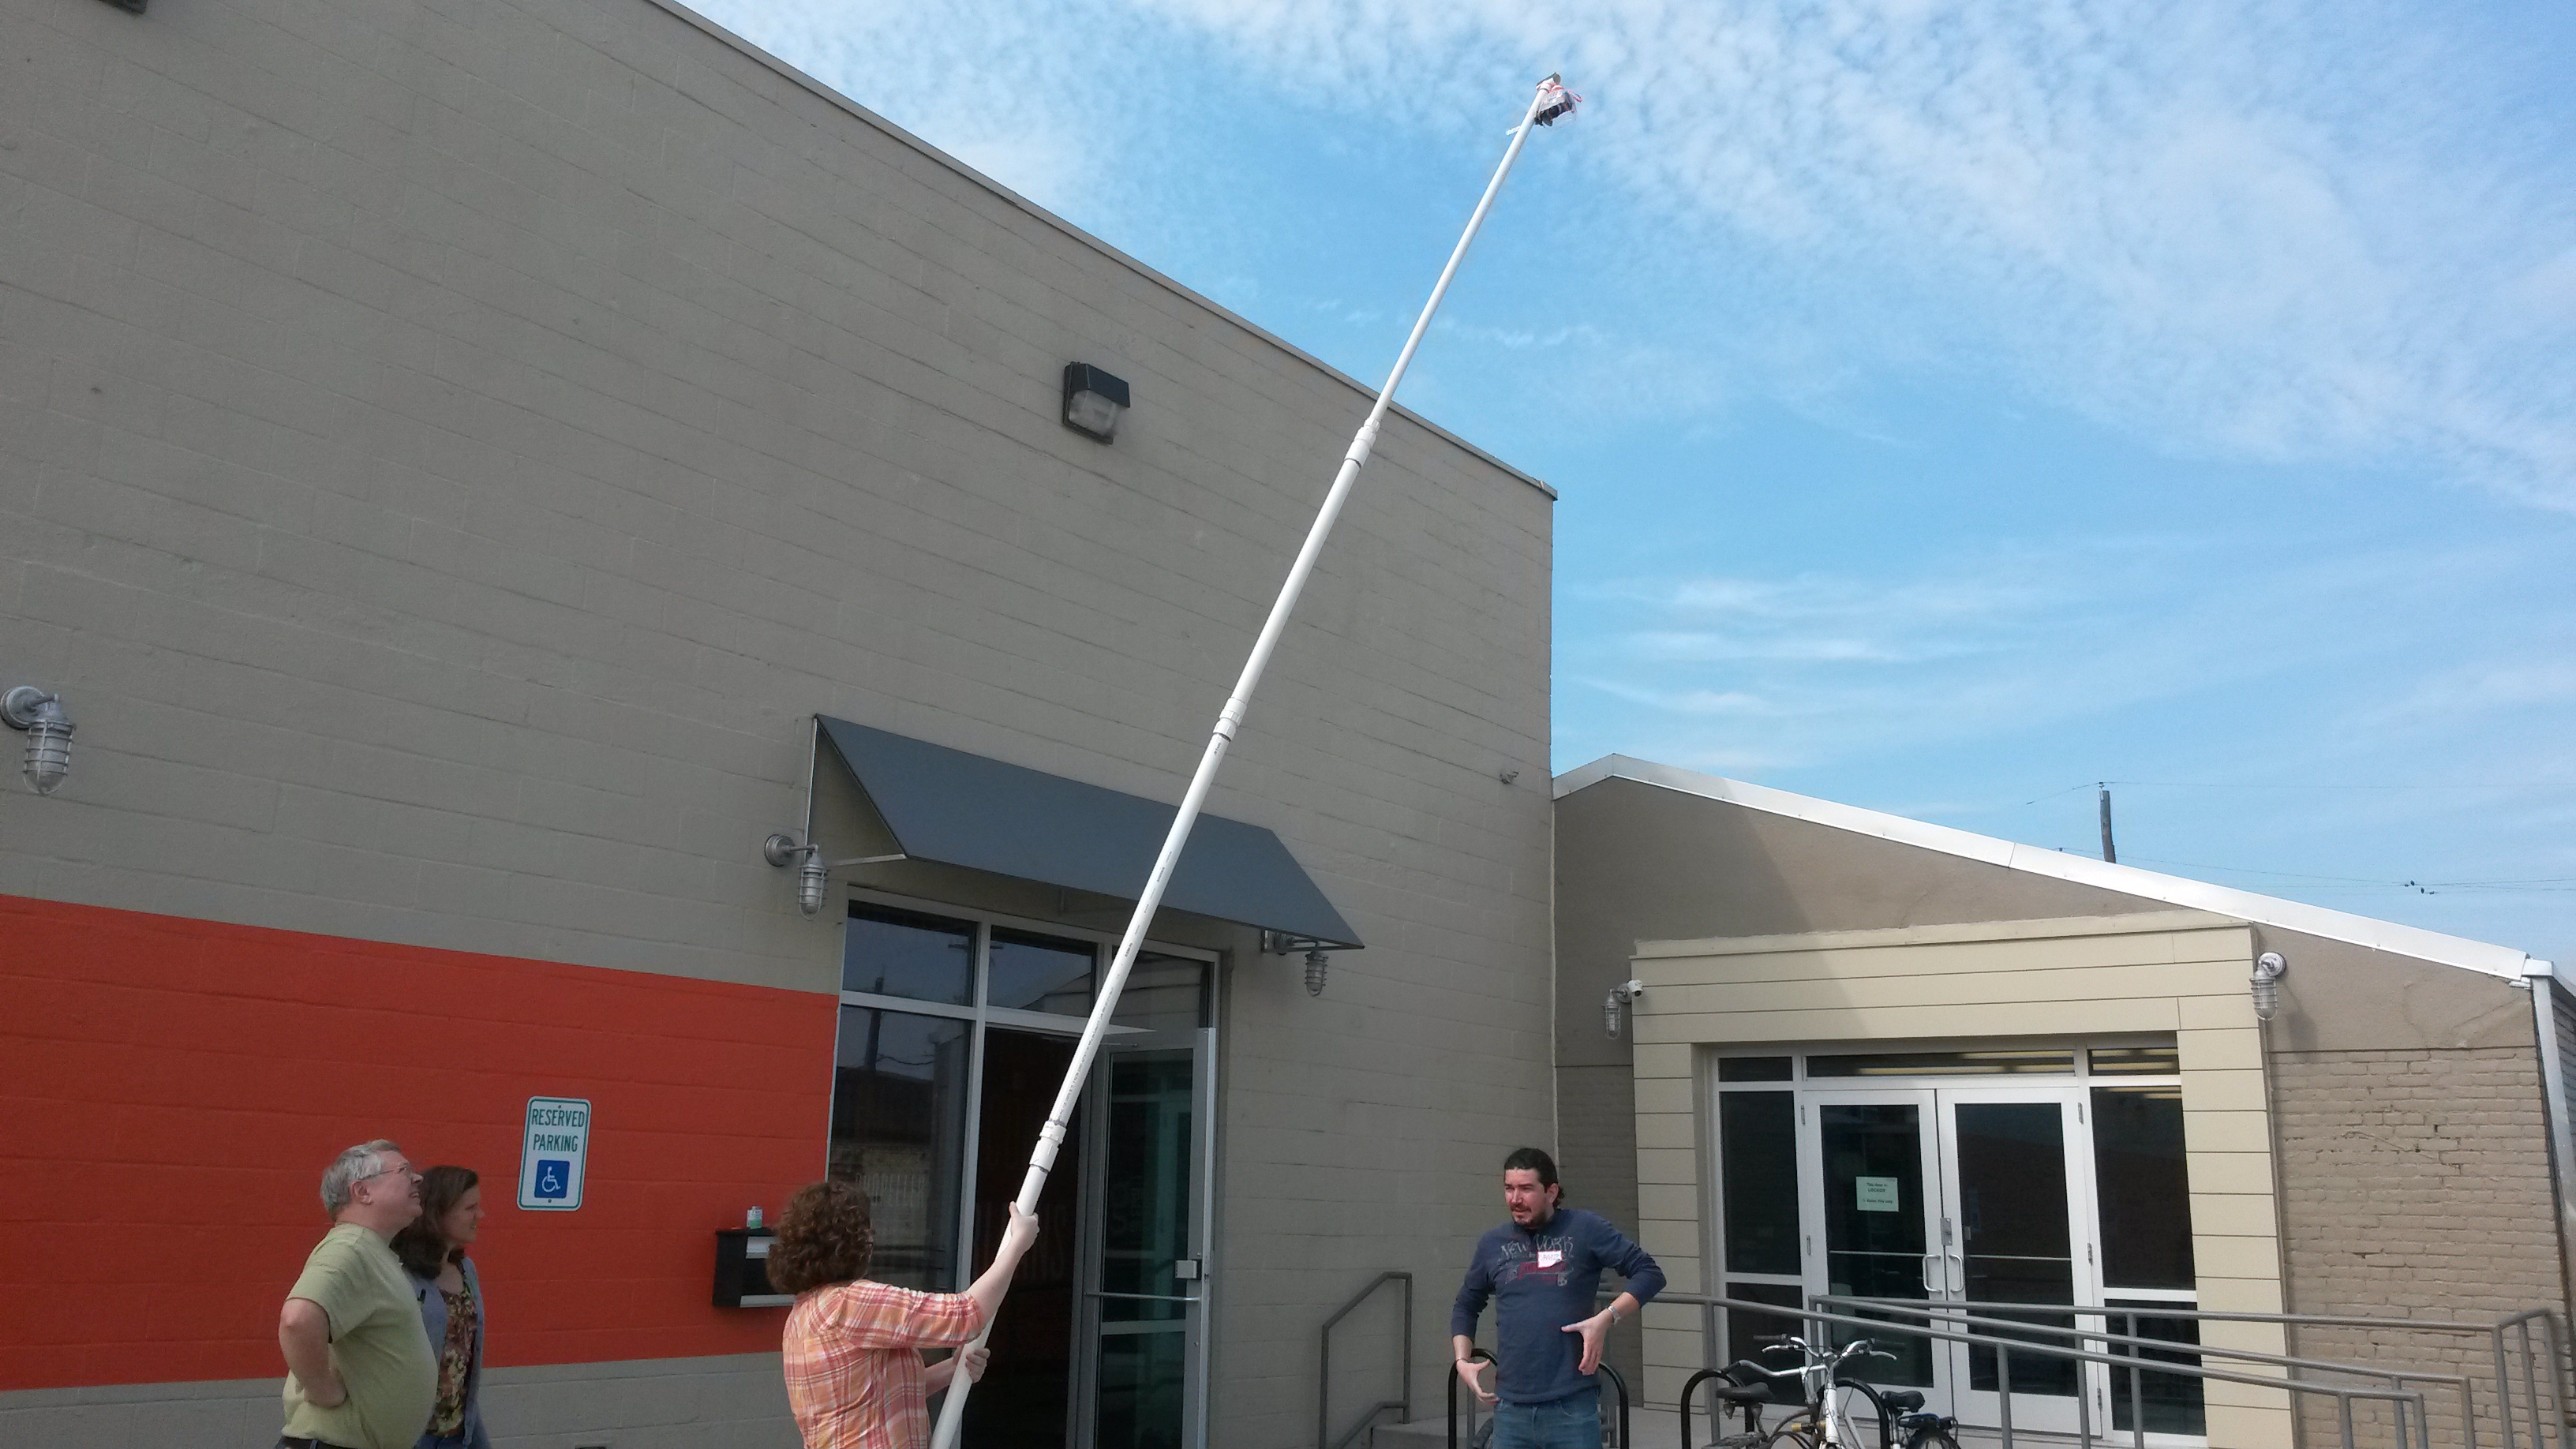
Step 5: Put it together and take some photos! Now grab a friend and screw the pipe together. Aren't threaded fittings great? Now you don't have to put the pole out the car window to transport it!

As you can see from the photos this pole is much sturdier and easier to maneuver. I was able to walk around with it and didn't feel like it was about to fall over. This is something we struggled to achieve last time even with three other people with guy-lines.


Further Improvements: 1 - The pole was hard to get apart again. It needs something to lubricate the threads. Dan suggested beeswax.
2 - The pole is a little heavy, but we suspect that one of those belts that people use to carry flags in parades would really help with this.
Until next time,
Diana .
3 Comments
Hi I have set up my own rig with a chdk camera taped to an aluminum roof-rake. I ran the pictures through Agisoft Photoscan Pro and got he following orthophoto as a result of my garden: https://farm6.staticflickr.com/5590/14678236891_247042ba7a_o.jpg
I know that this might not be the best place to share (a how to of building a pole), but I just wanted to let people know what kind of results they can get. It has high enough resolution that you can id the types of vegetables. If I were to add some gps control I could use the accompanying 3d point coud to calculate micro drainages.
Reply to this comment...
Log in to comment
I would have to check, it was over 20 feet for sure, it did bow quite a bit and I tried not to move too fast so that it wouldn't bend. Rough and dirty I would say that is about 1/5th of an acre. If you can see that is a community garden and the square plots are about 20 feet by 20 feet. I walked up and down the paths between plots in both directions and around the perimeter. This gave me about 80 pictures with suitable overlap. I would say that the pixel resolution is in the 1-2 cm range.
Reply to this comment...
Log in to comment
Hold on a moment - that finished pole looks a lot longer than 10 feet. Did you add on some pipe you already had on hand? Or am I just mis-judging the length of it? Thanks.
Is this a question? Click here to post it to the Questions page.
Reply to this comment...
Log in to comment
Login to comment.