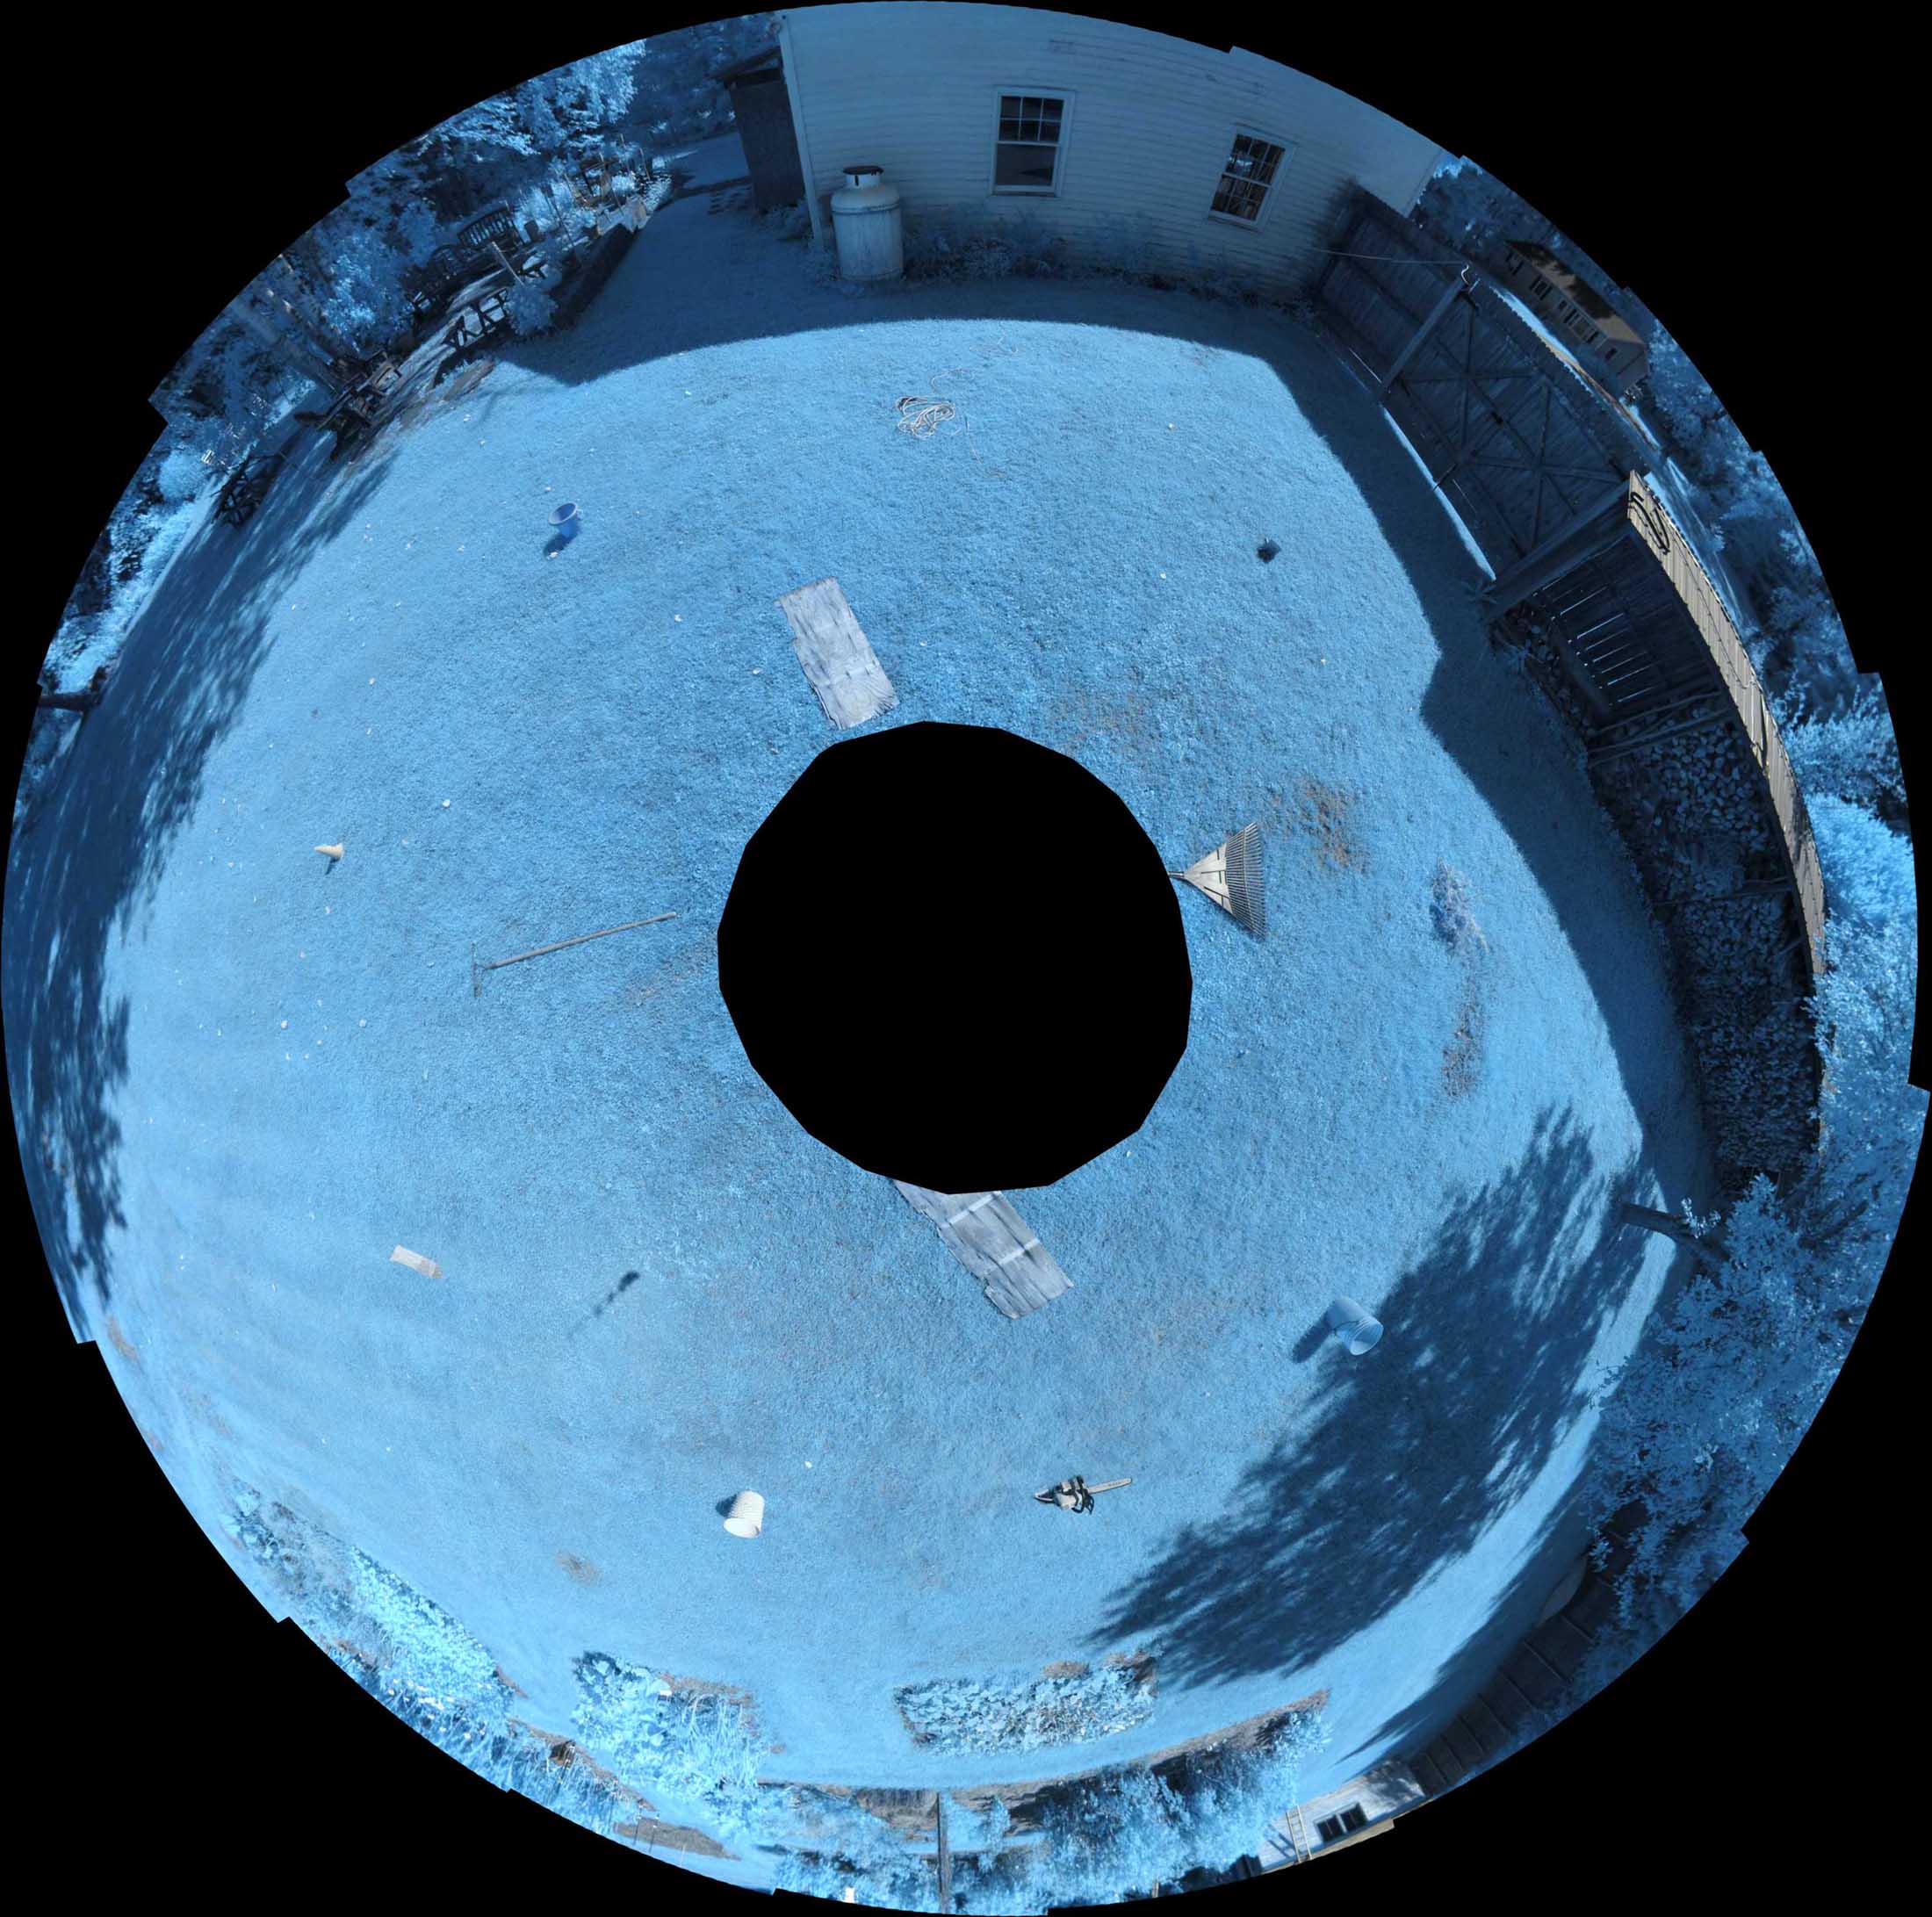
Above: Eighteen portrait mode photos taken by a Reconfigurable Rig were stitched into this ~half-spherical panorama. The camera was modified to capture near infrared light.
Public Lab has received support from Autodesk through the Autodesk Foundation and via an Autodesk Student Expert Intern. Ranon Prichard spent this summer as a paid intern working on improving old and new designs for aerial photography rigs. Ranon's big project was his original design for a new rig which pans a camera using only the power of rubber bands. Today I assembled one of these Reconfigurable Rigs and tested it on a static line.

Above: I built the Reconfiguralbe Rig for portrait mode photography. I did not attach any of the protective tubing for this test.
My test was fantastically successful. With a single winding of the rubber bands, the rig panned continuously for 44 minutes while a PowerShot A2200 took a photo every six seconds. Some of the photos were easily stitched together into a half-spherical panorama. The good stitching was not a big surprise because I tested the rig on a static line so the rig was not moving at all while it made 23 consecutive 360° rotations.

Above: False color infrared version of the stereographic projection of the stitched panorama from 26 portrait mode photos taken by a modified PowerShot A2200 on a Reconfigurable Rig. My lawn is usually not this junky, but I scattered stuff around to improve the stitching. After the panning test, I tilted the camera downward and took extra photos for filling in the nadir.
Assembly Instructions
Ranon used his expertise with Autodesk Fusion 360 to make incredible assembly diagrams. These are the kind of diagrams that are so good that no written instructions are needed. It was really fun to spread everything out and just start to put stuff together. It was the perfect antidote for instructions which start "Read through the entire manual carefully before starting."

I dumped the contents of four bags of small parts into four separate containers in case that helped me figure out how to assemble things. It helped a little.
Assembly notes
- I only assembled the portrait mode rig, so I can't comment on the landscape mode assembly.
- There are a lot of small parts. There are about 150 parts in the kit which is 20% more parts than in the Saturn V Rig Kit which requires soldering parts onto a circuit board, making camera and power cables, attaching two servos, and assembling a set of gears. Just sayin'.
- There are three versions of the type of tubing clamp which looks like an "R" when opened and like a "P" when in use. The instructions don't always indicate which of the three types you should use, so I had to do some disassembly after figuring this out. This should be easy to fix.
- Step one for portrait mode shows an exploded and assembled hub without hinting whether they are the same or different hubs (they're different).
- Step 6 seems to show three washers but only one is listed in the parts and only one is included in the supplied parts. I used several of my own washers to make this and other attachments work. More washers might be needed, and the diagrams should be explicit about which ones go where.
- The only tool needed is a flat screwdriver. That's pretty cool.
- Assembling the Silly Putty mechanism required more care than I would have guessed from the diagrams, but I used the wrong washer and got into more trouble that I should have.

Above: After failing to make the Silly Putty mechanism work, I added some washers at the base. The steel washer keeps the others level. The nylon ring (the torus from an eye bolt) was the only thing I had that fit. The two flat nylon washers have Super Lube between them, but the contact with least resistance was above the torus.
Silly Putty mechanism
It took about two hours to get the Silly Putty mechanism to work. There is a nylon washer included that I used somewhere else, so I assumed I had to use a rubber ring under the Silly Putty tube. That produced too much friction. I eventually found some nylon things that worked.

Above: I'm not sure the upper O-ring was doing much. The lower one worked like a charm.
The rubber bands pull up on the wooden dowel which pulls up on the washers beneath the Silly Putty tube. As the rubber bands unwind they produce less rotational force and also less tension pulling up. These varying forces can allow the rate of rotation to stay reasonably constant if the nylon surfaces are just so. This is an elegant mechanism when it is constructed properly.
Stranger things

Above: Some of the small rubber O-rings did not seem to do much. The attachment of the pendulum shaft allowed lots of tilting action, but I don't know that it mattered much.

Above: The metal tubing clamps need washers that were not supplied and might also benefit from steel bolts instead of nylon ones.

Above: My static kite line is fairly taught, so I had to wrap the pendulum wire around it instead of the other way around. This works, but a stiffer wire is probably a better solution. I don't know what function is served by the short dowel piece and tubing clamp.
Test panning
After playing with the Silly Putty thing for a while it started to work as expected. I wound up the two rubber bands until they were double twisted along their entire length. This provided enough potential energy for 23 full 360° rotations of the camera.

Above: The rubber bands provide more force early and then it takes longer to make a complete rotation later on. So because the camera was taking photos at a constant interval (6 seconds here), more photos were taken per rotation at the end of the trial.
There was a gradual slowing of the rig rotation over the 44 minute trial, but there was also considerable cycle to cycle variation in rotational rate. The time for a single 360° pan varied from just under one minute to 2.5 minutes. These results are with the rig hanging from a completely static kite line, and results during a flight might be rather different.

Above: The portrait mode assembly does not allow the camera to take nadir photos because the lower hub is in the field of view of the camera.
I took a few nadir photos to fill in the gap directly beneath the rig. This required temporarily reconfiguring the Reconfigurable Rig because just pointing the camera downwards points it at the lower hub. By the way, there has got to be a better name for this rig.

Above: The false color IR version of the spherical projection of the 360° panorama stitched from 18 oblique portrait mode photos.
Conclusions
In this controlled trial the Silly Putty mechanism performed exceptionally well. The slow and steady panning is perfect for capturing the 360° view. I don't know how this will translate to a flight in which the rig is swinging in the wind.
The connections between all the dowels, hubs, and clamps were plenty secure for this trial and would be adequate for typical gentle kite flights. But there are a lot of connections, and if any one of 12 friction dowel connections fails, the rig can come apart. If all the connections are made well, the rig should survive typical kite flights. But after storage, transport in a pack, rushed field assembly, or last minute reconfiguration, it might be easy to overlook a loose joint. This rig requires careful inspection before each flight. Kite flights can impart lots of whipping force on a long dangling rig like this, for example when hurriedly pulling in the kite when conditions change. I would be a little worried about this rig surviving that type of event.
6 Comments
This is amazing documentation Chris!!!!
Reply to this comment...
Log in to comment
This is awesome, Chris! Thanks for the great feedback!
It seems I missed the nylon washers for the vinyl tube clamp for the silly putty mechanism. I may have been thinking you could use a hex nut instead, but forgot to include that in the diagrams. Either way I think a #6 nylon washer is best suited there.
I tried to specify which size nylon tube clamp to use for each part as they're pretty close in size, but I guess that could be better specified. Maybe if I designate one type (1/4" ID) for use with the dowels and the other (5/16" ID) for use with the tubing that would be easier to follow?
For the pendulum, I was also thinking a thicker gauge wire might be better suited, although I did like how easy the 14 gauge was to bend by hand.
I'm also not sure the short dowel and nylon hose clamp are necessary at the top, they are remnants from some earlier iterations and were included in the kit as an added safety in the unlikely case that the tubing were to tear.
Securing the pendulum shaft is definitely an issue that needs to be addressed, I solved it on some flight tests by wrapping a rubber band around the shaft and the laser cut plate, although it would be nicer if there were a cleaner way of securing it.
The rubber o-rings do prevent the plates from slipping off of the dowels when pushed tightly against the plates, although they may be prone to a bit of slipping with some rough turbulence in flight.
Is this a question? Click here to post it to the Questions page.
Reply to this comment...
Log in to comment
Great notes, Chris! Thanks for the specific instruction and design feedback. I'm going to have to dig in to some of these in more depth. I love the graph of rotational speed variability.
One thought on Nadir photos: In portrait configration, the bottom hexagonal hub connector isn't necessarily needed and could be replaced by a clamp used in the very simple pole configuration. (like this but upside down):
Reply to this comment...
Log in to comment
most of the parts in the kit are duplicates, as are most of the assembly tasks. Do you think more careful bagging of the tube clamps would help? I'm thinking of the assembly parts and instructions for the hubs being distinguished as more clearly separate.
Is this a question? Click here to post it to the Questions page.
Reply to this comment...
Log in to comment
Maybe if I designate one type (1/4" ID) for use with the dowels and the other (5/16" ID) for use with the tubing that would be easier to follow?When I was attaching the tubing clamps I didn't know whether they were for dowels or tubing, so that designation would not be so helpful. If I had known there were three types of clamp, and had the diagrams always designated which type, I would have figured it out.
most of the parts in the kit are duplicatesThat's true, so my snark about all the parts was somewhat unjustified. This kit is "reconfigurable" mostly because you can build two different rigs with it. That makes the BOM and the instructions more unwieldy than they would otherwise be. I wonder whether the rubber band and Silly Putty mechanism should be part of a portrait mode only rig. With a single tilt angle, portrait mode is much smarter for a panning rig if your goal is stitched panoramas.
A separate kit could be offered for a static landscape rig, and a separate instruction sheet could guide the combining of the two kits to make a panning landscape rig or maybe other things.
Chris
Is this a question? Click here to post it to the Questions page.
Reply to this comment...
Log in to comment
That's a good point about the instructions. if they were teased out into the different rig designs and each set of instructions stuck to one design at a time, assembly would be faster and clearer.
Your suggestion reminds me of Lego instructions-- Lego doesn't tell you can re-make the pieces in a variety of configurations-- they just show you how to assemble one model.
Reply to this comment...
Log in to comment
Login to comment.