Creating Graphic User Interfaces (GUIs)
This wiki was written to help people with limited computer / microcontroller experience write graphic user interfaces. While I have not put a lot of effort into finding then, I have not seen many examples of open source GUI code out there. In the text below, we provide links to examples (and a few modules) that I hope will enable people to understand and modify GUIs that they find and to write their own when necessary.
While it is definitely possible to run a microcontroller program from the serial port emulator in your Arduino development environment, a graphic user interface (GUI) will make your project a lot easier to use. There are a few programs that you can use to write a GUI. While there has been discussion of using python to write GUIs (notably something called Instrumentino has popped up recently), what I have seen online from the Arduino community suggests that Processing is the most commonly used program for the DIY community. At this time, this wiki only discusses Processing. Of course, if someone wishes to write content describing approaches to writing GUIs in python (or another program), this would be an appropriate place to describe them and to post links to other content.
##Intro to Processing:##
Processing is a free visualization program written for the arts community. It is amenable to interactive stuff, which makes it good for your user interface. You can download the program from here. There are a number of tutorials, both video and written that can be accessed from here.
Libraries Libraries are useful bits of code written by someone else that can generally be downloaded for free. If you have much experience with Arduino you have probably encountered them. Two libraries for Processing that we make frequent use of when writing GUI code are ControlP5 and gicentre. ControlP5 libraries are downloaded from here and used to create controllers (described in greater detail below). Gicentre libraries are downloaded from here and are used to create charts.
Just like libraries in Arduino, libraries in Processing need to be in proper file structures. Specifically, they need to be in a folder called libraries in the Processing sketchbook folder.
ControlP5 controllers: Download controlP5 libraries from here (http://www.sojamo.de/libraries/controlP5/) and install them in a folder called library in your Processing sketch folder. Once you do this, you should be able to open a bunch of example sketches that illustrate controllers in the controlP5 library. Clicking on File-> examples should open a window that allows you to chose from a large number of example sketches. ControlP5 examples are found under Library Examples > ControlP5>controllers. Example sketches are available for a number of controllers, including buttons, dropdown lists, knobs, properties, radioButtons, sliders, tabs, textareas, textfields, timer and toggle.
In the following paragraphs we present links to code that will demonstrate how to get your GUI to do the stuff that you want your GUI to do. Of course, the GUI has to talk to the microcontroller and the microcontroller has to understand and respond to the GUI. This means that the GUI and microcontroller both have to be coded and the code on one has to complement the code on the other. While the microcontrollers we use are TI Launchpads, the code we use (Energia) is very similar to Arduino and the two can frequently be used interchangeably. The GUI is written in Processing and communicates with the microcontroller via serial communication. Since both Energia and Arduino use serial communication, any code written for the GUI will work for either microcontroller, although the Energia code might need to be adjusted slightly for Arduino. If there is ever any doubt about which code to use, GUI code has the extension .pde and microcontroller code is .ino.
Connect to the microcontroller:
One thing you will always want to do is connect your GUI to the microcontroller board. You will need to establish communication between the GUI and the communication port (or com port) on your computer that your microcontroller is attached to. This link (link to comPort sketches) will take you to a Research Note where we provide a brief description of some of the things involved and links to a site where we put code that establishes communications with your microcontroller.
Start and stop a microcontroller program using a button on your GUI.
This stuff needs to be written up but, for now, you can get the code from here and look at it yourself.
Manipulate data files:##
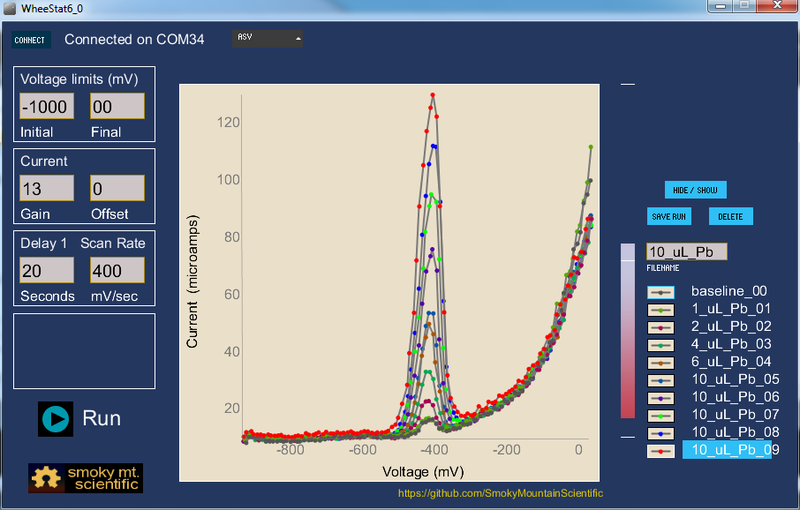
Once you have collected data, you may want to display and compare different data sets. There is an older research note here that describes some of the stuff we have done on this account. There is also a you-tube video that shows this program, found here. The Processing code for this program is here.
Stuff we haven't written up yet, but intend to:
Interact with the GUI using buttons and sliders write values to your microcontroller
Enter numbers into textfields and communicate those to your microcontroller Let you chose options from dropdown lists Handle events Draw graphs based on data from your microcontroller Save data to files Import strings from files on your computer and convert to data. *Monitor program status