What I want to do
After my research note yesterday here I'm posting some pictures that are significant improvements (datawise) to the end results. I'm demonstrating the impact that the white balance has on the end data and I'm demonstrating the effect of stretching in the visible band. Stretching in the NIR band didn't have any apparent significant effect, maybe just a slight intensification of the end results, but stretching in the NIR band is something that still needs further investigation.
My attempt and results
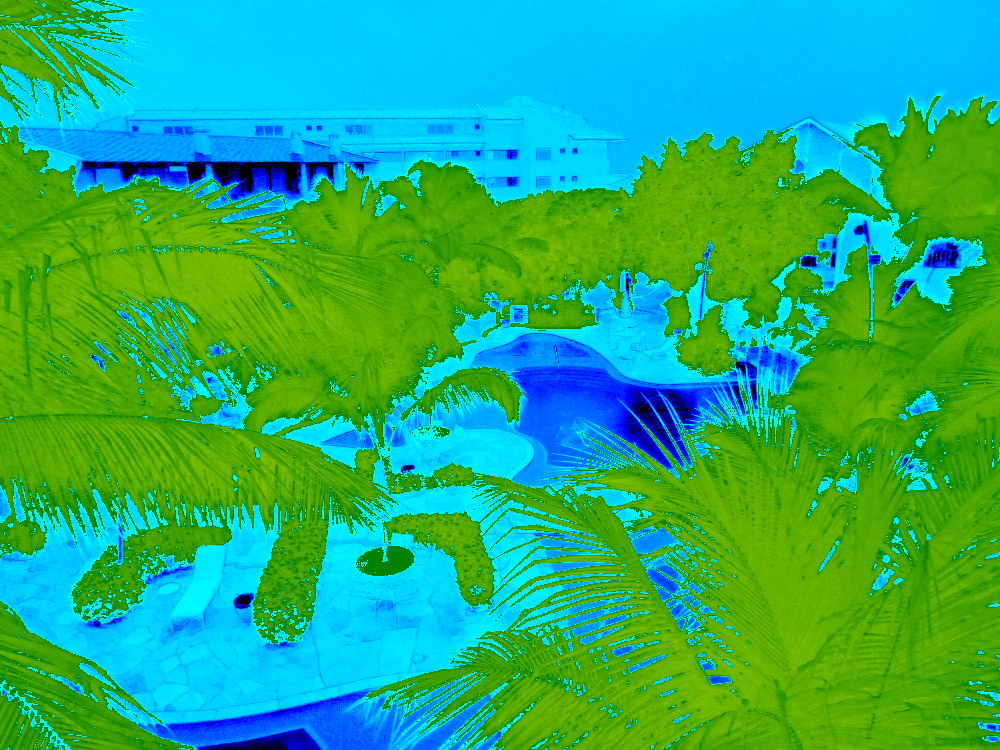
These two pictures show some pictures taken yesterday with a custom white balance, taken in sunny day off a red surface with stretching in the visible band.


These two pictures were taken today with auto white balance and stretching in the visible band. Notice immediately how the ndvi colors are dampened. That dampening is the effect of an "incorrect" white balance setting. The blue channel in the incorrect white balance setting just receives a lot less radiation.


These photos were taken with fluorescent white balance, yet this time no stretching applied on the visible band. Notice how shadows are now correctly represented, although it has resulted in an image that doesn't have a lot of variation. Yellows and reds don't even appear anymore.


Conclusions and next steps
So white balance does have a large effect on the end result, but it's mostly a question of resolution, the magnitude at which NIR radiation is captured in the blue channel. You can imagine this as if white balance determines the gains per channel. Some gain settings would apply a lot of gain to the red and very little gain to the blue, other settings produce a better (more even) distribution of radiation capture on the sensor. This "evenness" needs to be considered on the basis of the amount of visible and NIR radiation on a given day. These "better" white balance settings have more data in them, so can produce more informative end results.
The stretching in the photomonitoring plugin doesn't seem to work well my results at all. The stretching is the most important feature which negatively impacts NDVI by the shadows in the image. Even mild shadows go crazy. In the last results, shadows around the buildings are now actual shadows and you can now see that the windows are indeed the darker parts, so stretching in the visible band seems to lead to significant distortion of end results.
There's still something to resolve for "more correct" NDVI results. The formula directly compares actual values for NIR and visible light through addition and subtraction. This means that for correct results in the -1.0 to 1.0 range, the radiation magnitude must be directly comparable. I think that this is often not the case. A poor white balance already results in different gains per channel. The amount of visible vs. NIR radiation in the atmosphere is also not necessarily the same (I think it isn't, not an expert there).
This means that without stretching you'd expect to see correct variations of NDVI in the image, but not necessarily the correct coloring. It is as if the entire color scheme is shifted. Stretching the IR channel didn't seem to do anything in my case, so I'm looking at possibilities to apply a gain myself.
Further research could then focus on whether that gain should be multiplicative or additive.
10 Comments
Wow, those images and the explanation are crystal clear, thank you. Based on what you've learned, what suggestions would you have for improvements or new features to the Infragram.org tool?
Is this a question? Click here to post it to the Questions page.
Reply to this comment...
Log in to comment
I'm by no means an expert and my results here should be considered empirical and amateur. If the ratio of the amount of radiation between visible and NIR is not known, then it's extremely difficult to figure out what to do to produce a proper NDVI image. The NDVI is based on this ratio, so that's really the challenge. If the ratio is correct, then the rest just impacts the resolution of the image.
The problem with white balance really is that it needs to represent the "midpoint" of radiation intensity for both visible and NIR light. The white balance affects this the most, because it determines how radiation energy is distributed amongst the R,G,B channels.
What would be a really cool exercise is to see if the camera itself can be exploited to figure out what the calibration color for white balance should look like on a given day. One idea and theory I'm playing with is to use auto white balance from the camera. It could work as follows: - Get an 18% grey card (or possibly better yet, a white sheet of paper with 18% printed on it). - Take a picture with AWB outside in the conditions you want the photographs to be taken - The WB will be all wrong, but is likely representative for how the CCD captures the current radiation situation. Then print this color out as truthful as possible on a very white sheet paper. - Then immediately calibrate the WB of the camera outside on that sheet of paper instead. - Take pictures and see what NDVI results do.
If that works, then we can take pictures with a specific camera in many different conditions (cloudy, sunny, etc) and even use different calibration cards for different weather situations. Unfortunately I don't have a grey card or printer available here. Actual NIR does differ a little bit for a given day, but in this calibration that would only change the colors that are applied, not its variation that much.
Reply to this comment...
Log in to comment
We have been hoping that it would be possible to do this in post processing. Put the 18% gray card (or some other card) in the scene and take the photos. Then make an adjustment to all of the pixels so that the color balance of the gray card pixels meet some specification.
When we do a custom white balance of an Infragram camera by pointing it at a blue paper or red paper, the camera adjusts so that a photo of that colored paper is colorless, like a gray card (some tests). We could try the reverse, put a gray card in the scene, then adjust the entire photo so that the card is some specified color.
Ned Horning has been working on another approach to calibrating the photos so the NDVI results are in the proper range without subjectively selecting camera settings that force the results into the proper general range (which is what we are doing now).
There are lots of things to try.
Reply to this comment...
Log in to comment
Hi Chris,
I keep on experimenting here. I got to see the effects of a grey card in sunlight with AWB. I got a nice lila, poison candy picture from that (not red though, not sure if that means anything). I played around a lot with different white balance settings (always turning off stretching for visible light to prevent shadows), but I don't get pictures with a lot of contrast. The results however don't look very wrong.
An interesting observation is that when the white balance is configured by the lila image on a computer monitor, I'm getting a very blue image and extreme contrasts, but unfortunately also a lot of correlation with shadows. I think that's because monitors don't emit any IR at all, so you'd get a blue channel that's very easily saturated when exposed to sunlight.
I did manage to get the nicest image so far, which is done by calibrating on the red ipad cover in my bathroom with diffuse light through a window and the door shut. So I expect a relatively low amount of NIR to reach the sensor in those conditions. The pictures weren't as blue as with the monitor method, but still bluer than calibrating in cloud cover conditions. So on CMOS it seems that the amount of NIR blows visible light out of the water quite easily.
Since both bands accumulate NIR, I'm also doubting the calculations at this point. Not sure if the photo monitoring plugin subtracts a certain value from R, because that would also have accumulated some NIR light?
Is this a question? Click here to post it to the Questions page.
Reply to this comment...
Log in to comment
The Fiji plugin doesn't subtract anything, it just assumes you have a visible channel and a NIR channel. Once you remove the IR block filter, there is going to be some NIR light in all three channels. Ned was talking about ways to subtract out the NIR from a channel, but I don't understand how that would be possible.
Reply to this comment...
Log in to comment
I agree. I think what the white balance does is basically a custom re-balancing of radiation levels which allows to get correct readings in the end. It offsets the amount of NIR going to blue vs. red.
I'm using a script to take photos as well and it's interesting that the internal calculation for exposure is off by about +1.66 ev. So I have to dial down exposure rates to -1.66 to get proper photos using that script. When taking photos normally I don't make such changes to the exposure settings.
Sounds like an interesting experiment for today is to dial exposure down a bit and see if this improves the results.
Reply to this comment...
Log in to comment
The camera can't distinguish between NIR and other wavelengths, so it assumes that light getting to the blue pixels is mostly blue, light hitting the red pixels is mostly red, etc. Custom white balance adjusts the total amount of light being saved in each channel with the goal of producing a normal-looking color photo, even when the color balance is not normal (e.g., fluorescent light). Each camera's algorithm takes into account the particular color filter array over the pixels (e.g., Bayer filter) and also the characteristics of the IR block filter and lens coatings. With the IR block filter removed and an infrablue or super-red filter in the path, the custom white balance algorithm produces nonsense results. We exploit that by flooding the sensor with a particular color of light which establishes a custom setting which emphasizes a particular proportion of red, green, and blue. The fact that we get pretty good results when custom white balance is done with single color LEDs suggests that all we are doing is establishing a setting which emphasizes whichever channel we are using for NIR (e.g., infrablue cameras white-balanced with a blue LED emphasize the red channel, super-red cameras white-balanced with a red LED emphasize the blue channel). The single color (R, G, or B) LEDs apparently emit little or no NIR light, so during the white balance process the camera just sees that one channel is getting lots of light (which happens to be visible light). This has been investigated with CCD cameras, but not CMOS cameras. CMOS cameras seem to have more NIR light in all the channels when the IR block filter is removed. Much more testing is called for to figure out how to get good NDVI results from single camera (infrablue or super-red) CMOS systems.
Reply to this comment...
Log in to comment
I can't seem to post photos in the comments, so here's some links to my dropbox. This time I dialed exposure down by -1.66. Then I calibrated white balance on a pure red surface (ipad cover) in bright sunshine. Then took a photo with -1.66 exposure settings. Results below:
https://dl.dropboxusercontent.com/u/11452962/lower-expo.JPG
https://dl.dropboxusercontent.com/u/11452962/lower-expo-ndvi.jpg
https://dl.dropboxusercontent.com/u/11452962/lower-expo-ndvi-stretchcolor.jpg
Really interesting to see that this time with color stretching the results are now also much more acceptable. Previously this would just overamplify shadows far too much. It's still very visible it happens though. I'm happy with these results given the complexity of the scene.
I notice that sometimes the 'neutral' comes out light green and other times light blue. In the levels tool of gimp this level can be changed by moving the middle slider of only the blue channel (not all, not the red). This can be done without significantly affecting the overall results of the image. If the red channel is manipulated that way the shadows become overintensified.
Let me know what you think!
Reply to this comment...
Log in to comment
Nice photo. The NDVI results look quite believable, even for that complicated scene.
In Fiji, when a fresh NDVI image is active, select Process/Math/Subtract. Enter a number which will be subtracted from the digital number (0-255) in every pixel. The colors of the NDVI image will be slid down the gradient in the lookup table (enter negative numbers to slide up). You might be able to make more buildings turn blue, as below where I subtracted 15.
I think I know which color table you are using, but I suspect nobody else does. It would help to include an image of the gradient with your NDVI results. In Fiji, select File/Open and select a .lut file to see the gradient. An easy way to include the gradient in an NDVI image is to select Image/Color/Show lut. Then position that window over the NDVI image and capture that part of the screen:
To get images into comments, I start a new research note and drag an image into it. Then I copy the code to the comment. Then close the tab with the research note without publishing it.
Reply to this comment...
Log in to comment
Chris, thanks very much, those methods are easier.
I think now it's time to redo some of the other tests re: the color balance. I want to see the results utilizing the poisonous looking purple color as white balance instead. As can be seen, the NDVI doesn't get into the orange/red yet as one would expect.
I used the infrablue lut.
Reply to this comment...
Log in to comment
Login to comment.