Future Goals
I wanted to get started creating an attachment for the [Public Lab Microscope] (https://publiclab.org/wiki/microscopes) that would allow me to have more control over the movement of my specimen in the XY plane. So far, I've gotten something that will allow me to manually move a sample and is based on the design of [Foldscope](www.foldscope.com). Here are some things that need refining:
- Scaled-down to fit current microscope stage
- Ability to mount and remove from current microscope stage
- Built of a stronger material
- Have a ruler so that you can reference a location on preserved slides (would love to say, go to X4, Y5 to see the Planaria worms)
- Create a way for more fine-control over movements, maybe a gear or something
The Stage
Here's what it looks like once it's put together. You can pull on the little wings to move in the x axis, and pull on the spot marked B to move up and down in the y axis.

Putting It Together
Maybe once this is better this part will be an activity!
Step 1: Get Ready to Cut
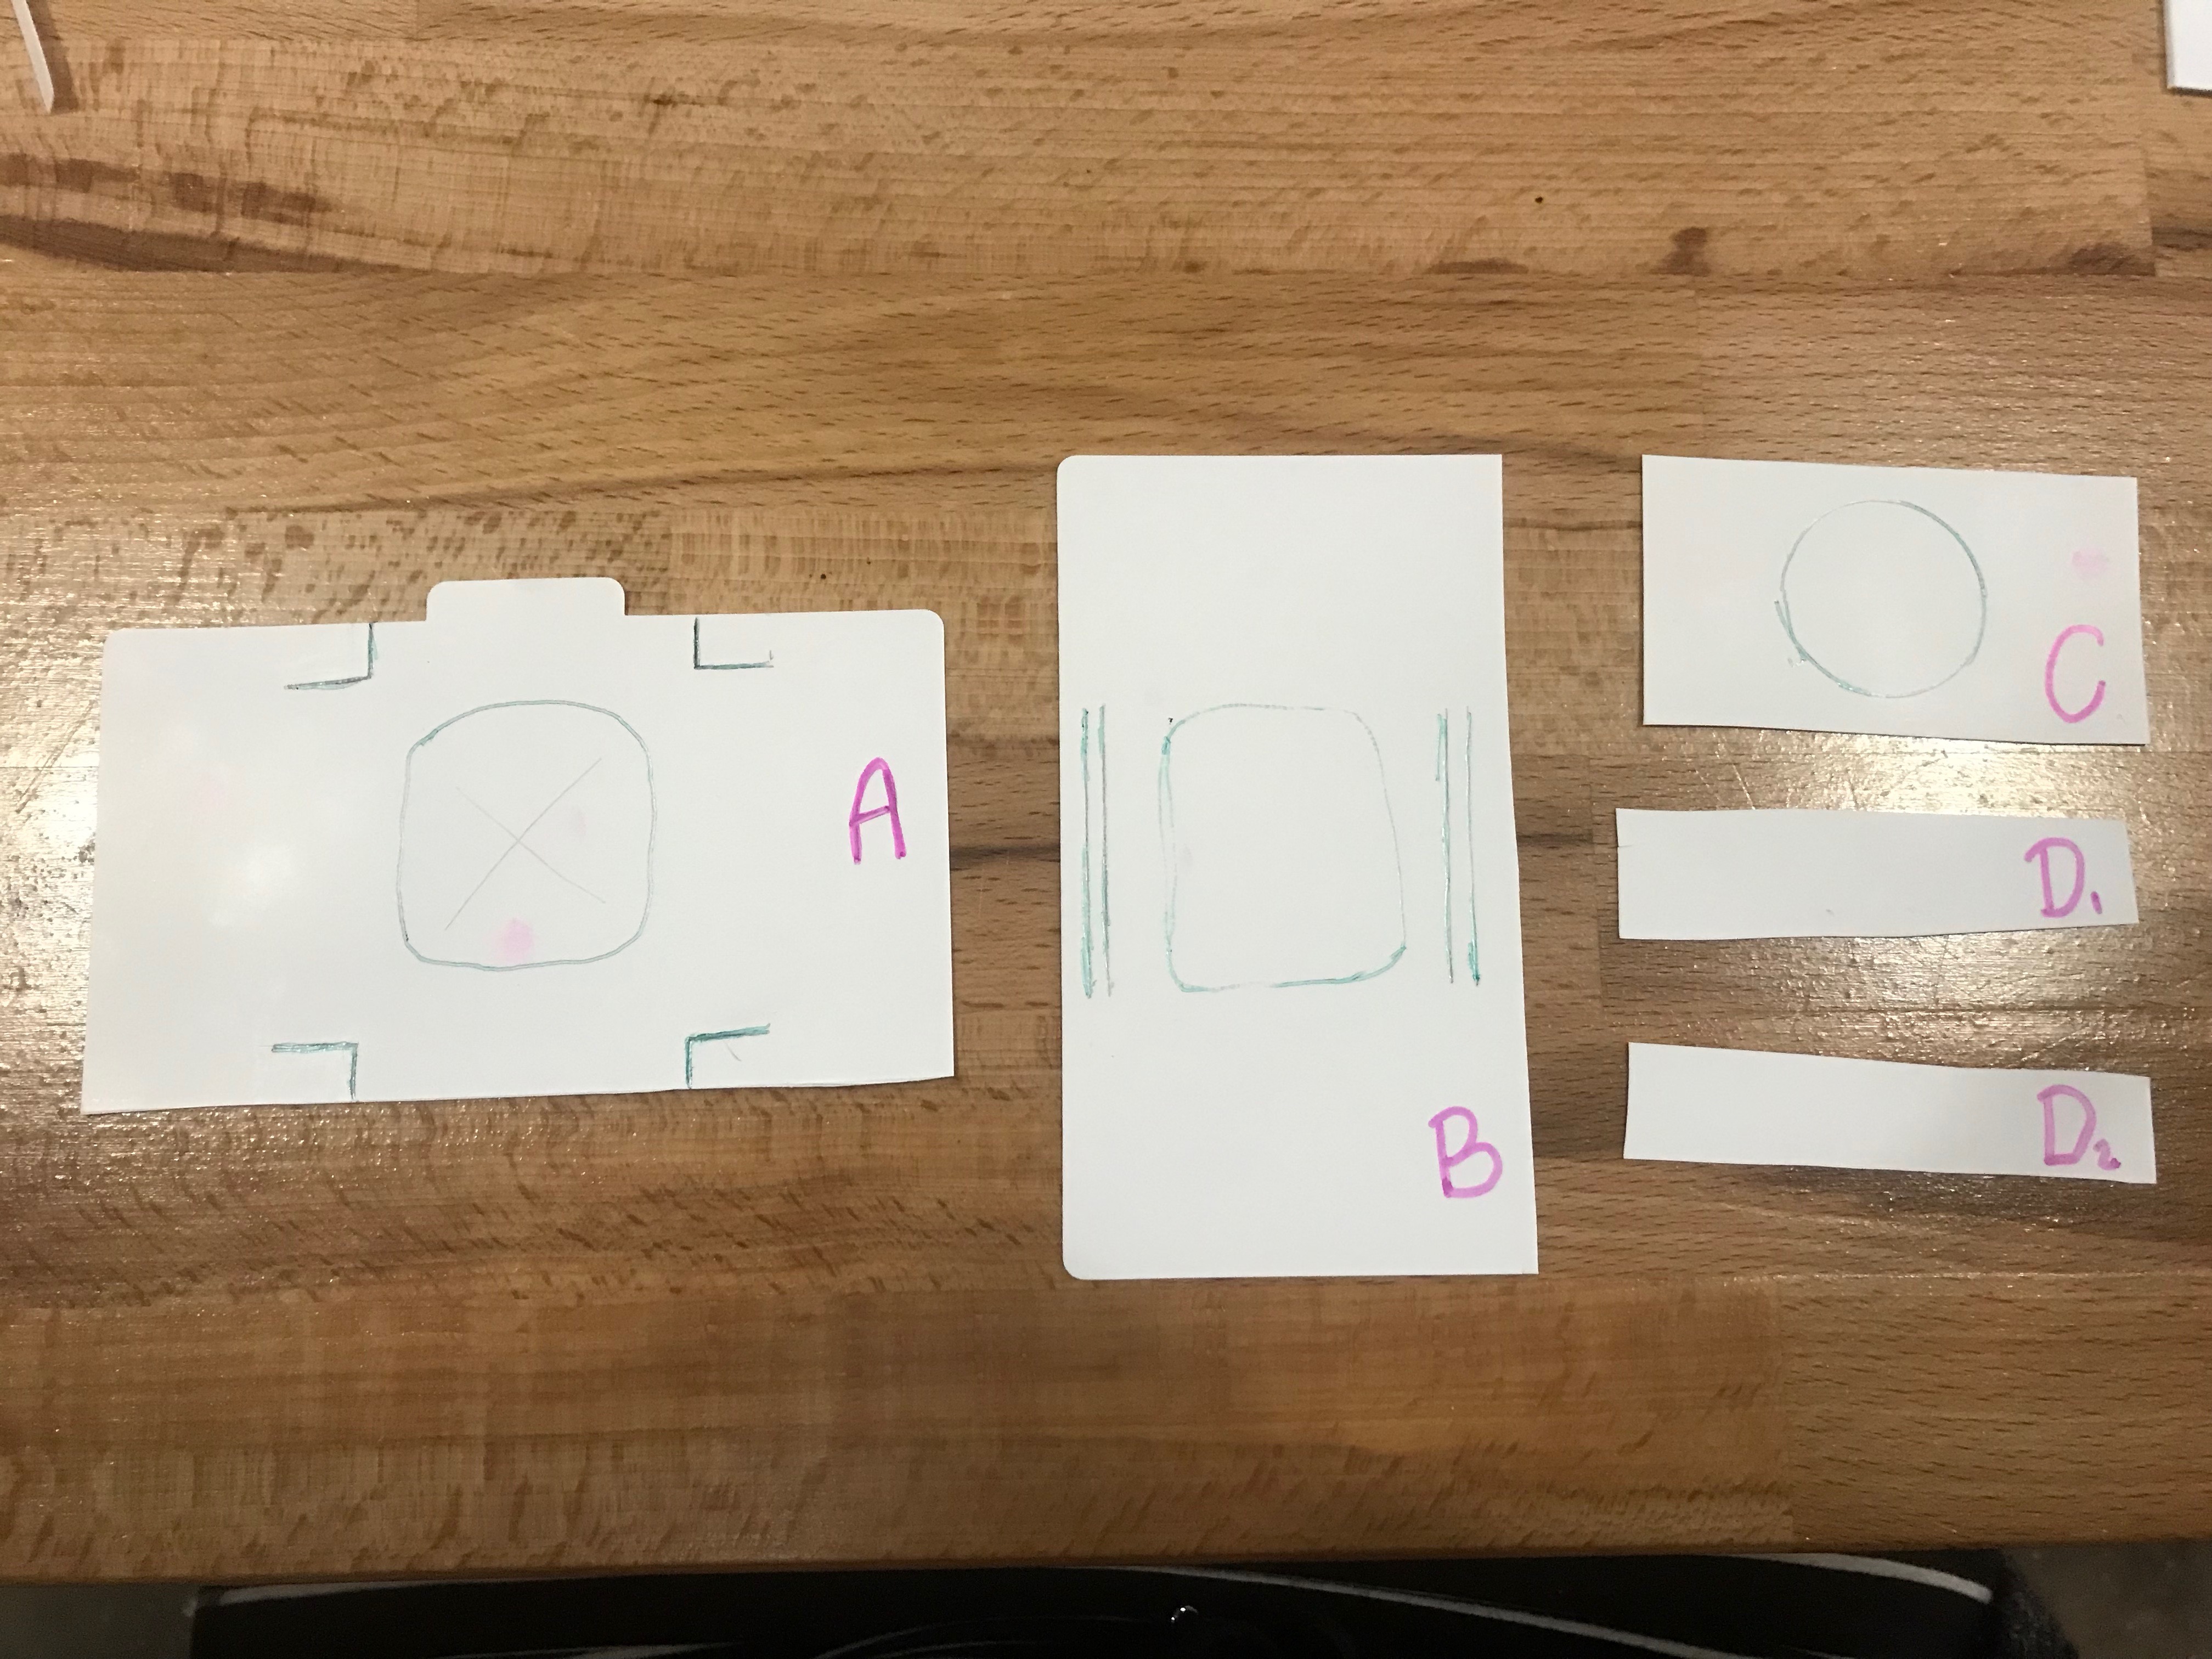
Gather your material, a cardstock or recycled plastic folder would be great. All pieces are made of the same material. Each piece needs the cut guidelines added, they are shown in green below. Since I'm not a measure-er, all cuts are made relative to the other pieces and not in a standard size (sorry, my brain works best this way).
Here are the relative sizes:
Piece A: The slits need to be the same width as piece B so that it can fit in there. Also outline a hole in the middle. This hole will allow the microscope lens to see the sample.
Piece B: Two vertical slits must be cut on each side that are the height of piece C. A hole in the middle must also be cut to allow the lens access to the sample.
Piece C: This piece should have a hole cut in the center that is the size of the lens. It should be small enough that your sample won't fall through! If piece C is wide, it can function as its own handle and negate piece D.
Piece D: These flaps were added only because C wasn't long enough and could be removed if C is simply wider.

Step 2: Cut
Cut along all the green lines you've made! You should now have something like this:
Step 3: Tape D to C
Just tape them on the shorter side so that they can be handles. Don't bother if you've made your piece C longer than mine.
Step 4: Thread Piece C/D through Piece B
You'll need to put piece C through the slits on either side of B. C should end up on top of piece B.
Step 5: Attached Piece B/C to Piece A
Place piece B on top of Piece A, and push the edges of Piece B behind the tabs of Piece A. It should end up looking like this:

So...
Well that's how you make it! It still has a ways to go to become useful, but I'd love to see your improvements on it.
1 Comments
This is awesome! Would you mind uploading a scan of it disassembled? Then we can make a PDF people can print out!
Does it fit on top of the existing top stage of the Community Microscope? Just thinking modularly and perhaps it'd provide extra stiffness as well.
Is this a question? Click here to post it to the Questions page.
Reply to this comment...
Log in to comment
Login to comment.